Collecting payments with React Native & RevenueCat (Part 3): Configuring Entitlements & Oferings in RevenueCat

Before diving into this third part, I highly recommend watching this video to become familiar with some essential RevenueCat concepts like Entitlements, Products, Packages, and Offerings.
Following with the example we presented on the previous post, we now need to set up our subscriptions and one-time payment in RevenueCat.
Scenario
Our example scenario includes:
A monthly subscription with 7-day free trial
A annual subscription with 7-day free trial
A one-time purchase to remove ads from the app
The process
Create 2 entitlements: “Pro access” (used by the subscriptions) and “Ad free” (used by those who paid to remove the ads)
Create 6 products: “Pro monthly”, “Pro annual”, and “Ad free” (both for Android and iOS).
Associate products with entitlements
The “Pro access” entitlement will include the “Pro monthly” and “Pro annual” products for both platforms.
The “Ad free” entitlement will include the “Add free” product for both platforms.
Create 3 “packages”
The “Pro monthly” package will include the “Pro monthly” products for both platforms
The “Pro annual” package will include the “Pro annual” products for both platforms
The “Ad free” package will include the “Ad free” products for both platforms.
Create 1 “offering” that will display the 3 packages mentioned before.
I know… take a 5 minute break to digest all these new concepts 😄
I’ll guide you through the entire process below 💪
SpiroKit for SaaS
In case you want to save weeks of painful hours of work & research on your next React Native app, checkout SpiroKit for SaaS. It's a starter template that comes with Purchases, Push Notifications, Authentication, Analytics, Error Reporting and more. It also includes a Notion template to guide you through the entire process
Creating the Entitlements
The first step is to create 2 entitlements: “Pro access” and “Ad free” (feel free to adapt this to your needs)
Visit https://app.revenuecat.com/ and navigate to your project dashboard.
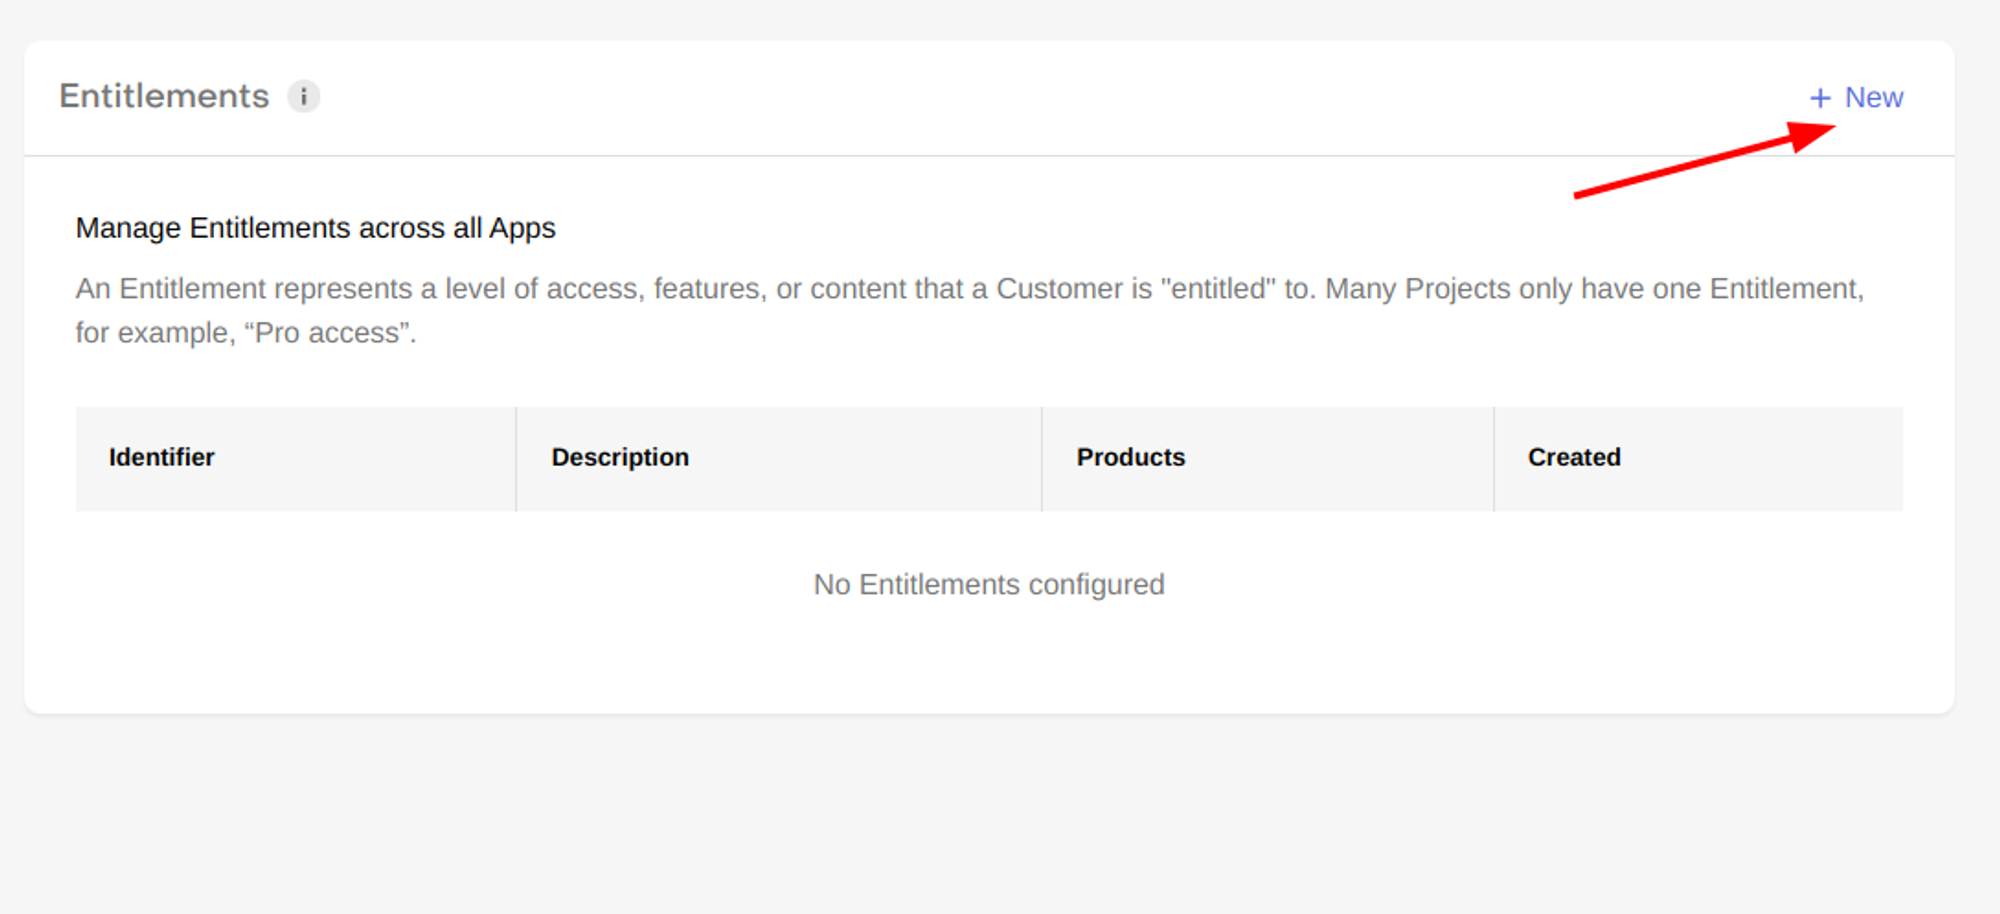
In the sidebar, under the “Product catalog” section, click on “Entitlements”

On the top right corner, click on “New”
Choose an identifier and a description for your new entitlement
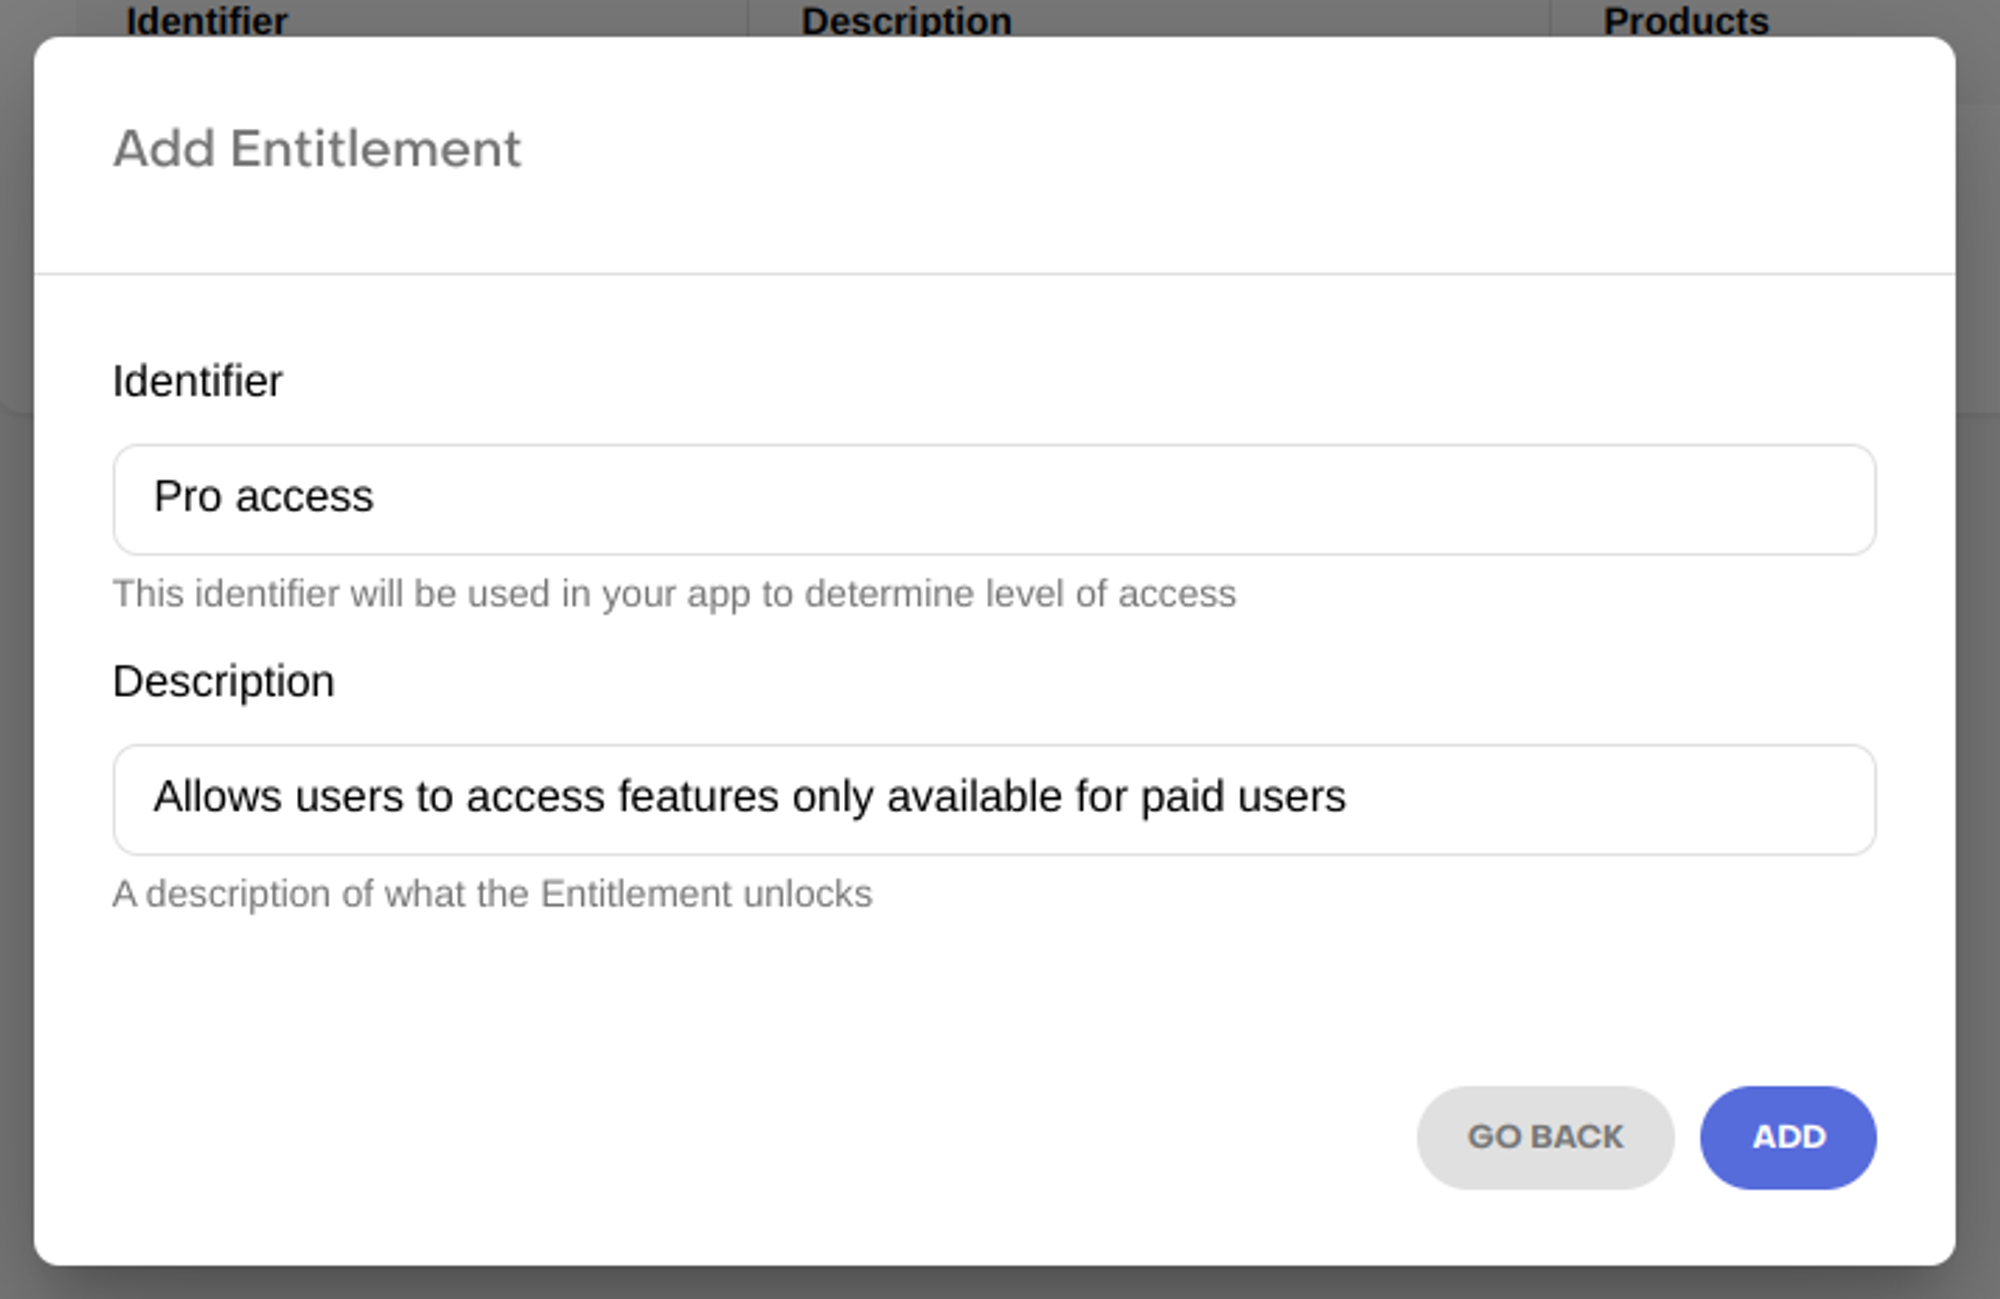
Repeat step 3 and 4 for the “Ad free” entitlement (feel free to adapt this to your needs)
Creating the Products
We’ll need to create 6 products: “Pro monthly”, “Pro annual”, and “Ad free” (both for Android and iOS).
Automatically importing Android products
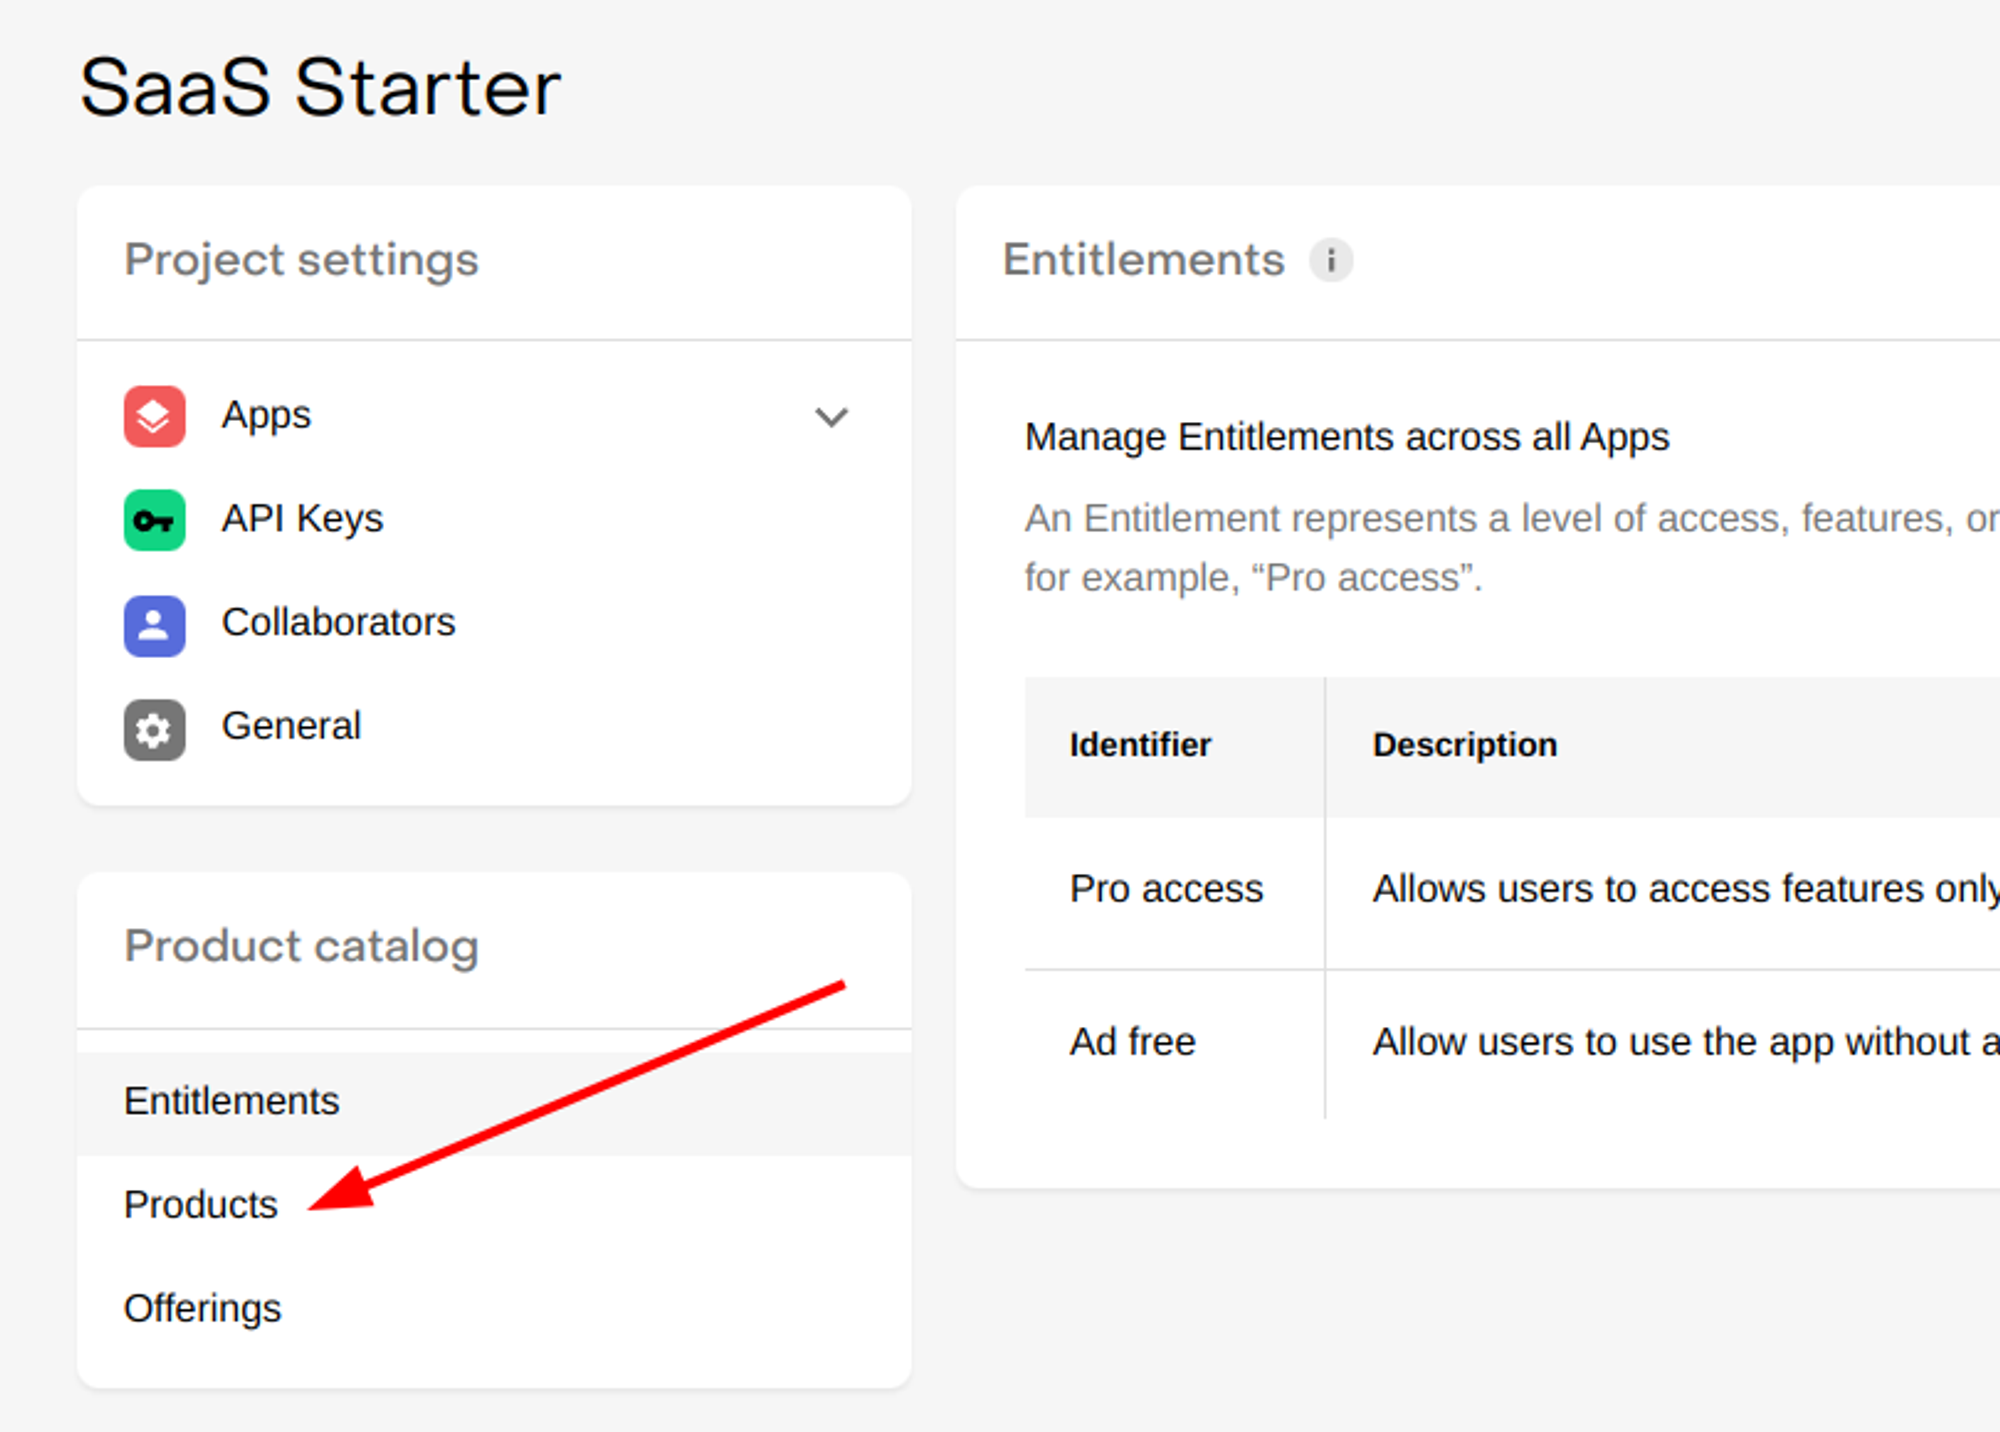
In the sidebar, under the “Product catalog” section, click on “Products”
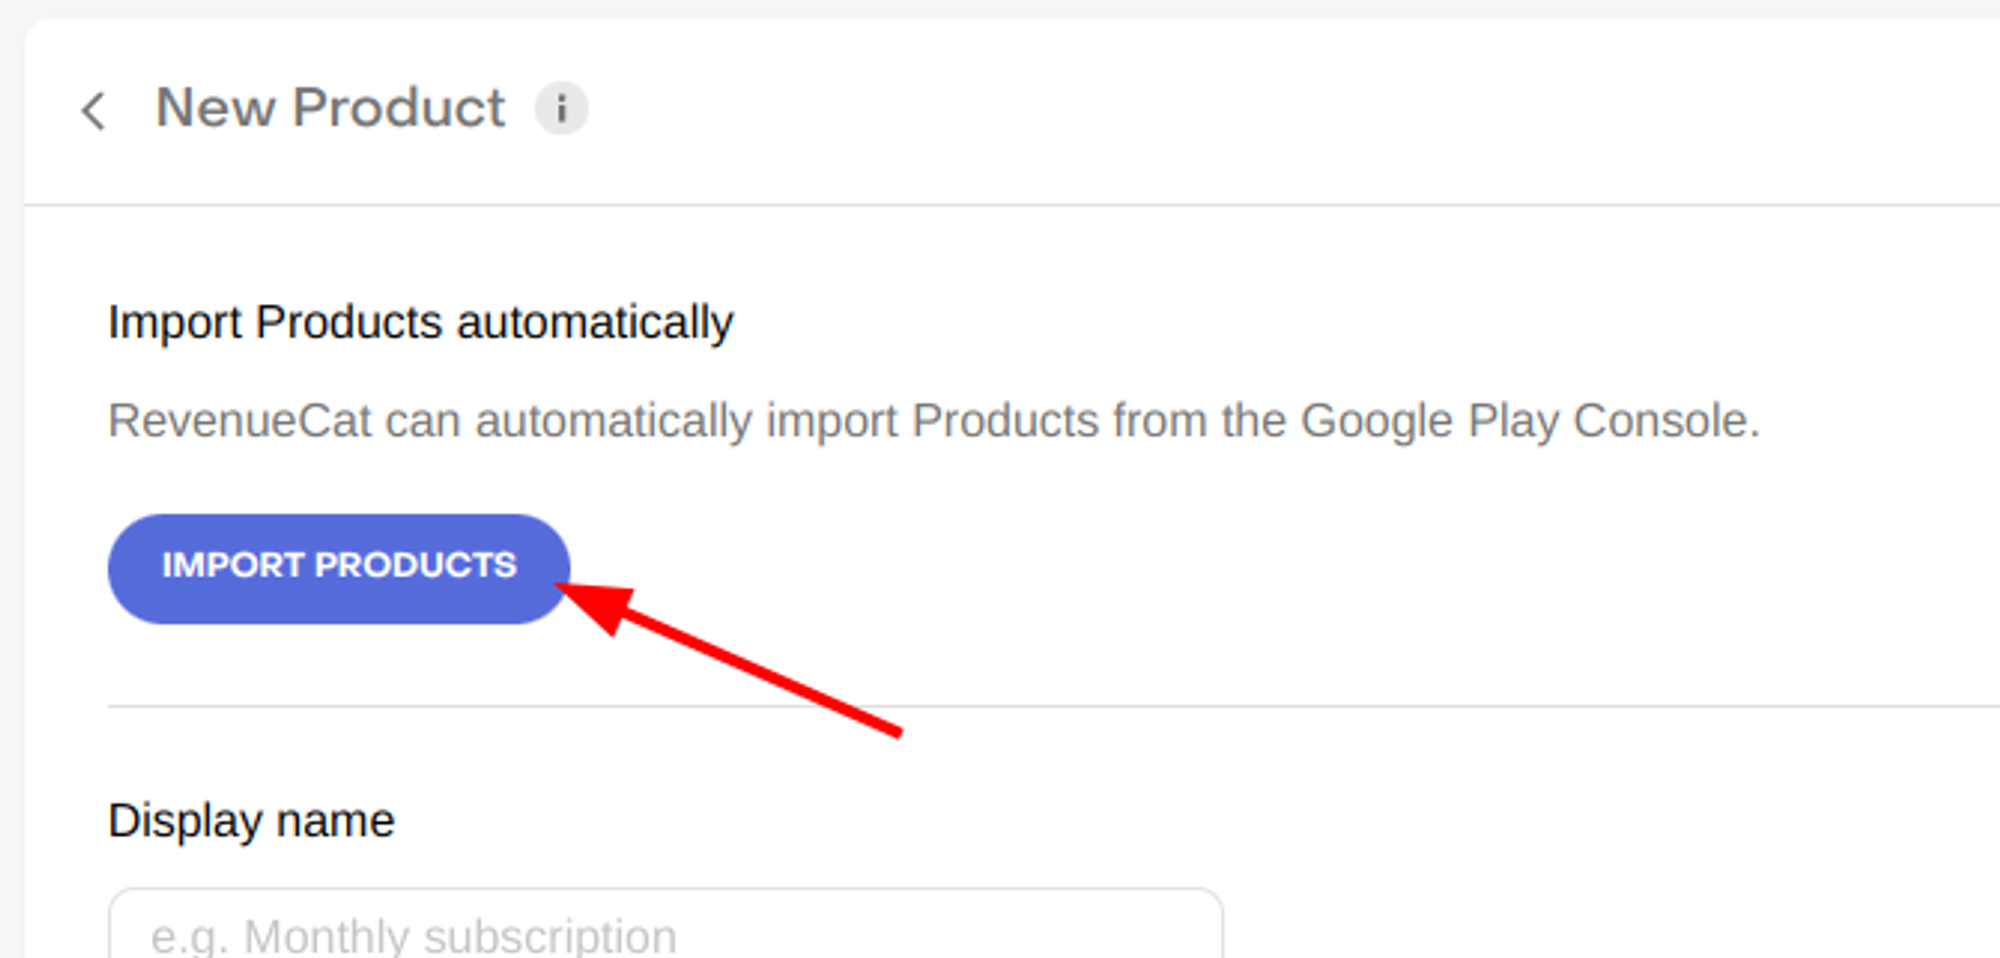
On the top right corner, click on “New”
Choose your Android App
Click on “Import products”
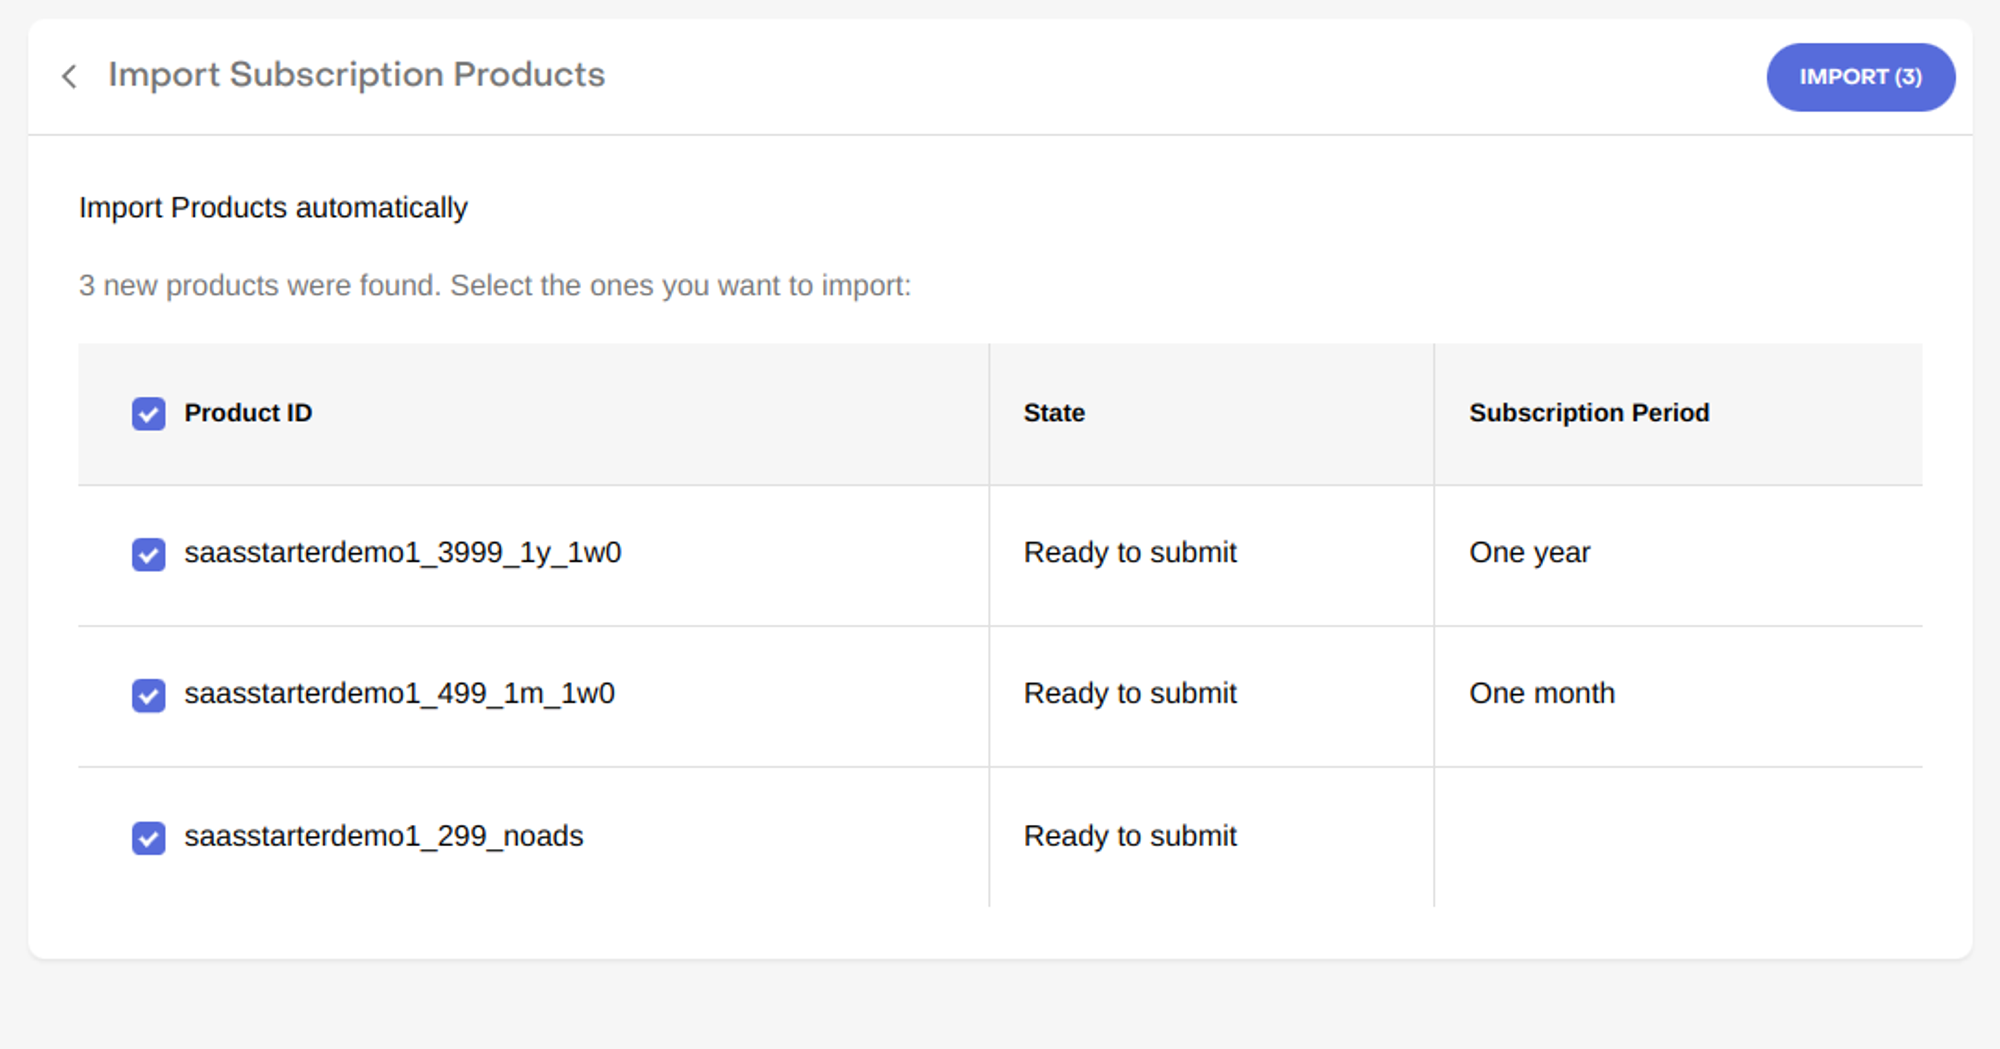
If everything went as expected, you should see something like this
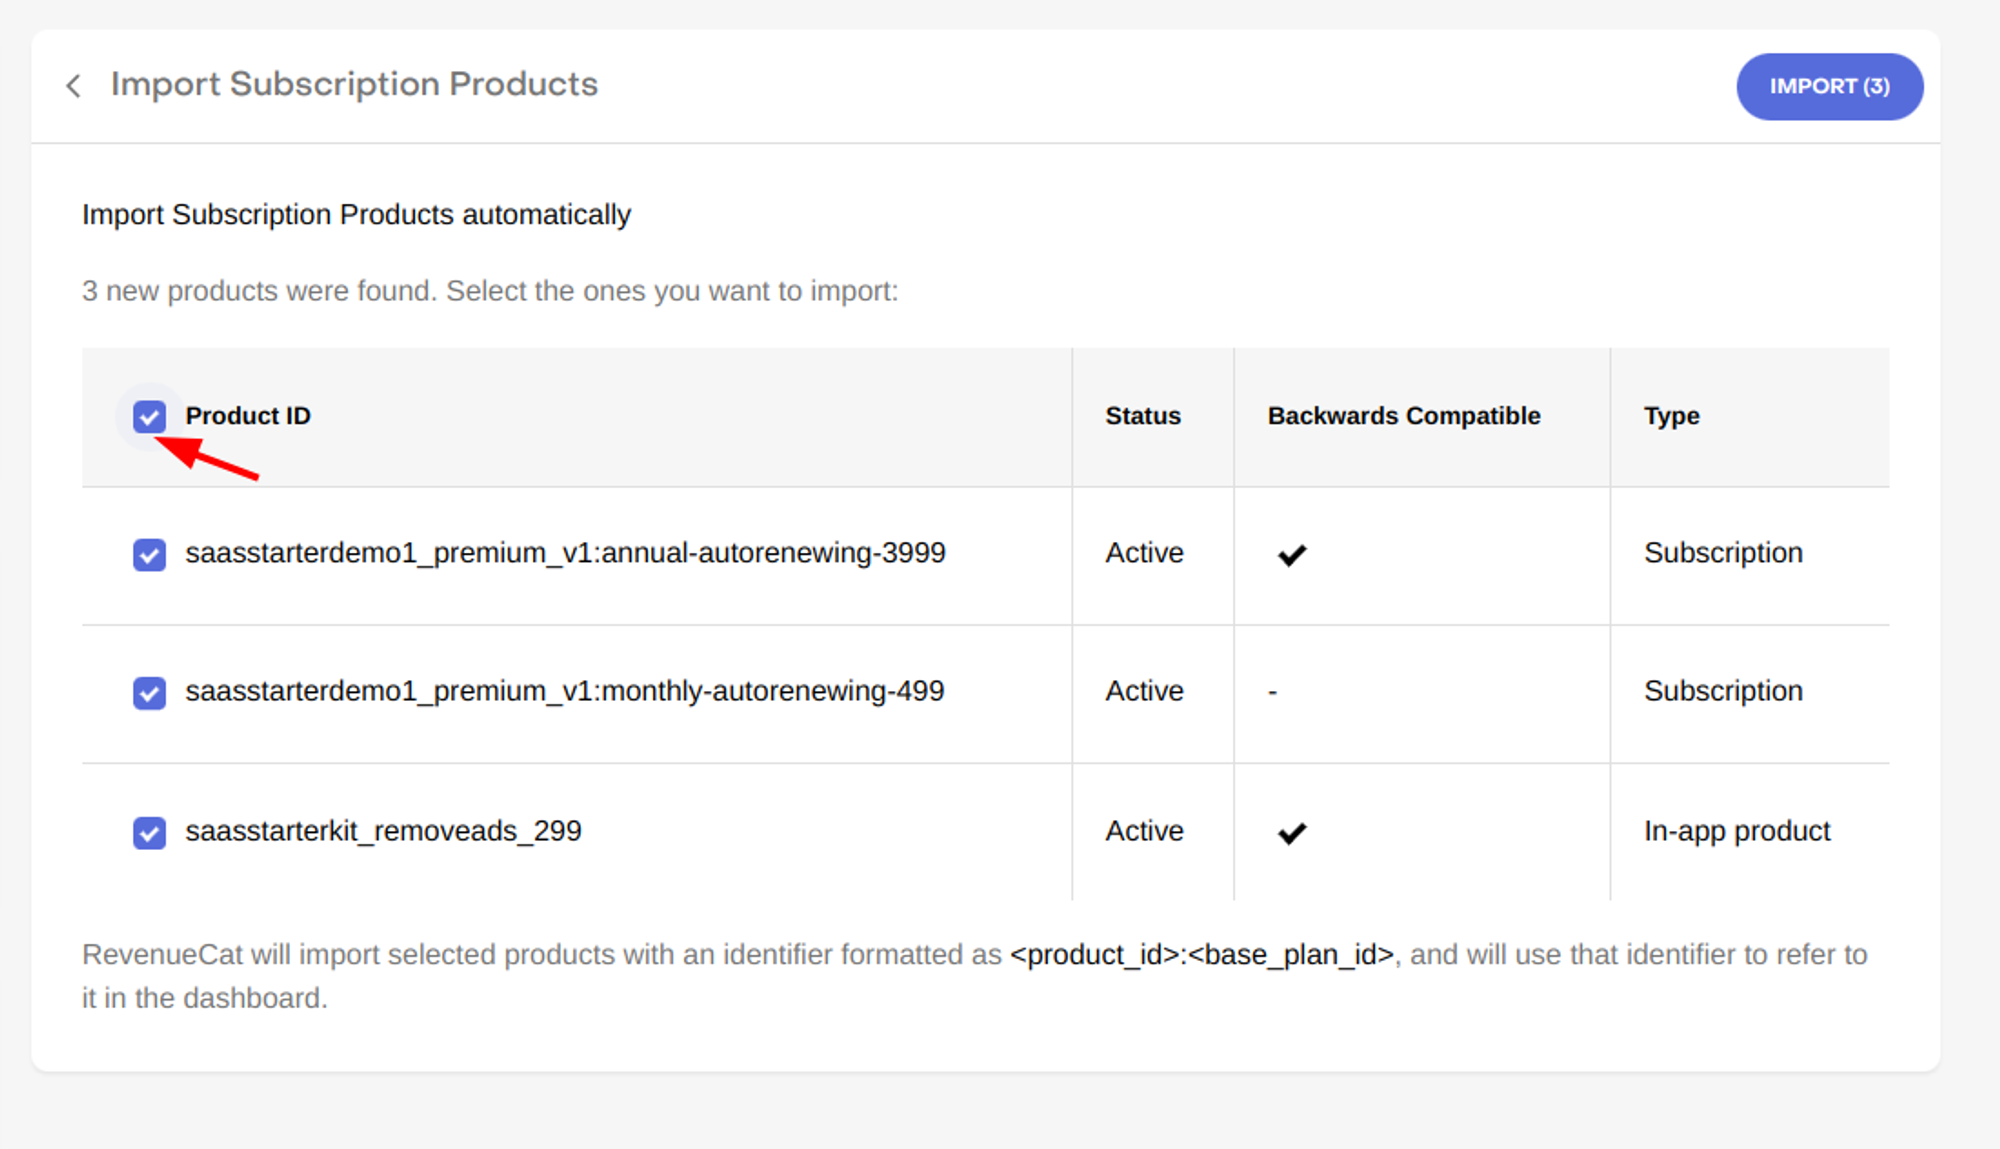
Select all the products you want to import and click “Import” to confirm.
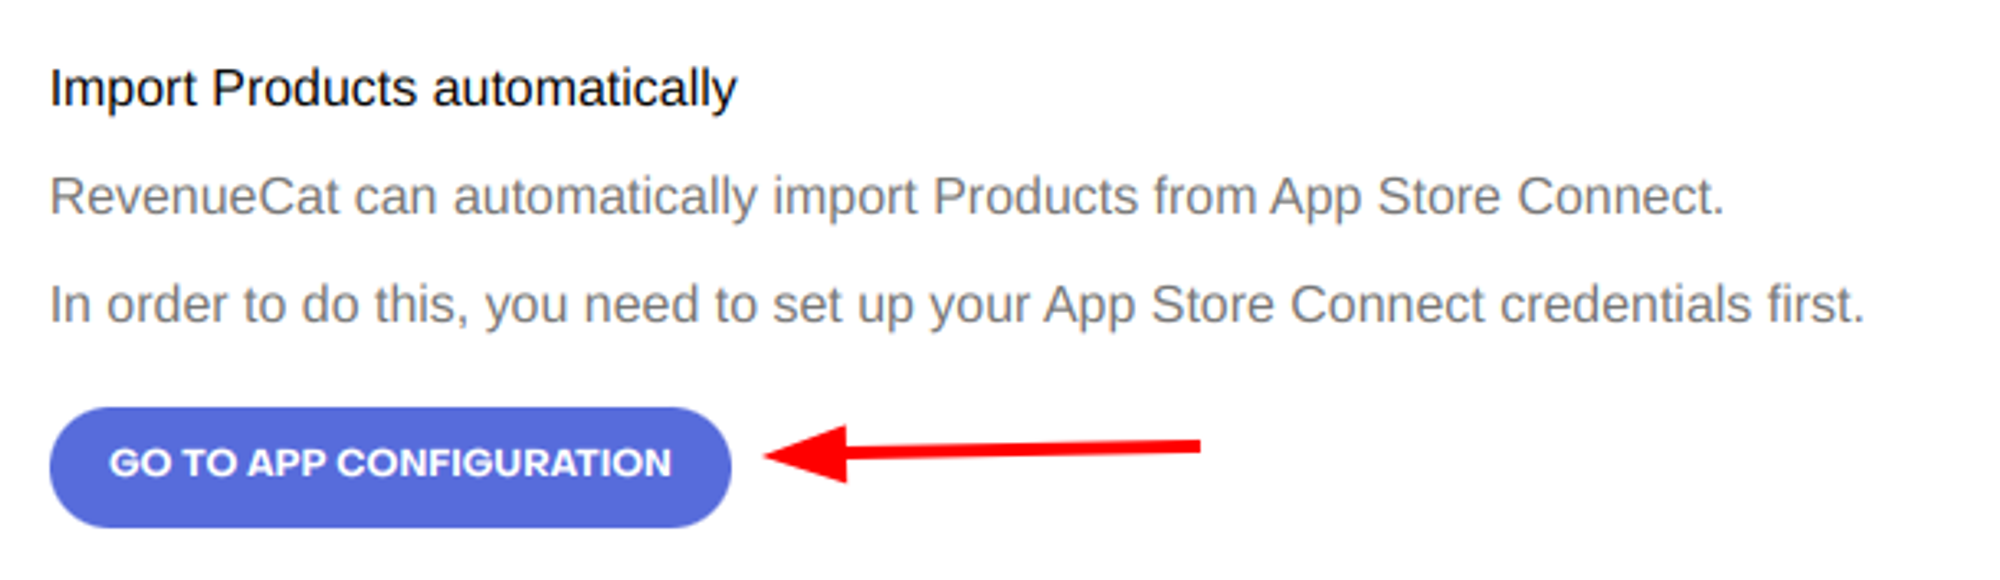
Repeat steps 2 to 4 for the iOS app. But there’s a small difference with Android. You’ll need to setup your App Store Connect API key
Automatically importing iOS products
Before you can automatically import the iOS products, you’ll need to setup your App Store Connect API key. In order to do that, follow these steps:
Visit the App Store Connect
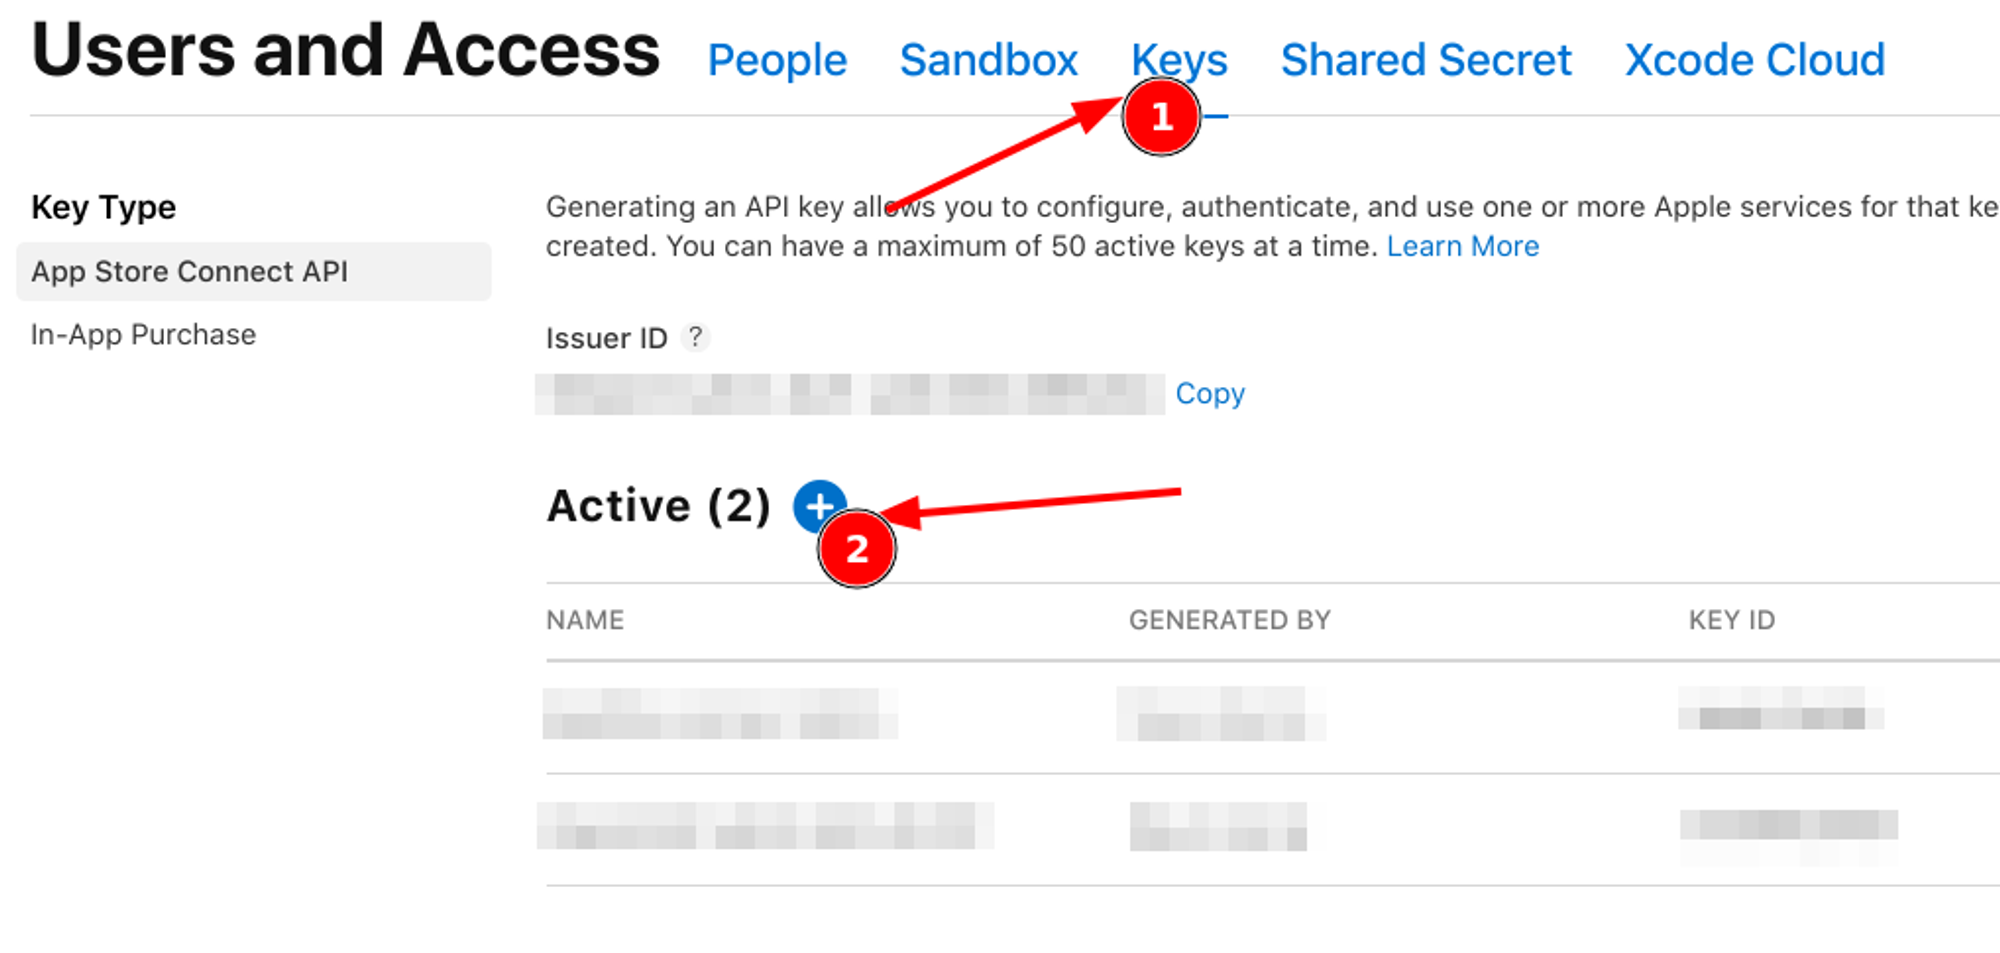
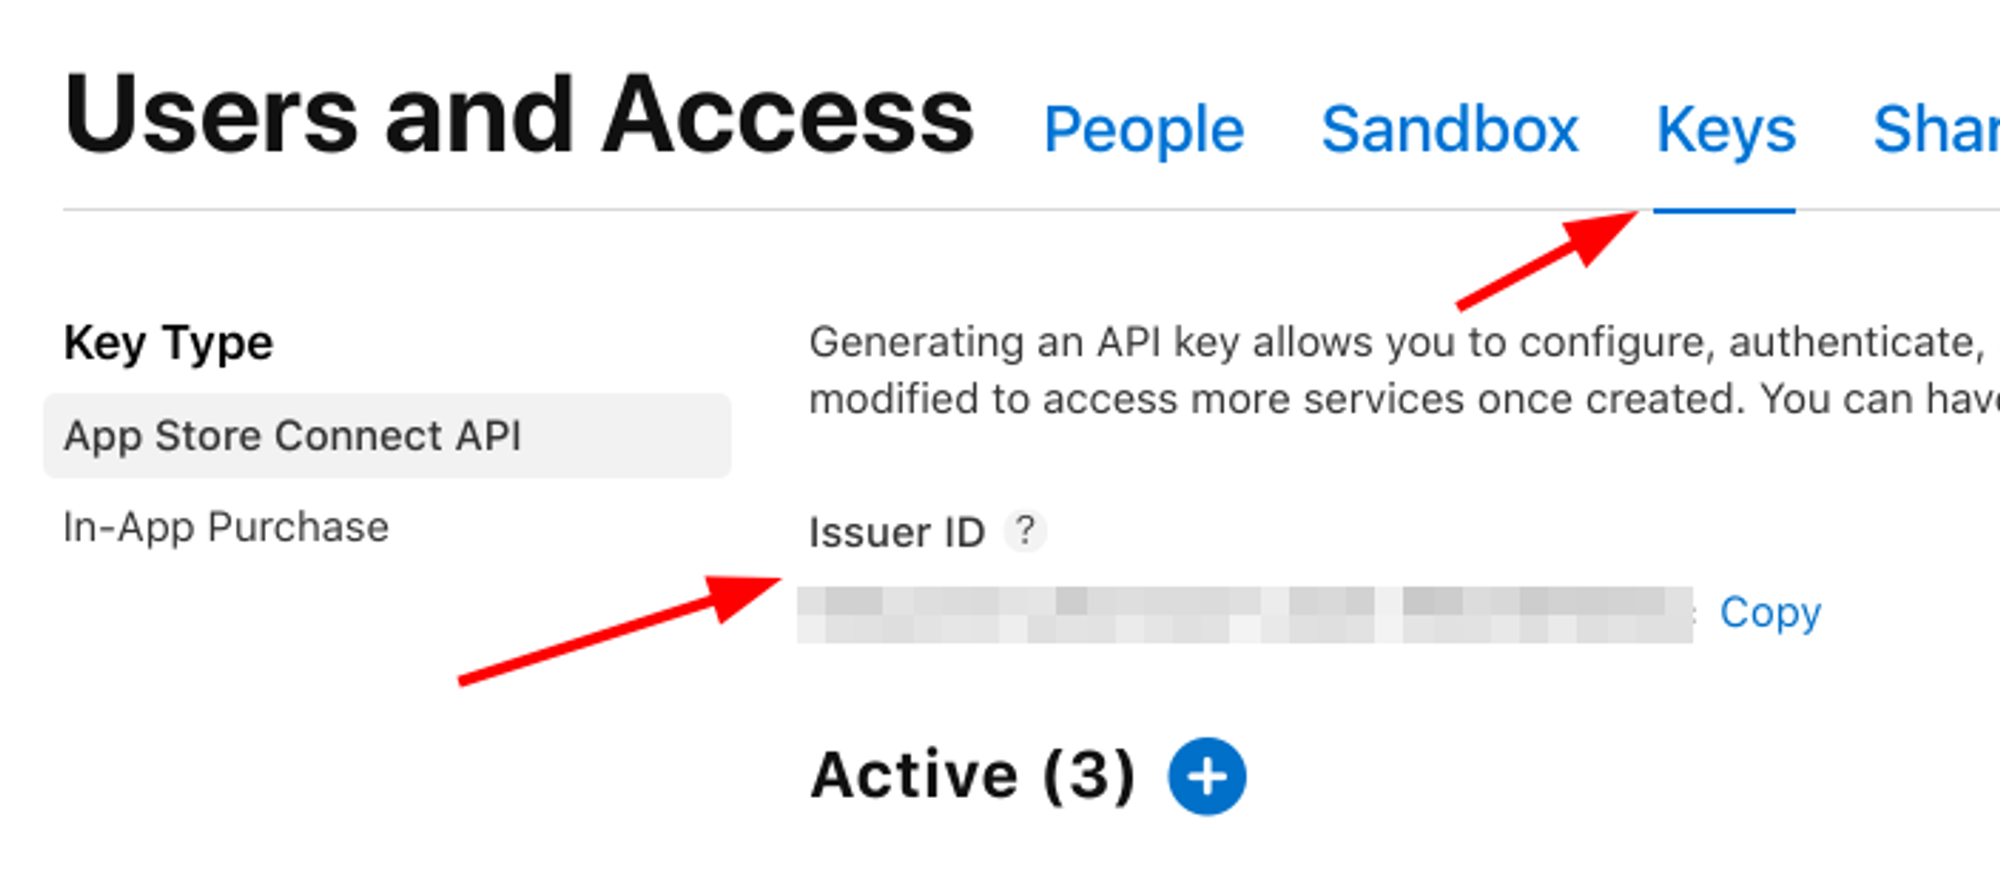
Click on “Users and access”

Click on the “Keys” tab, and then click “+”
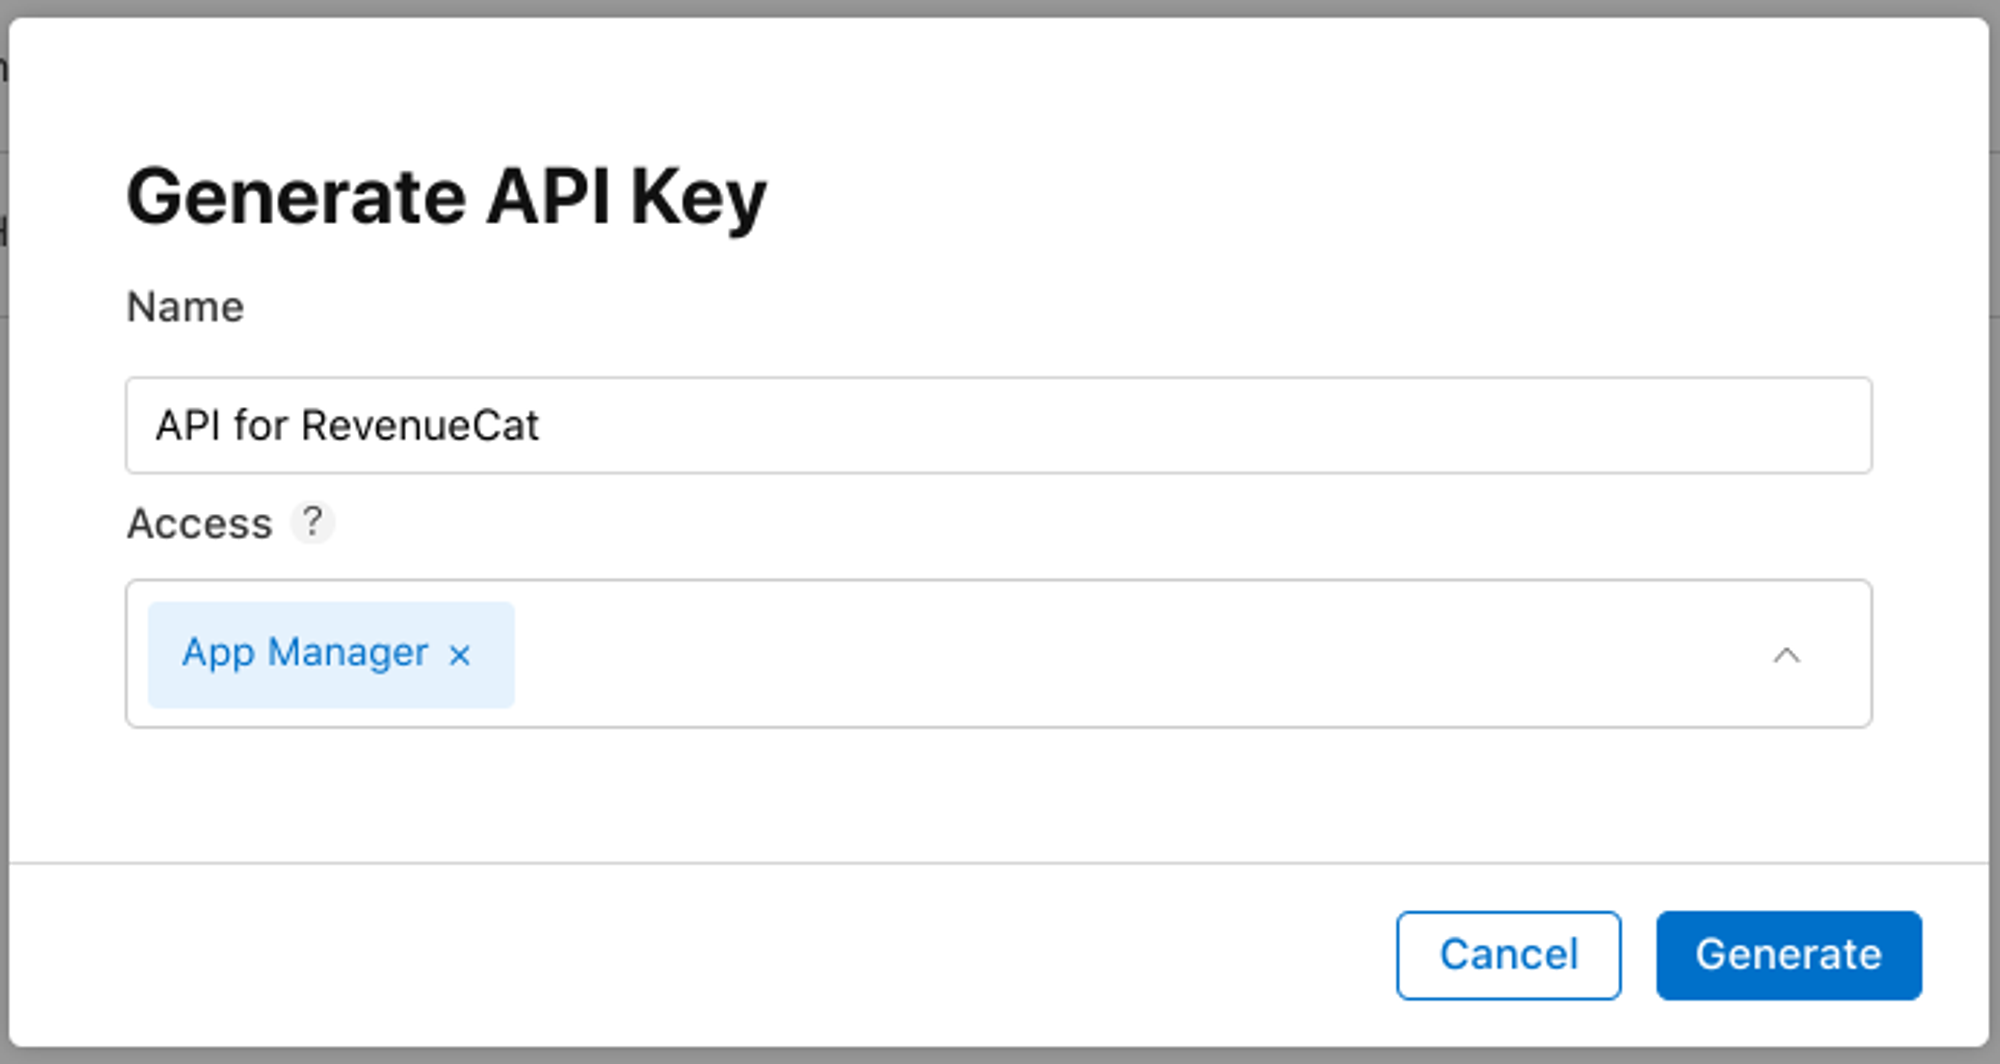
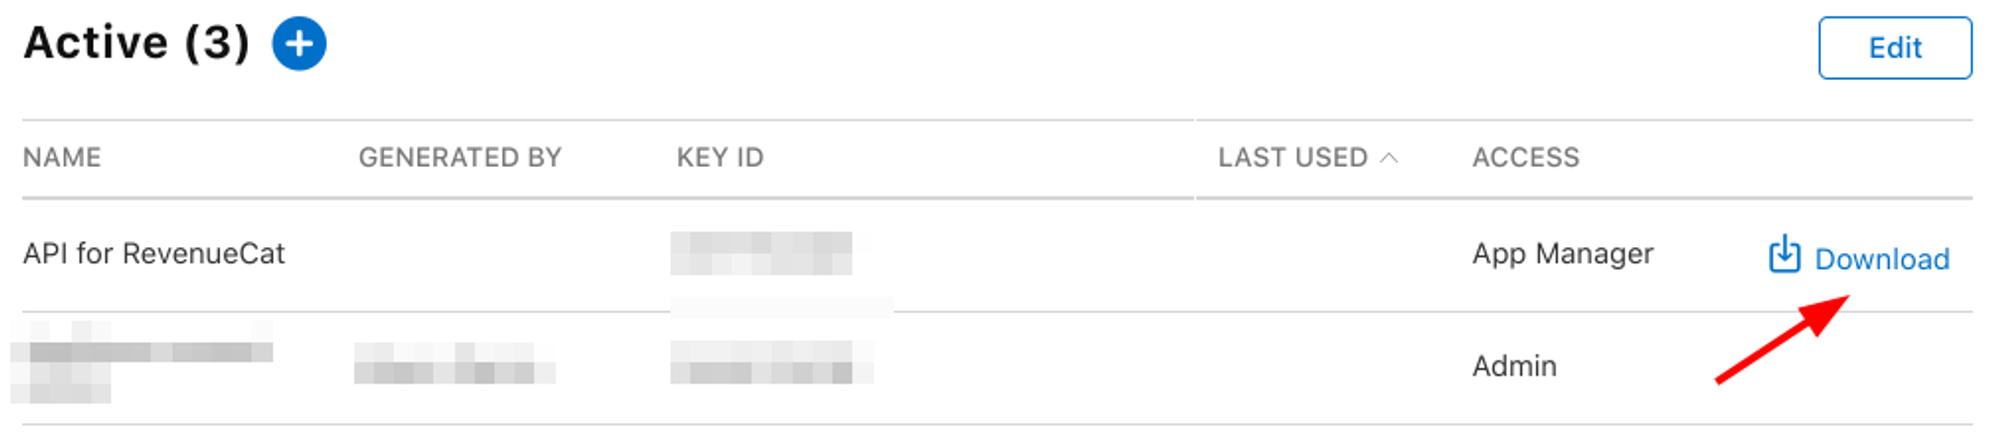
Assign a descriptive name, and assign the “App Manager” role that will be required by RevenueCat to import the products. Then, click on “Generate” to confirm
In the right corner, click on “Download”. Make sure to store this file in a safe place, as you won’t be able to download it again.
Once you downloaded the file, go back to your RevenueCat dashboard
In the sidebar, click on your iOS app
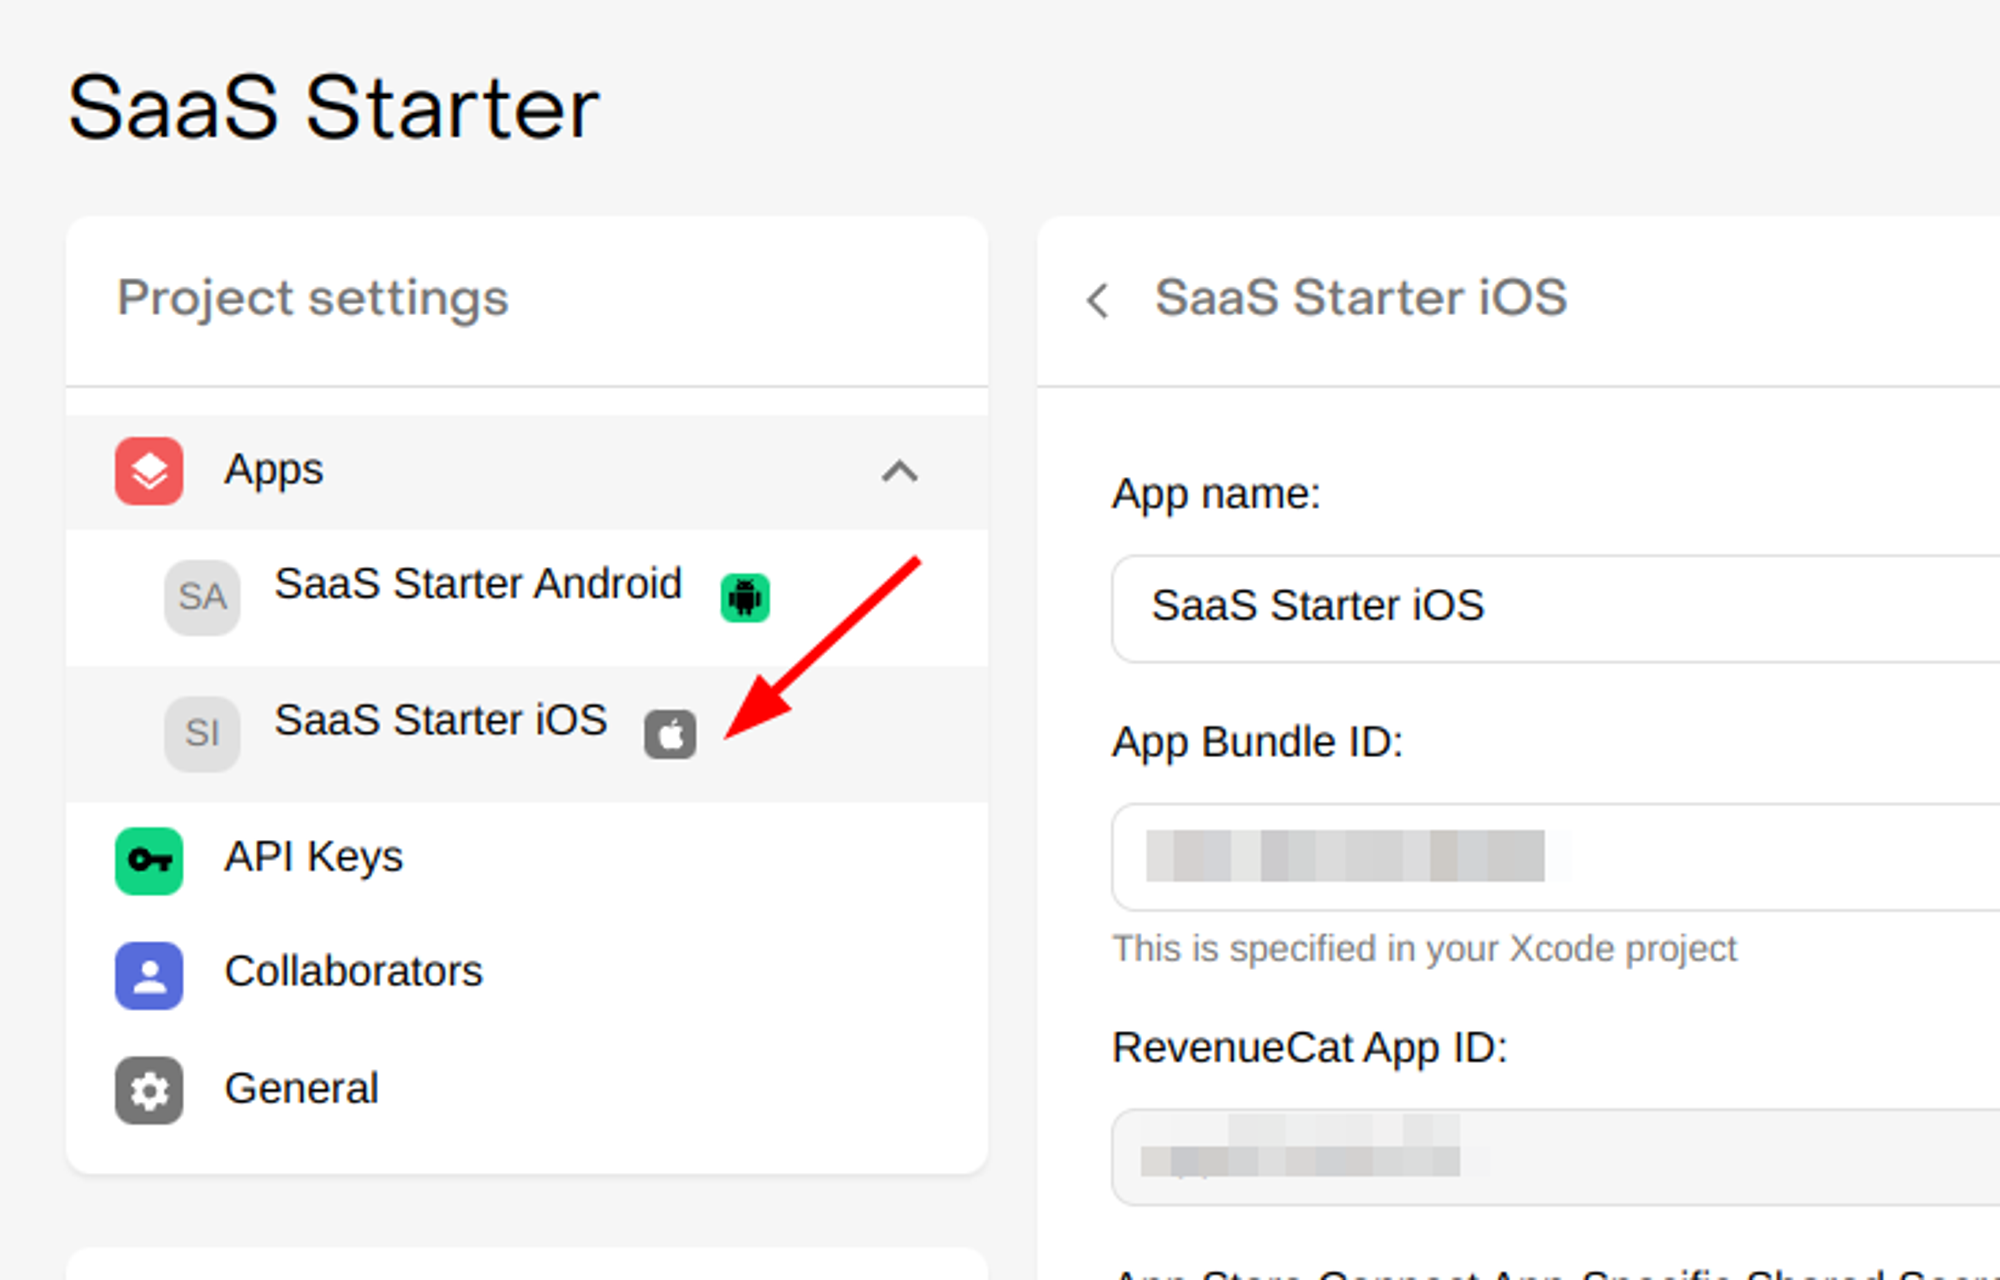
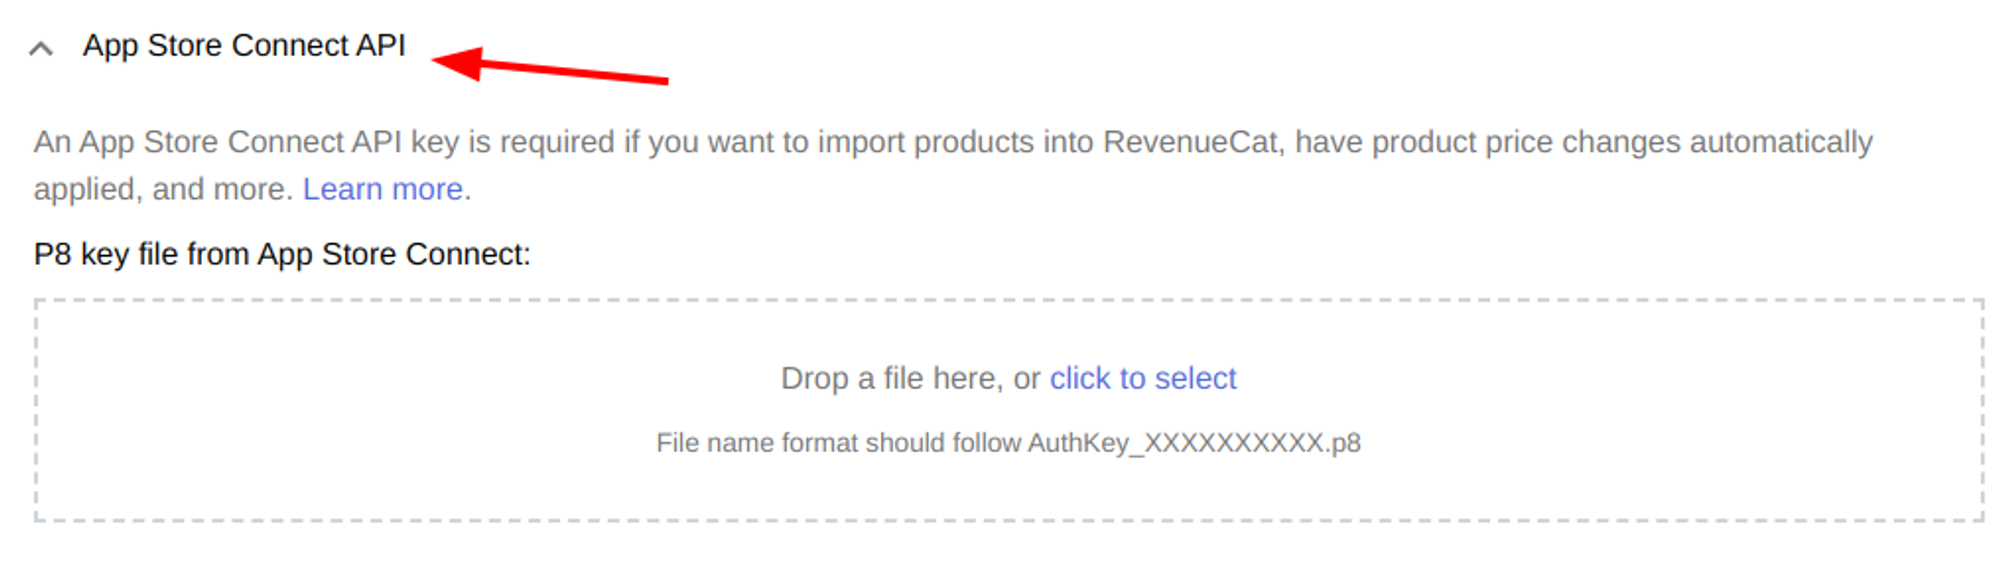
Scroll to the “App Store Connect API” section, and drop the file you just downloaded.
After that, you’ll be requested to complete two additional fields
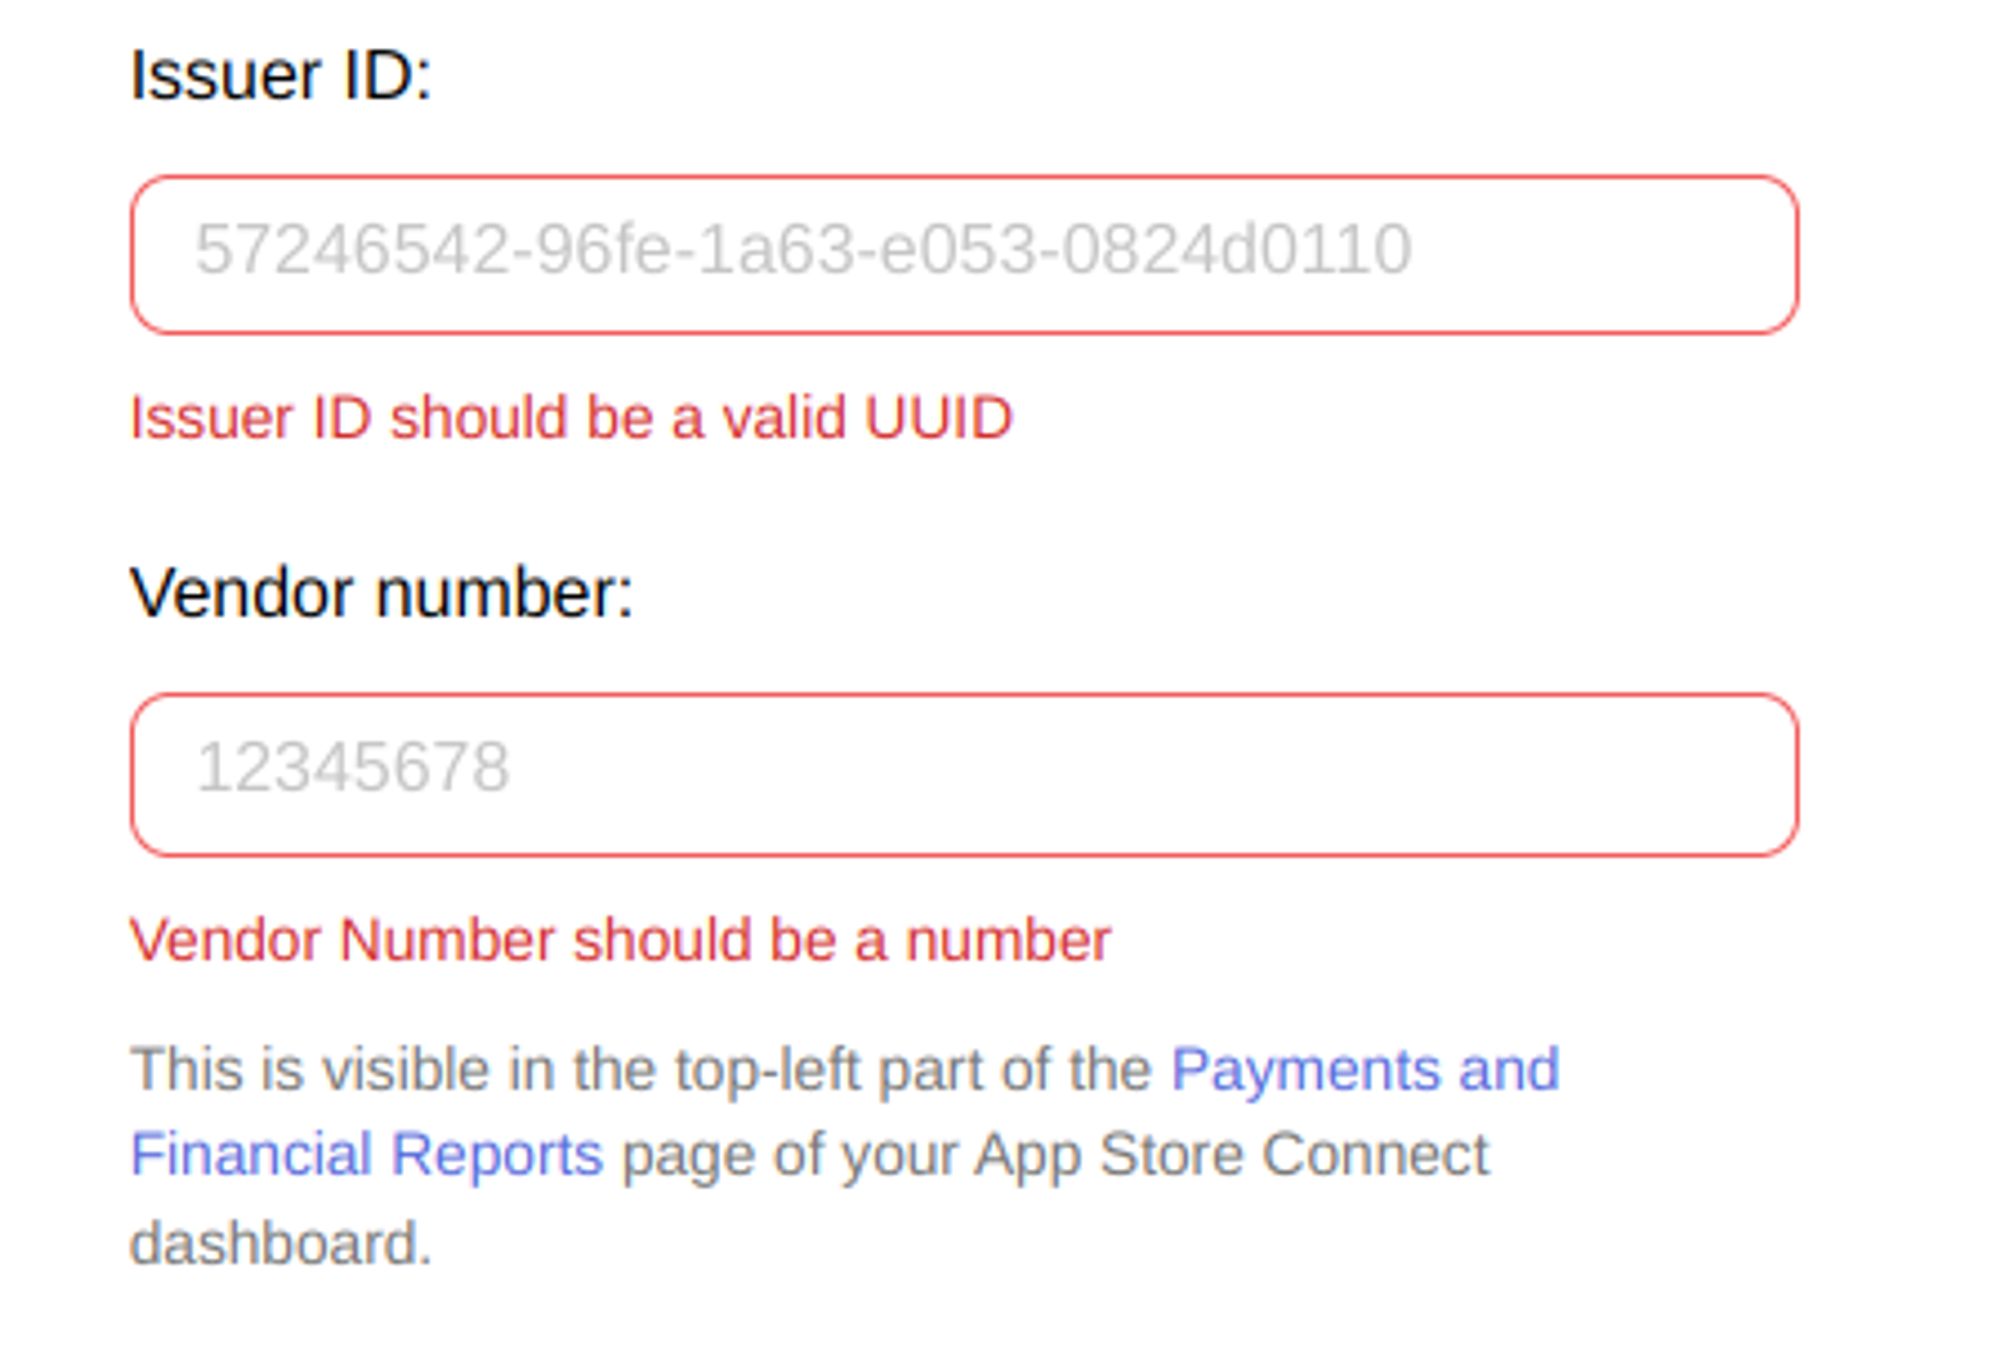
You can get the Issuer ID in the App Store Connect, in the same page you just downloaded your API key
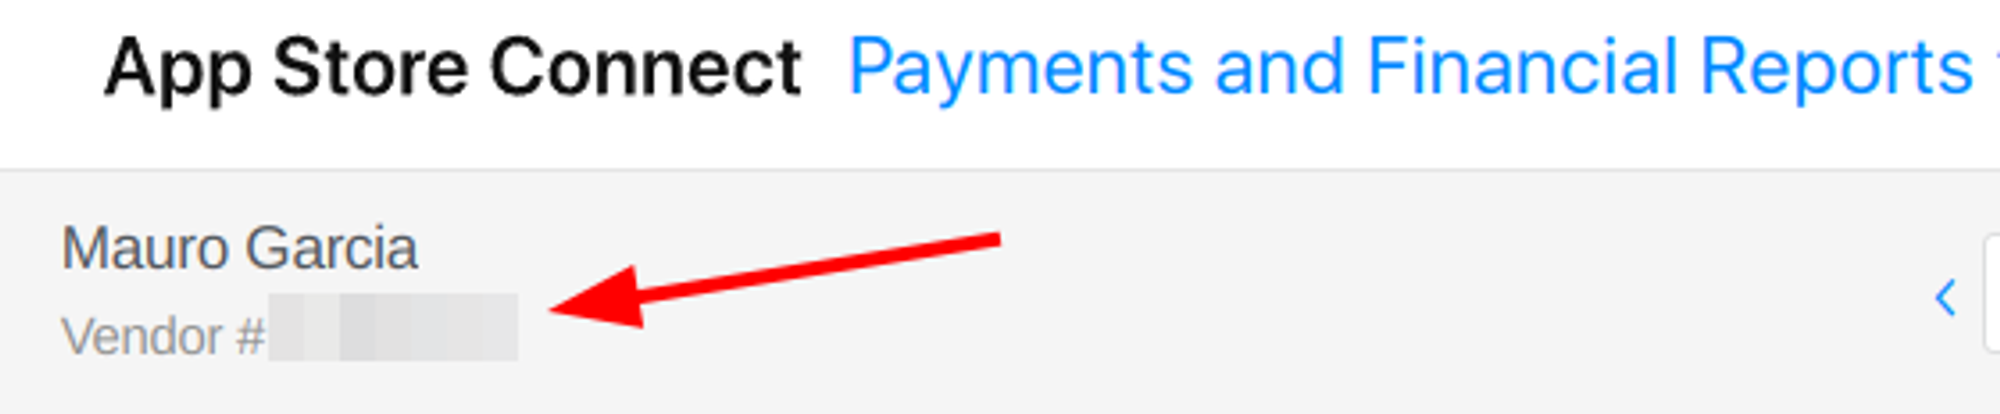
For the Vendor number, visit the “Payments and Financial Reports” section in the App Store Connect. You should see your vendor id in the top left corner
Click on “Save changes” to confirm
Now you can import your iOS products by following the same steps required for Android.
Make sure to select all the products and click “Import”
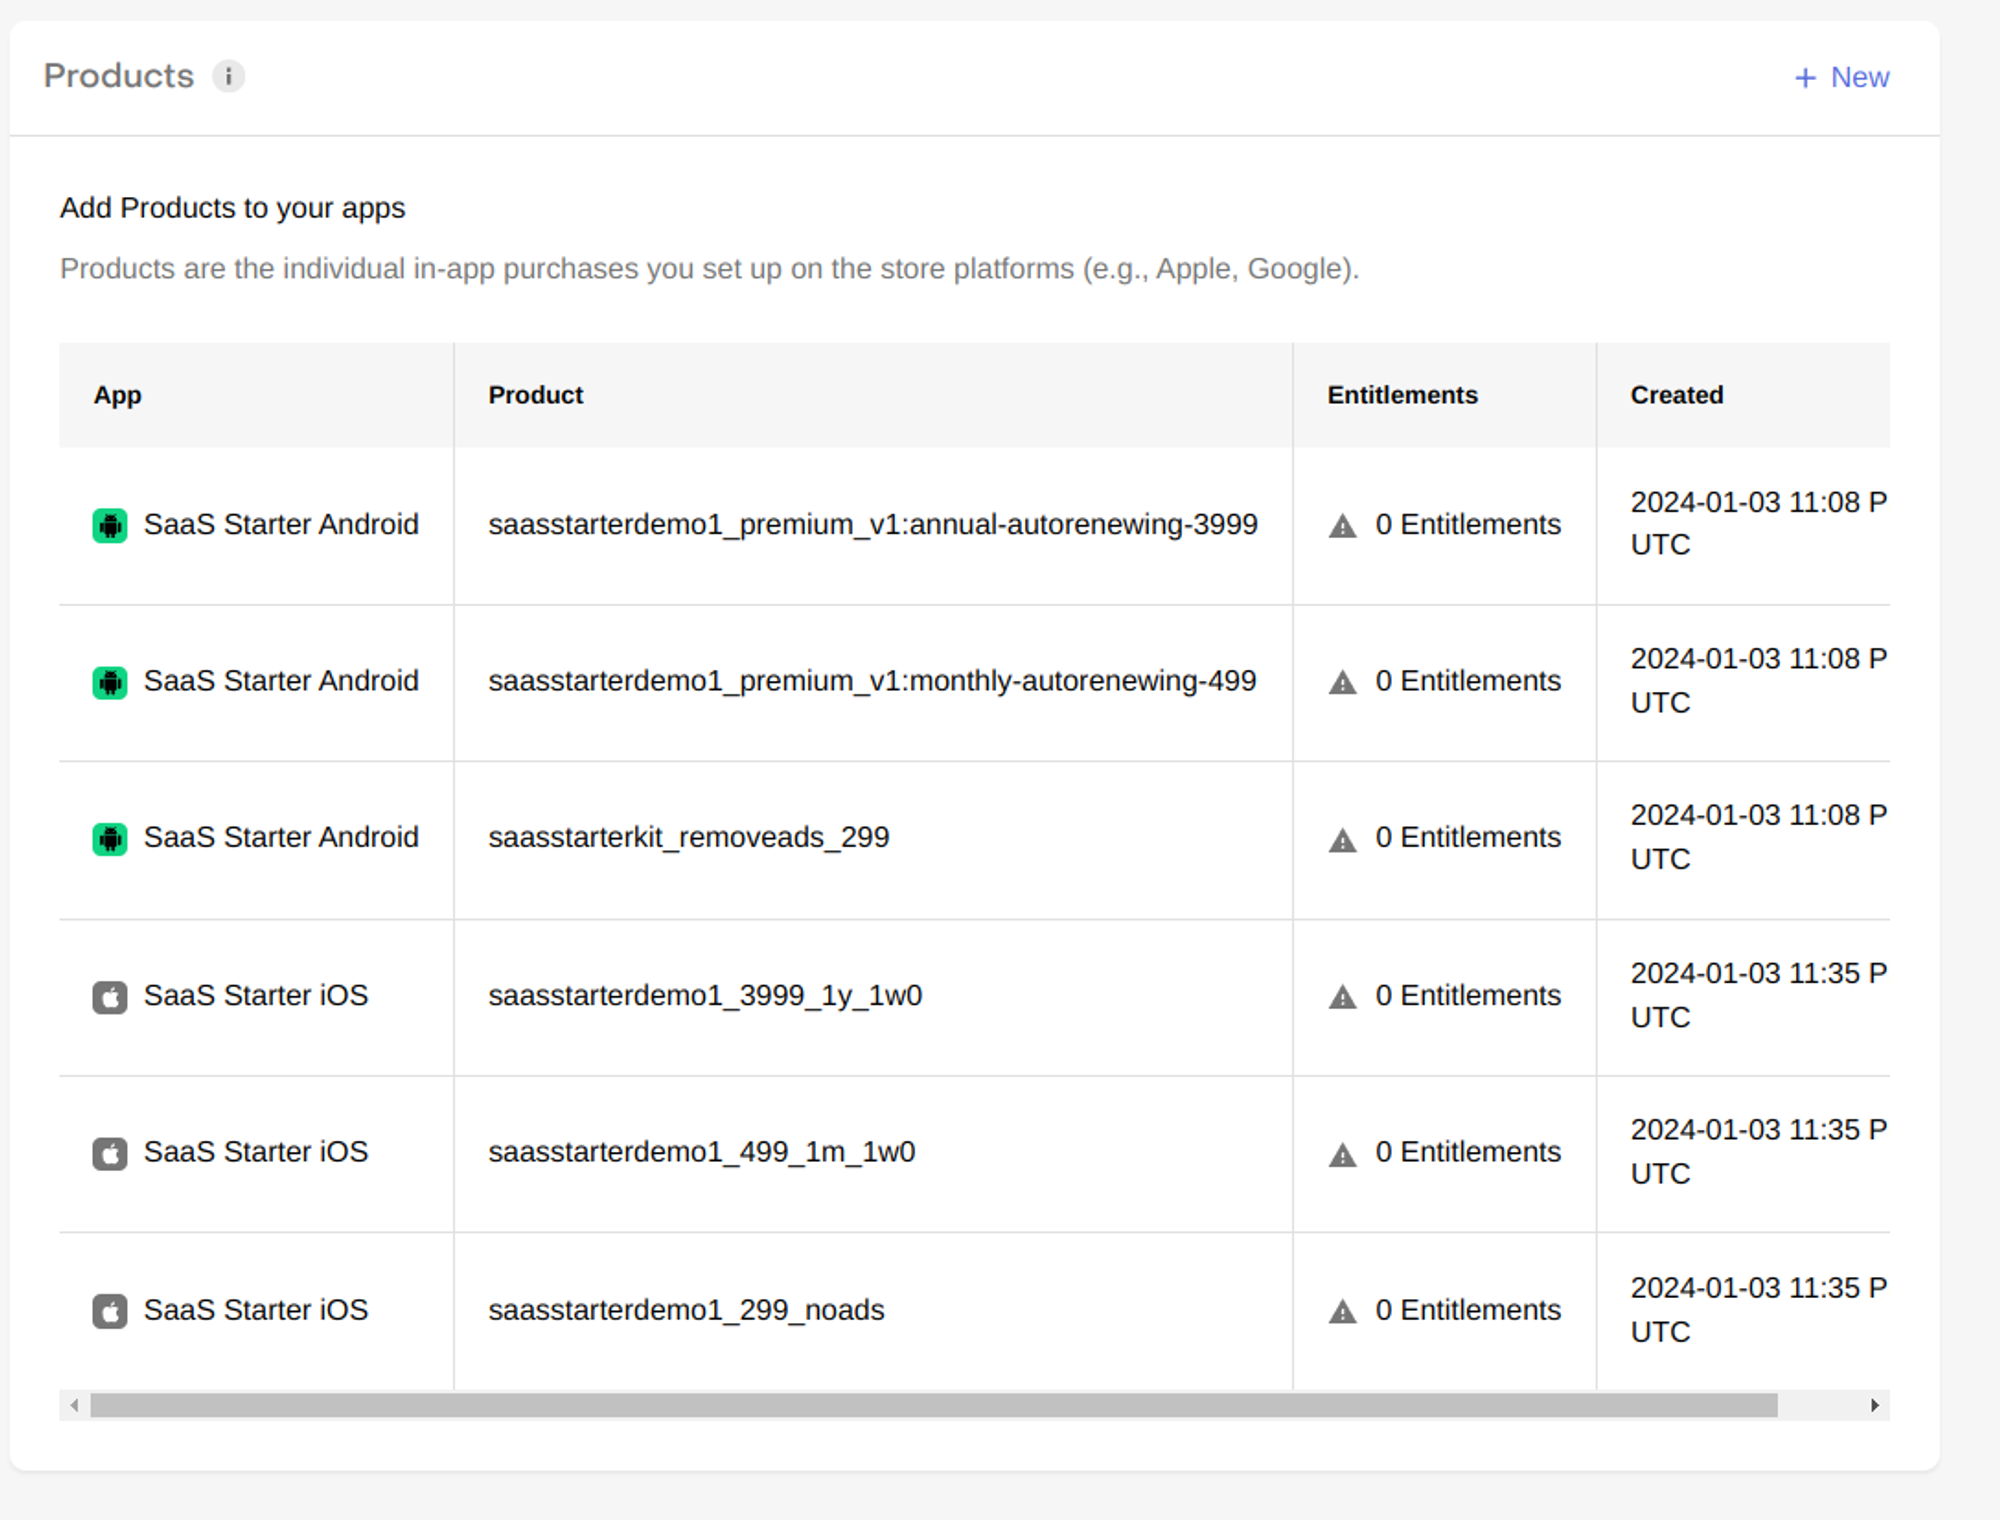
If everything went as expected, your “Products” section should look like this:
Attaching Products to Entitlements
Go back to “Entitlements” in the sidebar
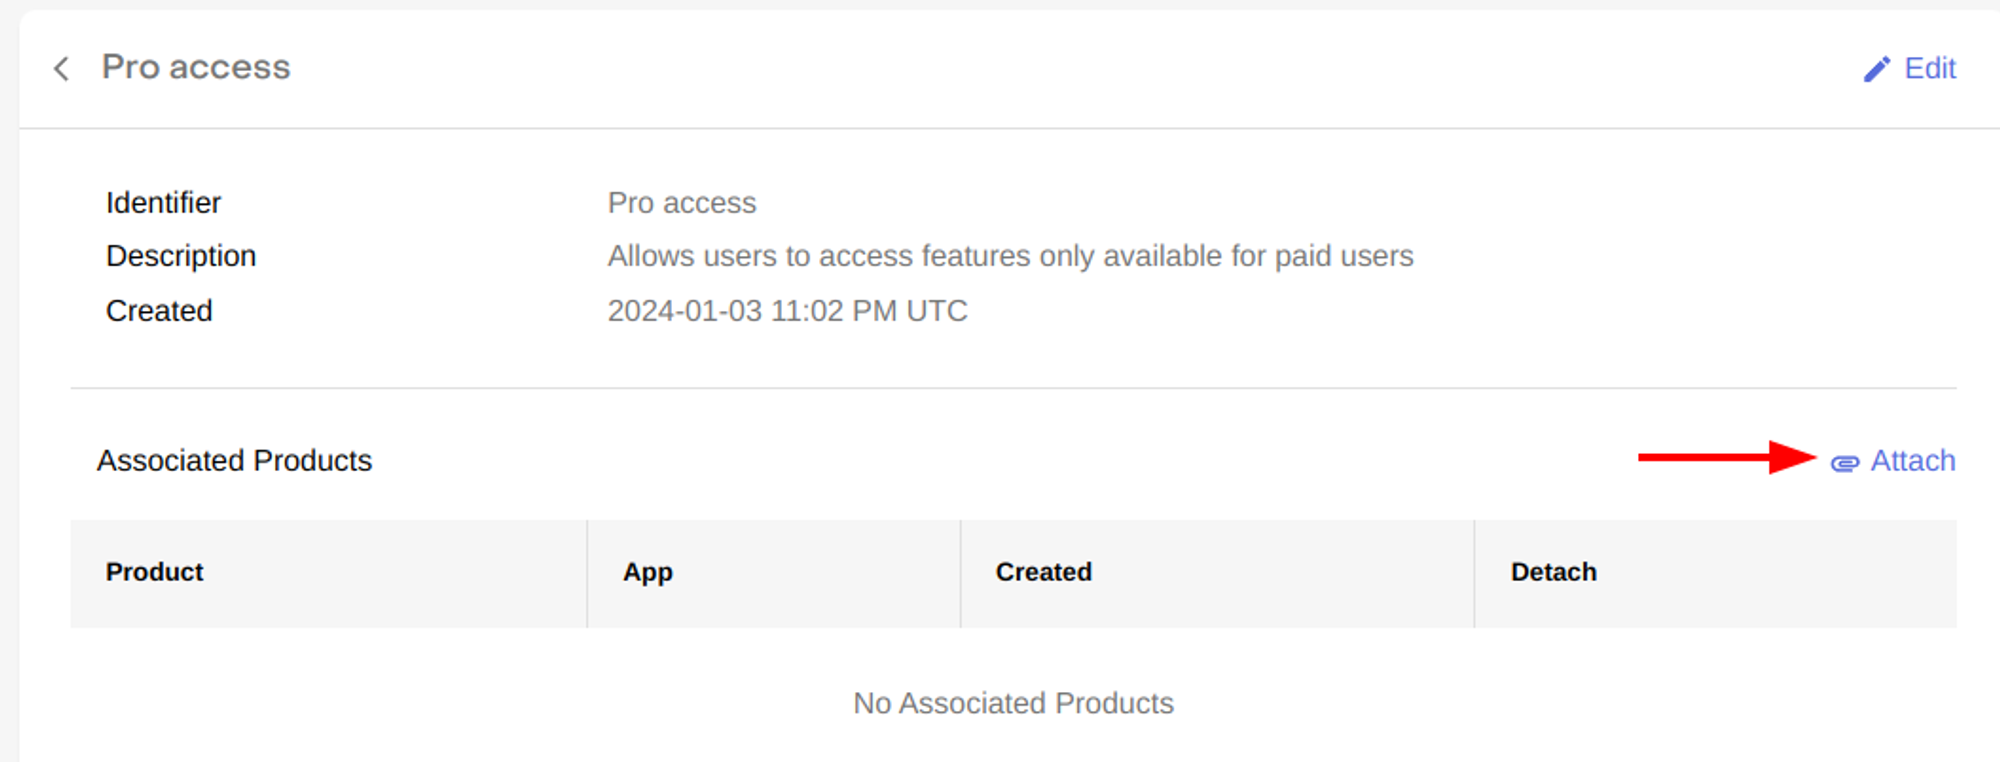
Click on the “Pro access” entitlement
In the “Associated Products” section, click on “Attach”
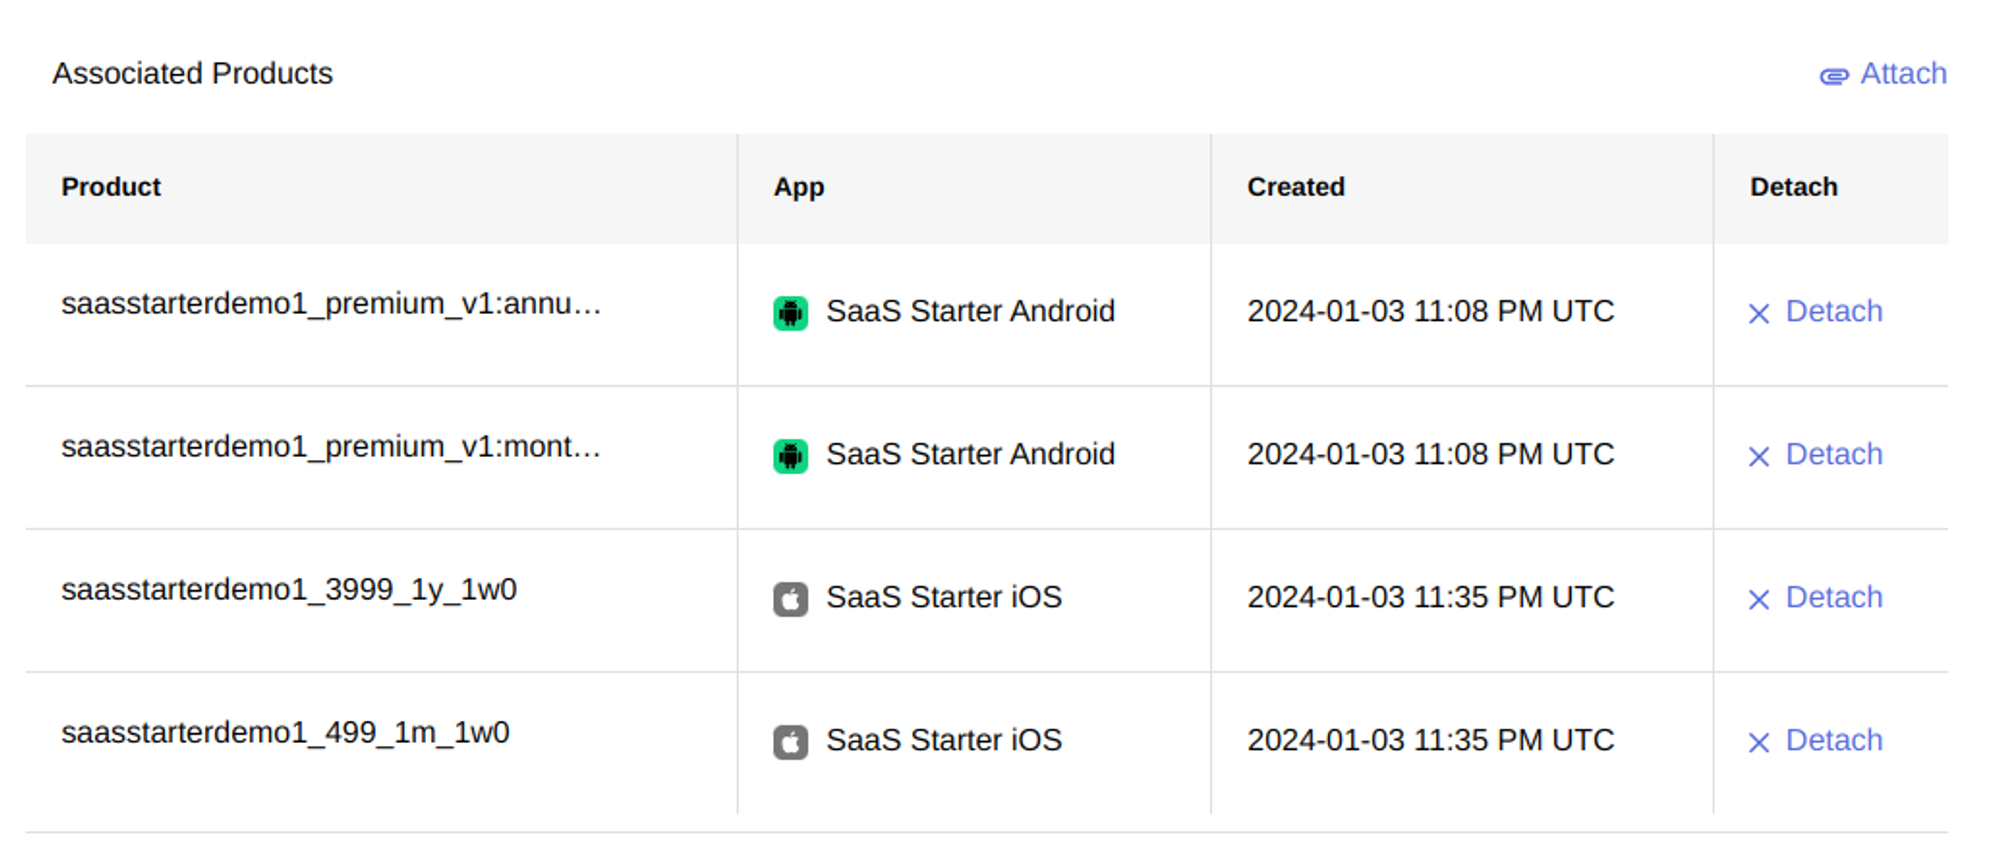
You’ll need to add the 4 products related to “Pro access” which are:
Monthly subscription (iOS / Android)
Annual subscription (iOS / Android)
After adding all the products, it should look like this
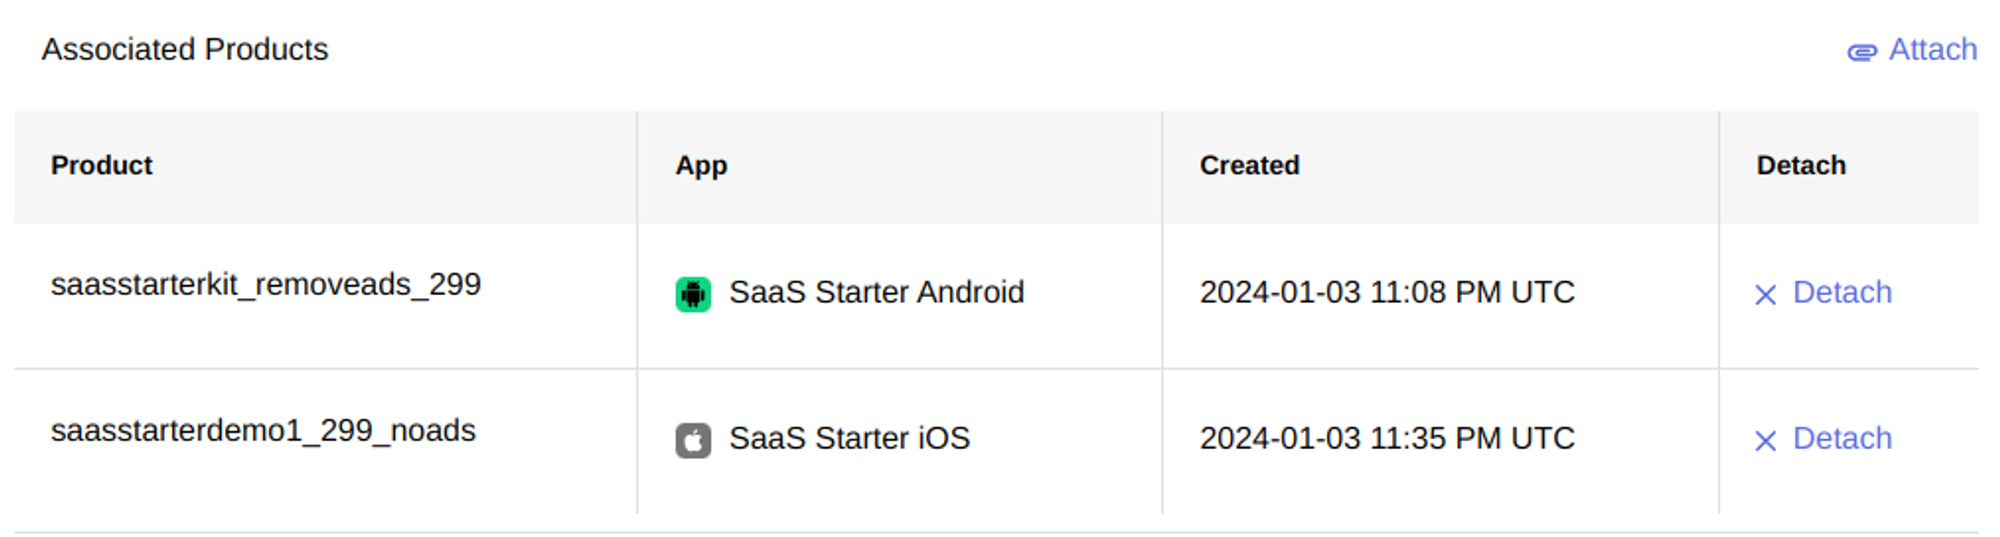
Repeat steps 2 and 3 for the “Add free” entitlement. This time, make sure to only add the “Ad free” products (iOS / Android). It should look like this
Creating Offerings
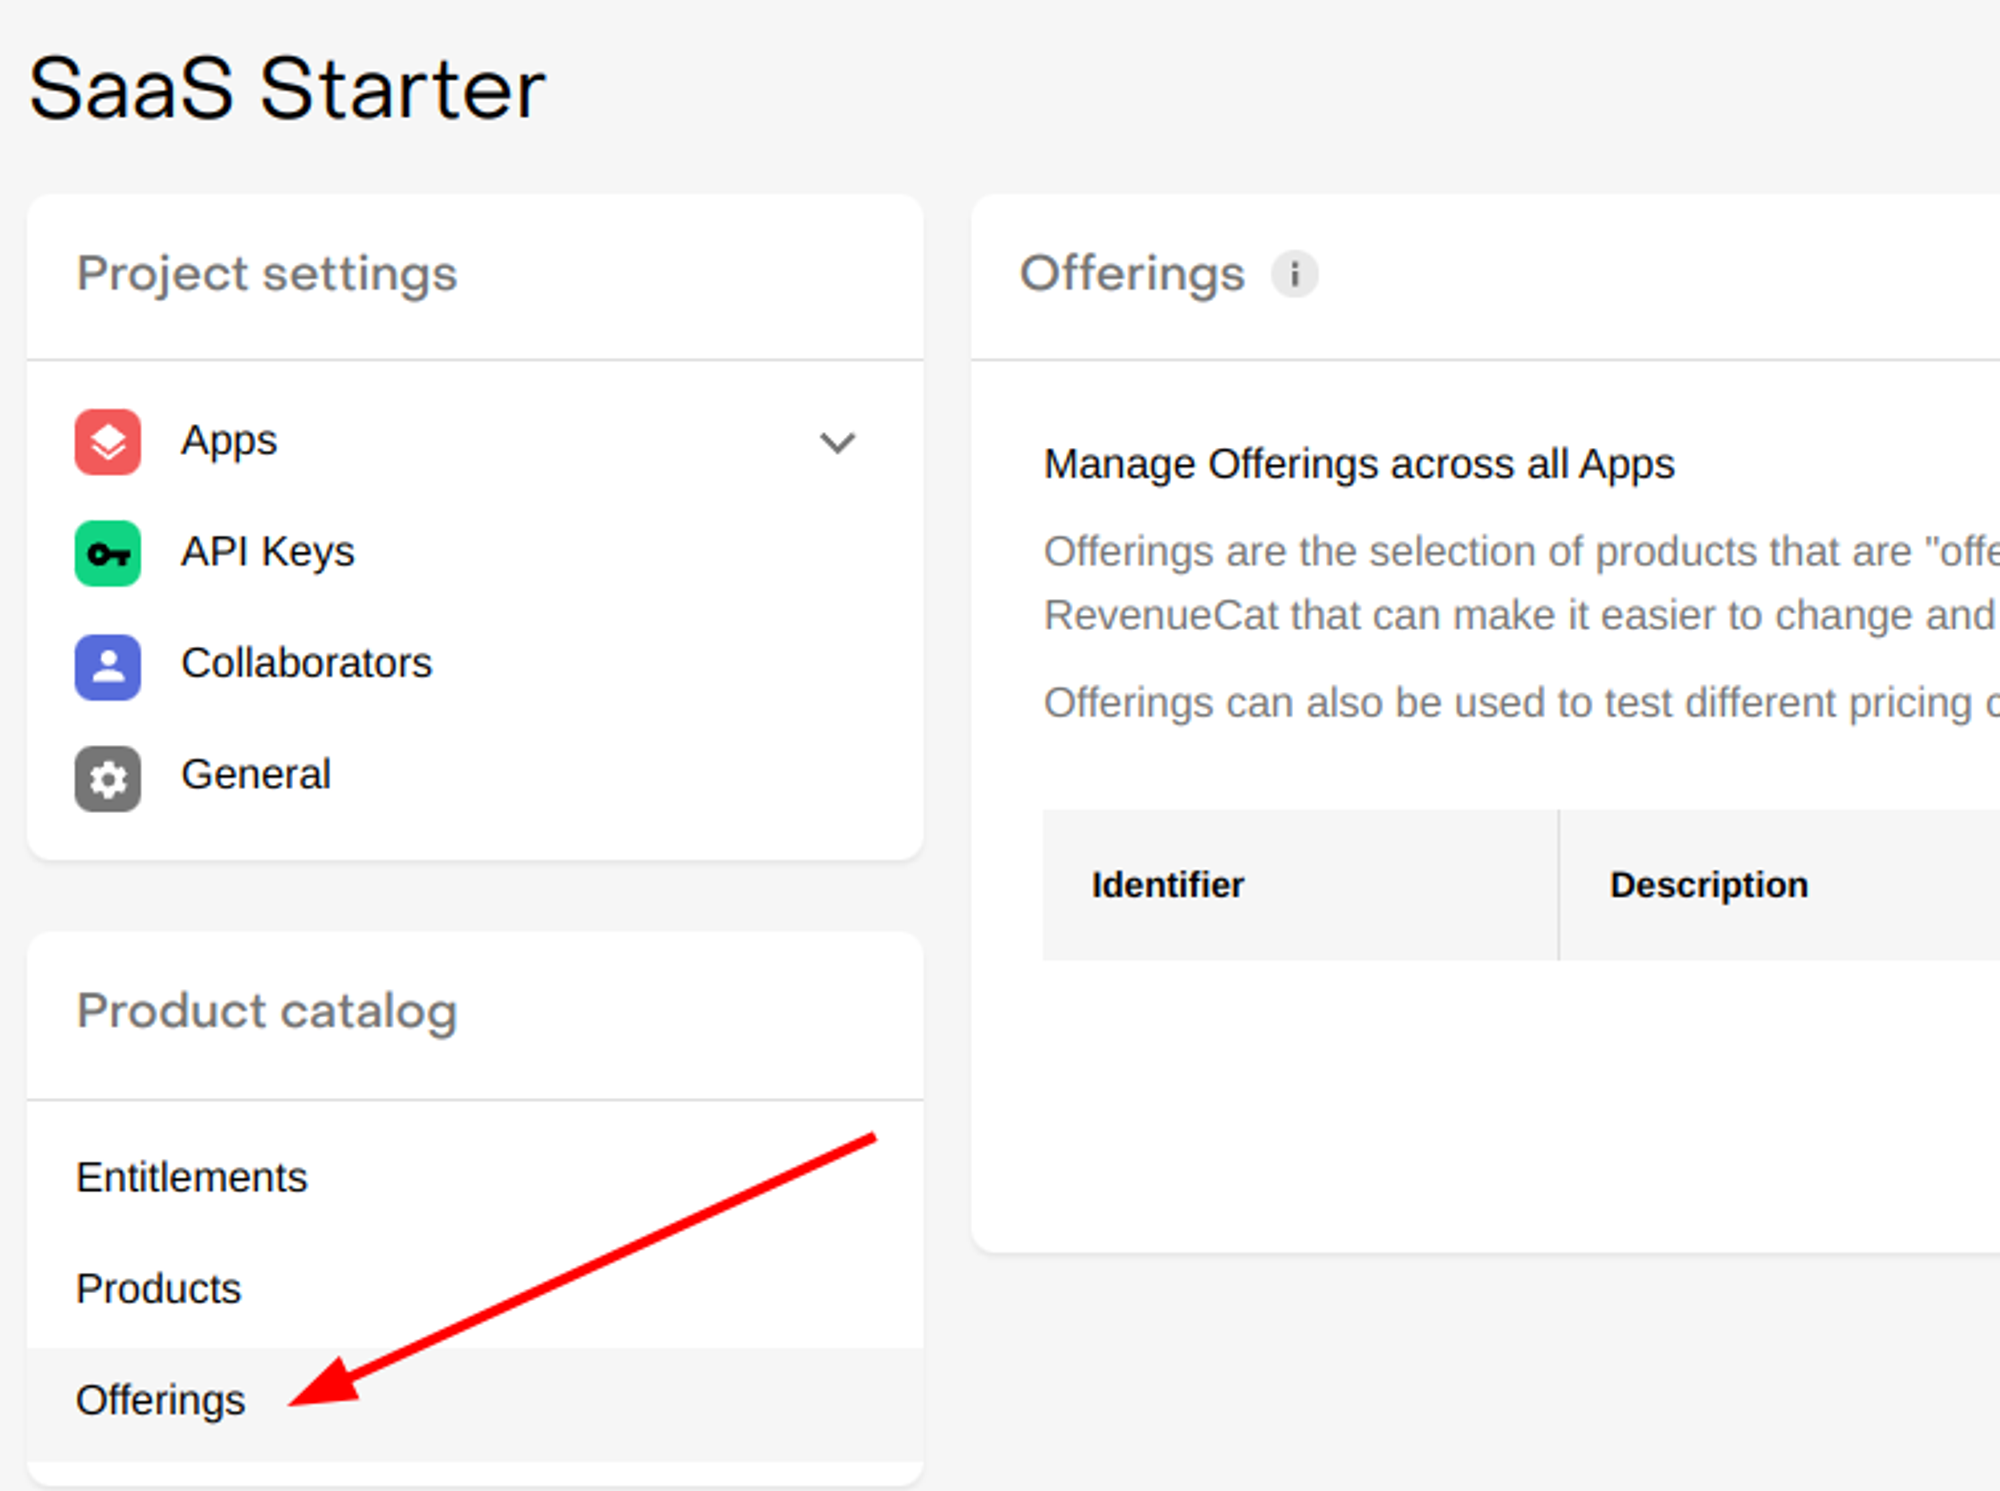
In the sidebar, click on “Offerings”
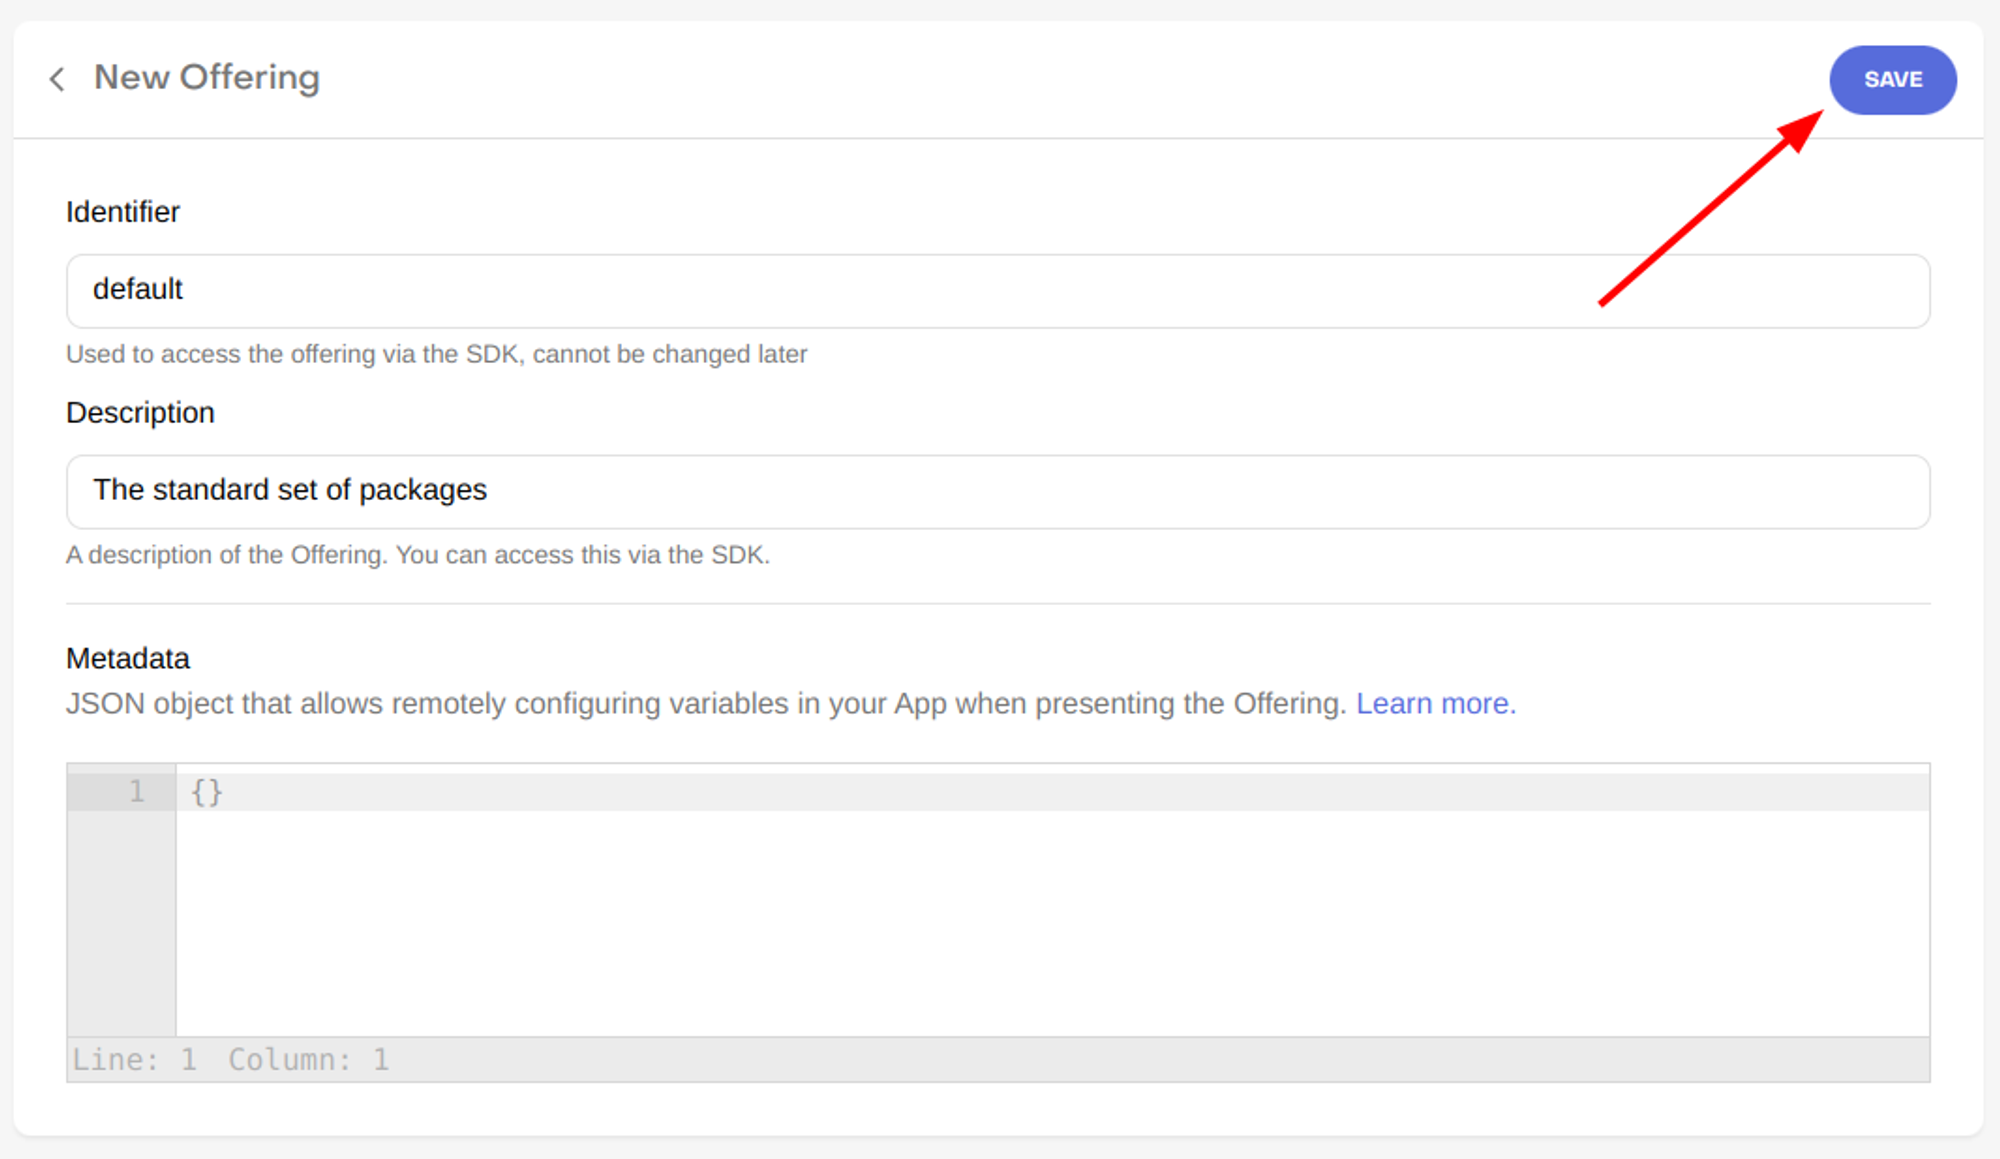
In the top right corner, click on “New”
You’ll need to provide an “Identifier” and a “Description” for the offering.
In the “Metadata” section, add the following json structure. Make sure to provide your product identifiers, and set the discount based on your pricing. This information will be used later in the starter template, to show a “50% OFF” label in the annual subscription
 {
   "subscriptions": {
     "android": [
       {
         "cycles": 12,
         "discount": "50%",
         "identifier": "[YOUR_ANDROID_ANNUAL_PRODUCT_ID]"
       },
       {
         "cycles": 1,
         "identifier": "[YOUR_ANDROID_MONTHLY_PRODUCT_ID]"
       }
     ],
     "ios": [
       {
         "cycles": 12,
         "discount": "50%",
         "identifier": "[YOUR_IOS_ANNUAL_PRODUCT_ID]"
       },
       {
         "cycles": 1,
         "identifier": "[YOUR_IOS_MONTHLY_PRODUCT_ID]"
       }
     ]
   }
 }
Click “Save” to finish
In order to start using this Offering, you’ll need to add at least one package to it in the next section.
Adding Packages to Offerings
We’ll need to create 3 packages:
The “Pro monthly” package will include the “Pro monthly” products for both platforms
The “Pro annual” package will include the “Pro annual” products for both platforms
The “Ad free” package will include the “Ad free” products for both platforms.
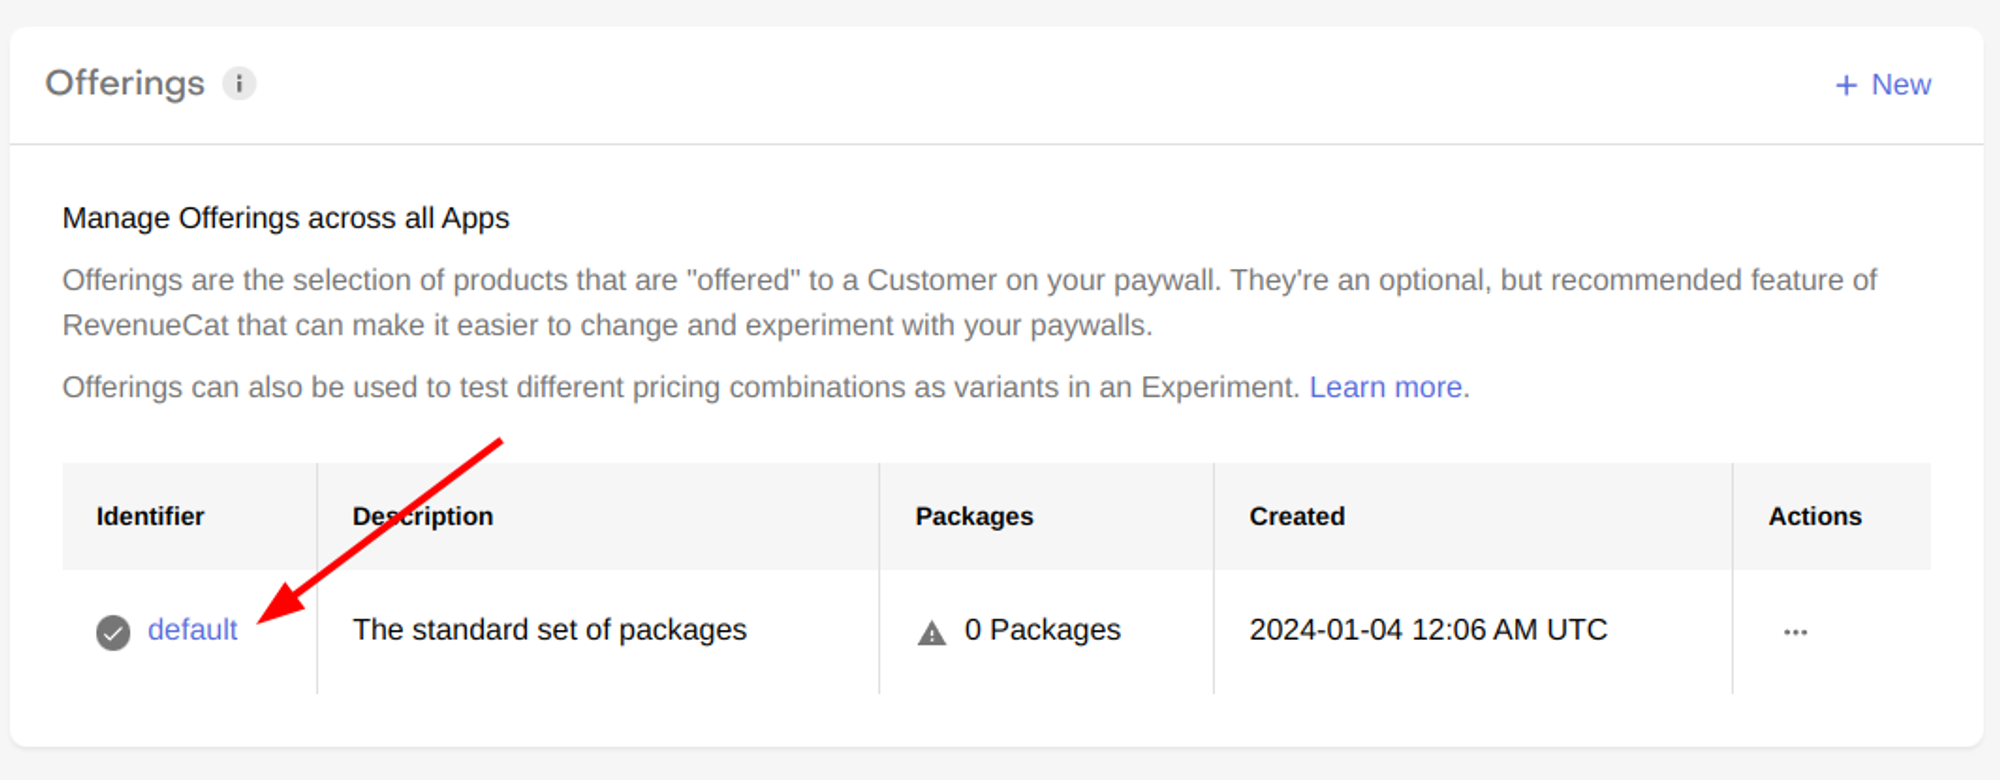
In the sidebar, go to “Offerings”
Click on the offering you just created in the previous section
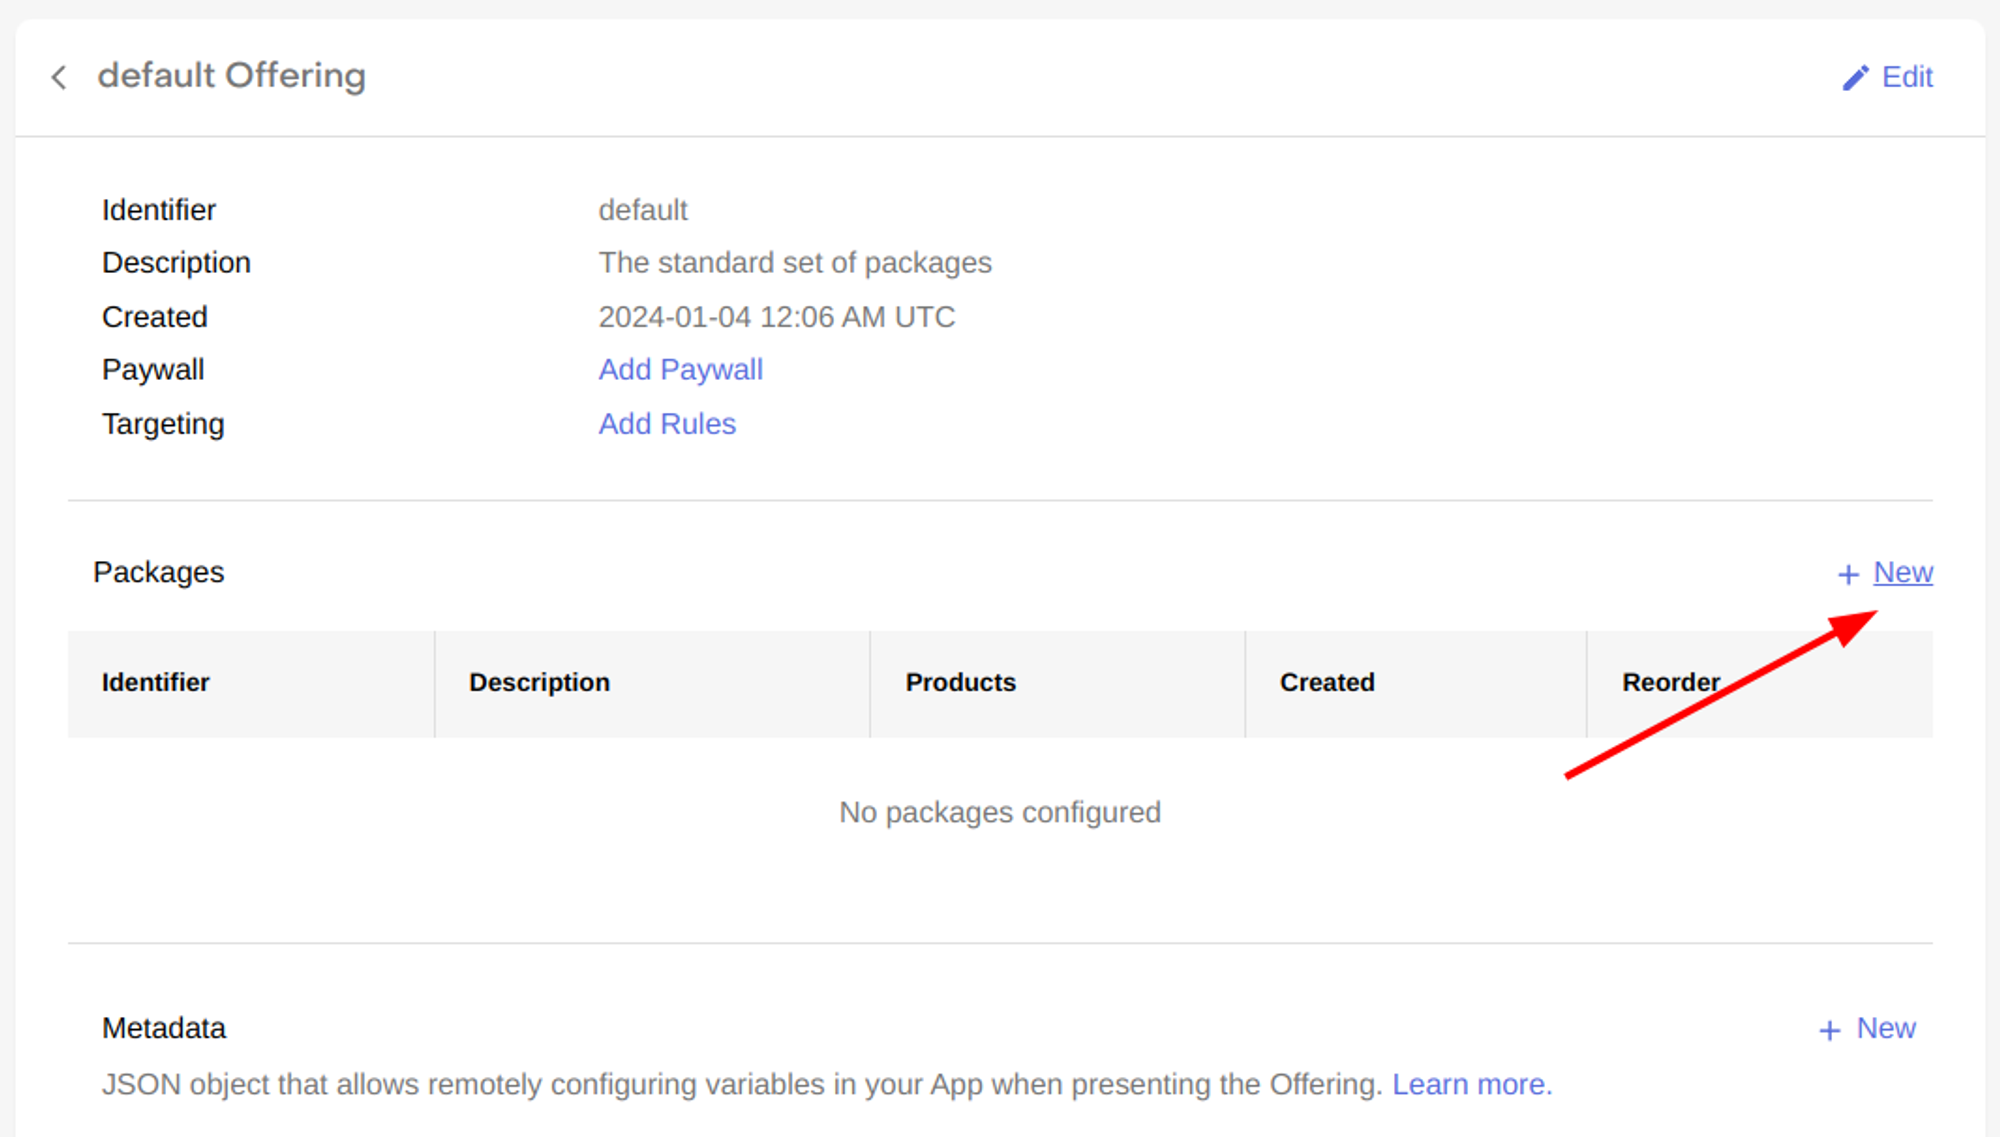
In the “Packages” section, click on “New”
For the identifier, you can choose between a list of “standard identifiers” or choose “Custom” to create your own identifier. I decided to use the standards for monthly and annual subscriptions, but a custom identifier for the “Ad free” package.
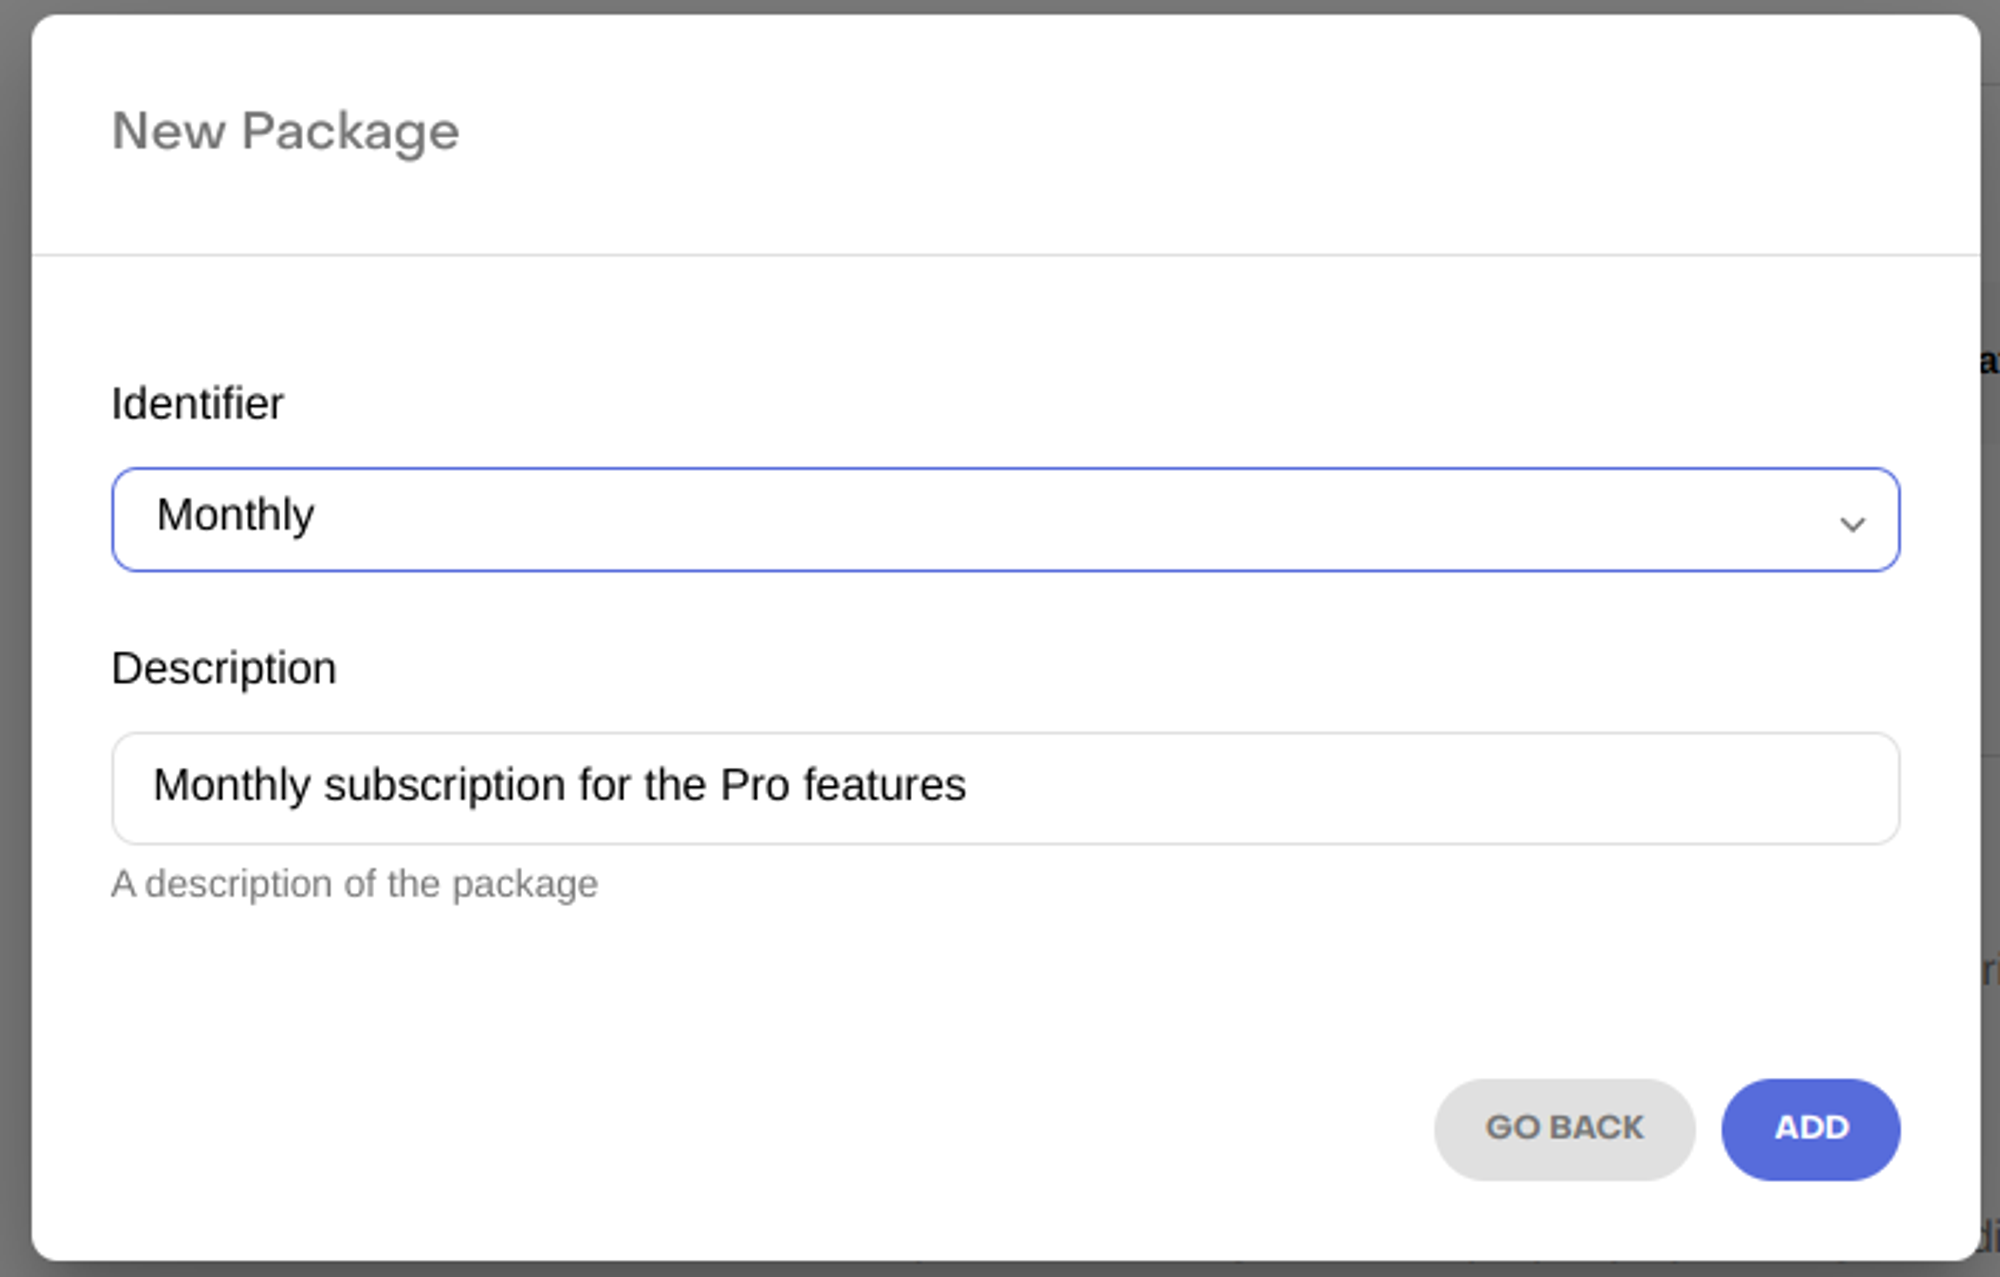
Click on “Add” to confirm.
Now, click on the new package, and then click on “Attach” in the “Products” section.
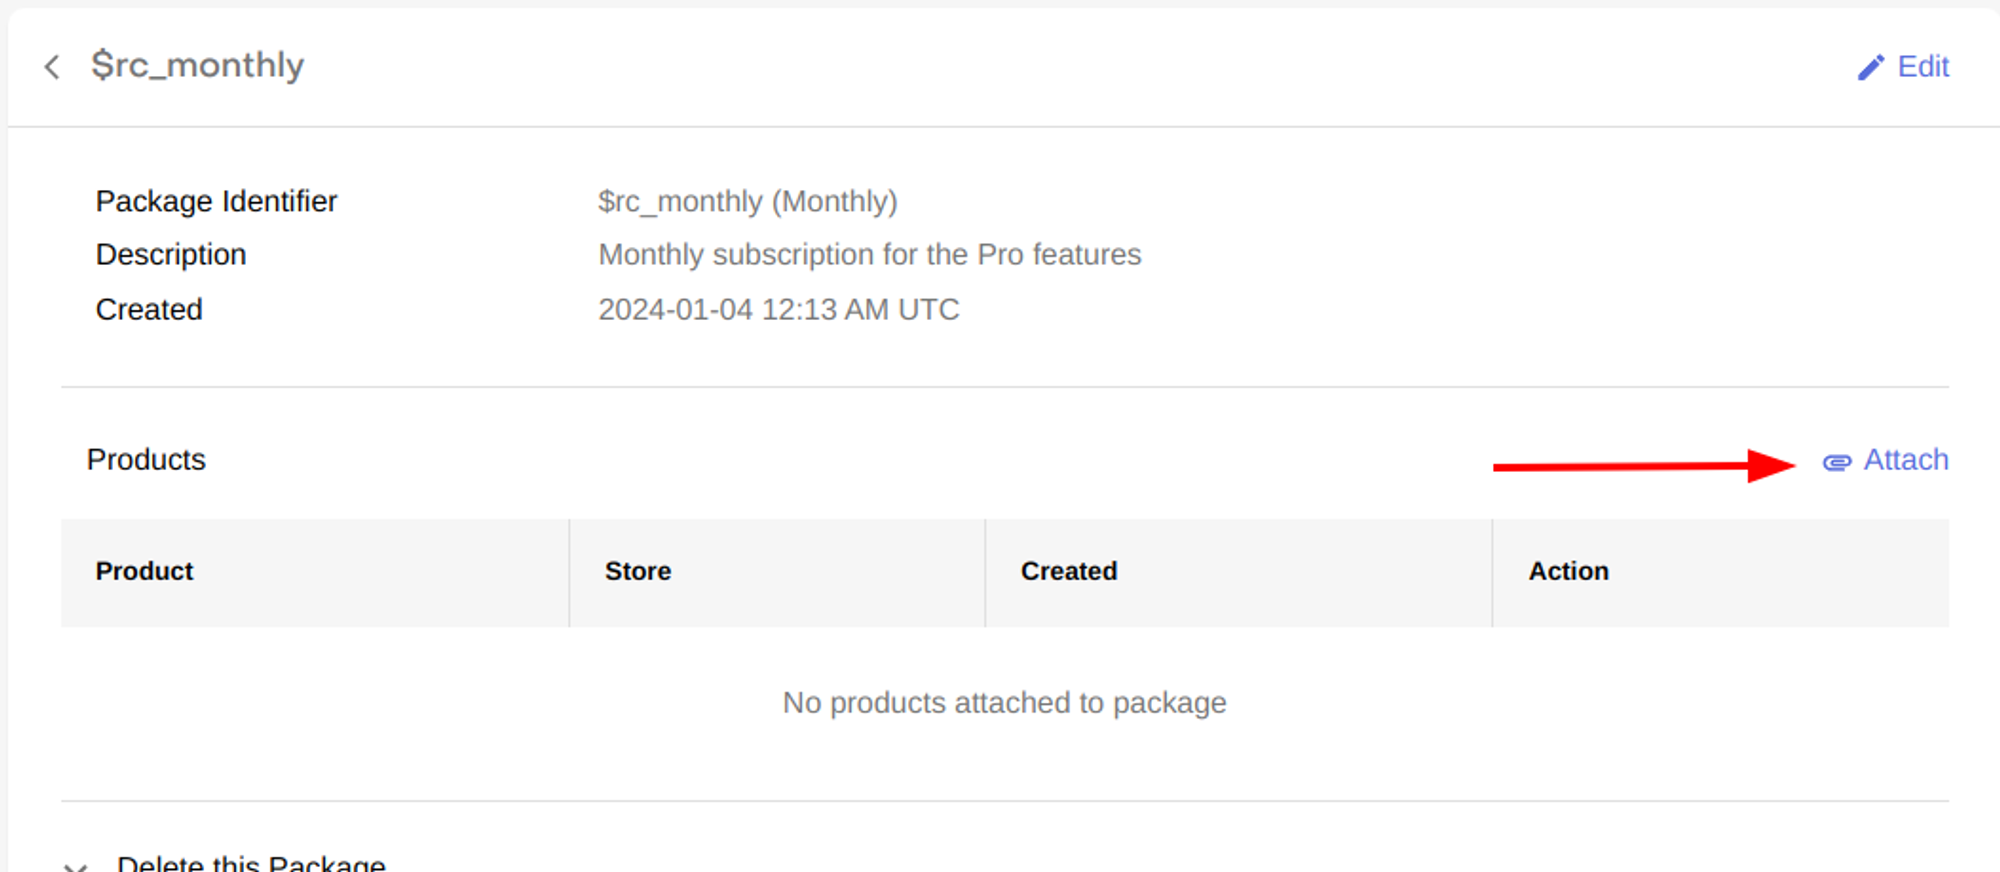
Select the relevant product for each platform. In this case, I’m adding the monthly products like this:
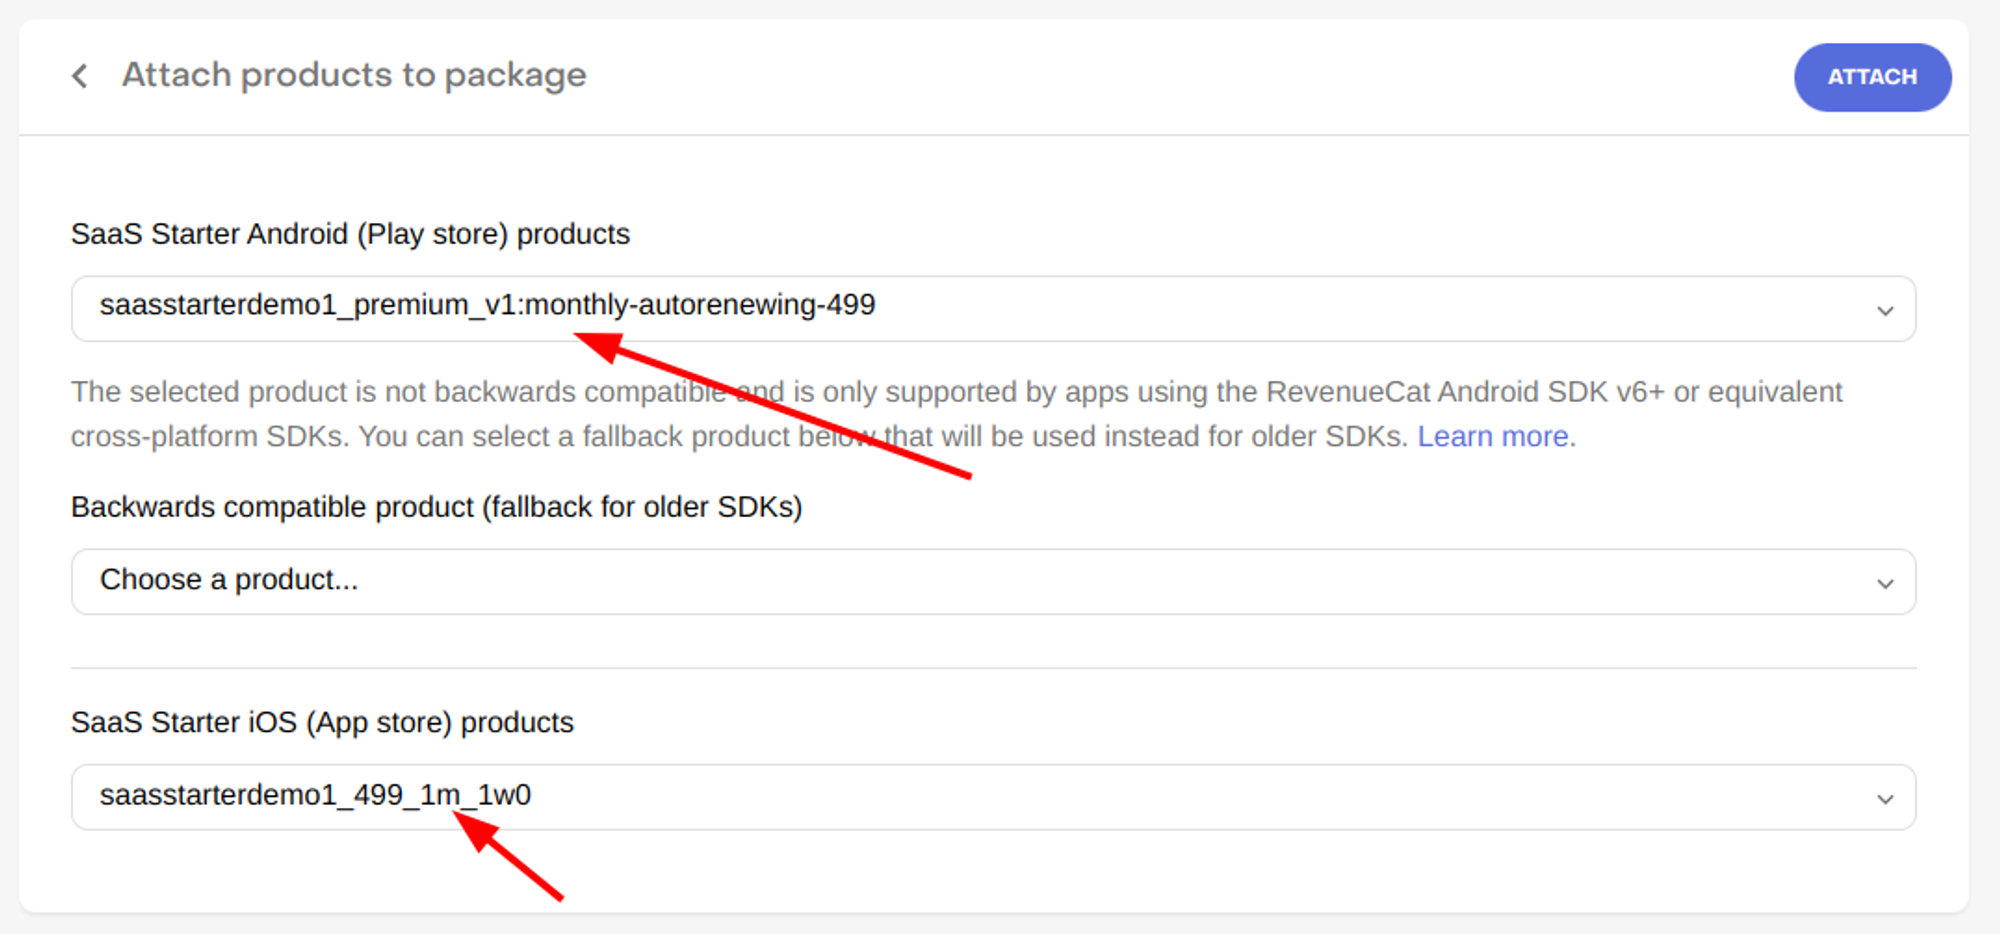
Click “Attach” to confirm
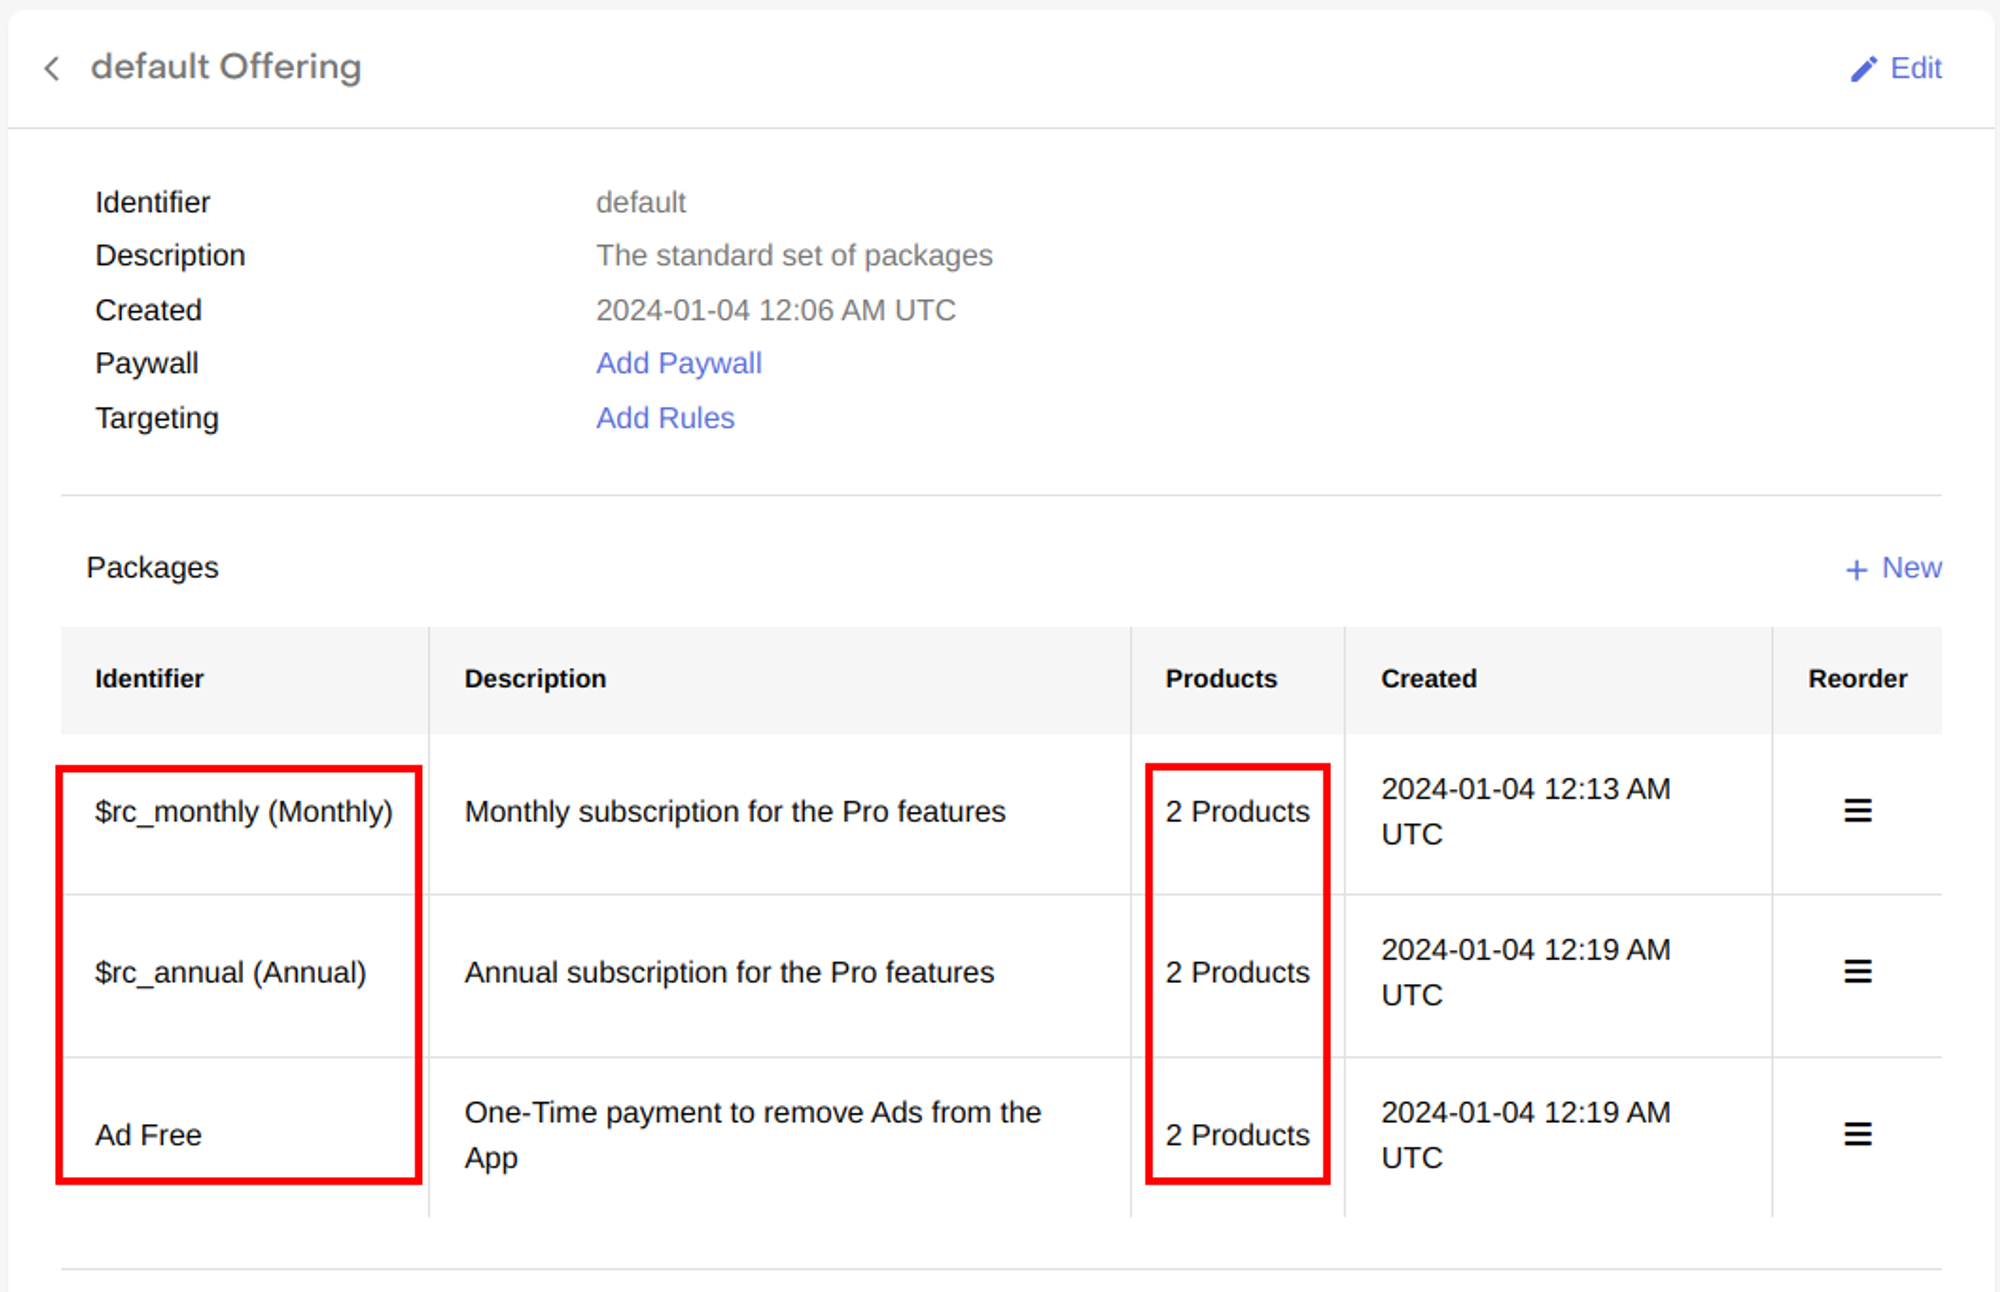
The first package is complete with the products associated. Now, go back to the offering and repeat steps 3 to 8 for the “Annual” package and for the “Ad free” package.
If everything went as expected, your offering should look like this:
Congrats! You are done with all the boring part! Now, it's time to code 🥳
What's next?
In the next and final article of these series, I'll focus on creating a new React Native project and wiring everything together to create a Paywall screen where users can purchase your products.
You can read the next part of the series here: