Collecting payments with React Native & RevenueCat (Part 2): Configuring Subscriptions in the Stores
SpiroKit for SaaS
In case you want to save weeks of painful hours of work & research on your next React Native app, checkout SpiroKit for SaaS. It's a starter template that comes with Purchases, Push Notifications, Authentication, Analytics, Error Reporting and more. It also includes a Notion template to guide you through the entire process
App Store Connect Setup (iOS)
Before we can offer subscriptions and/or in-app purchases on our iOS app, we need to setup in-app purchases in App Store Connect.
Creating a Subscription Group (App Store Connect)
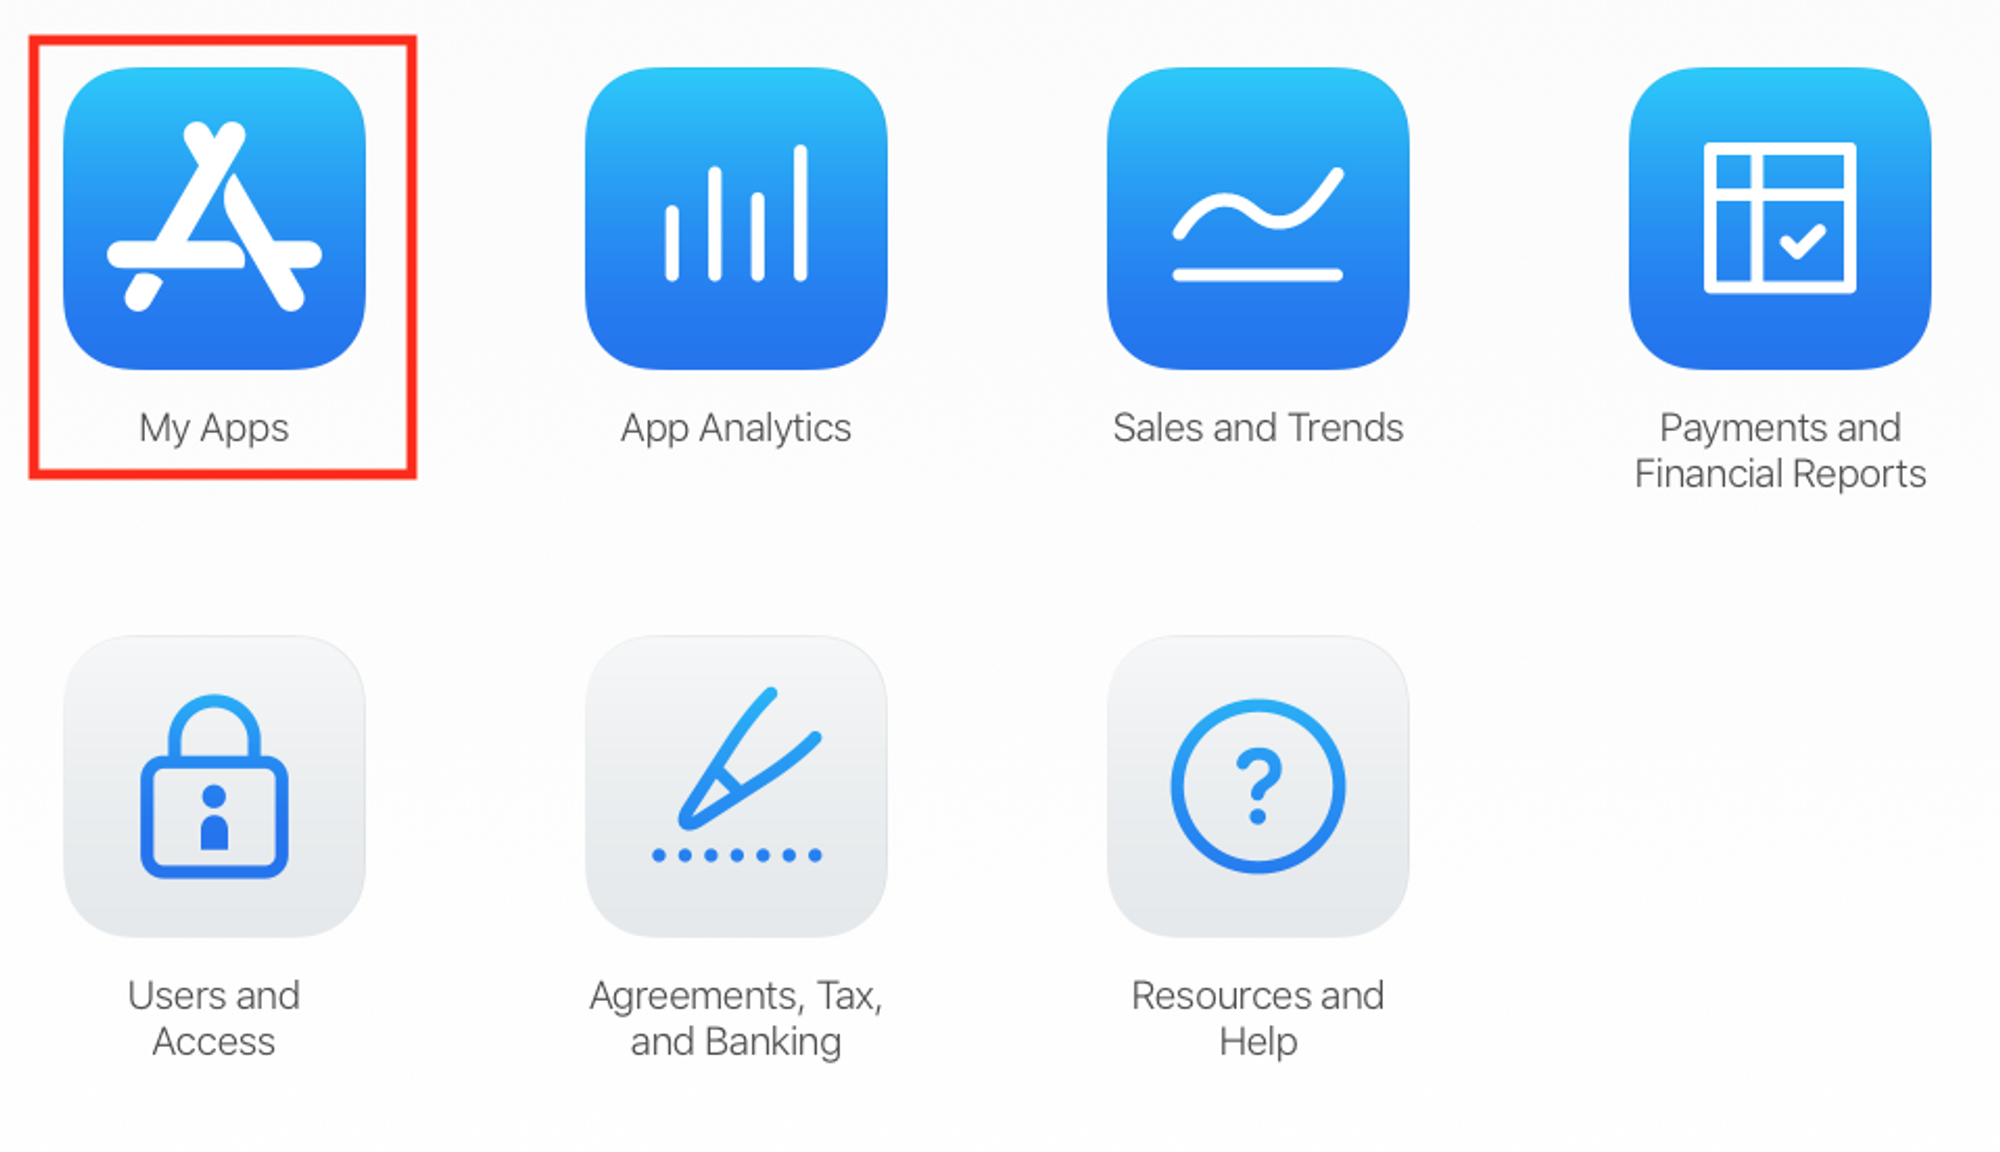
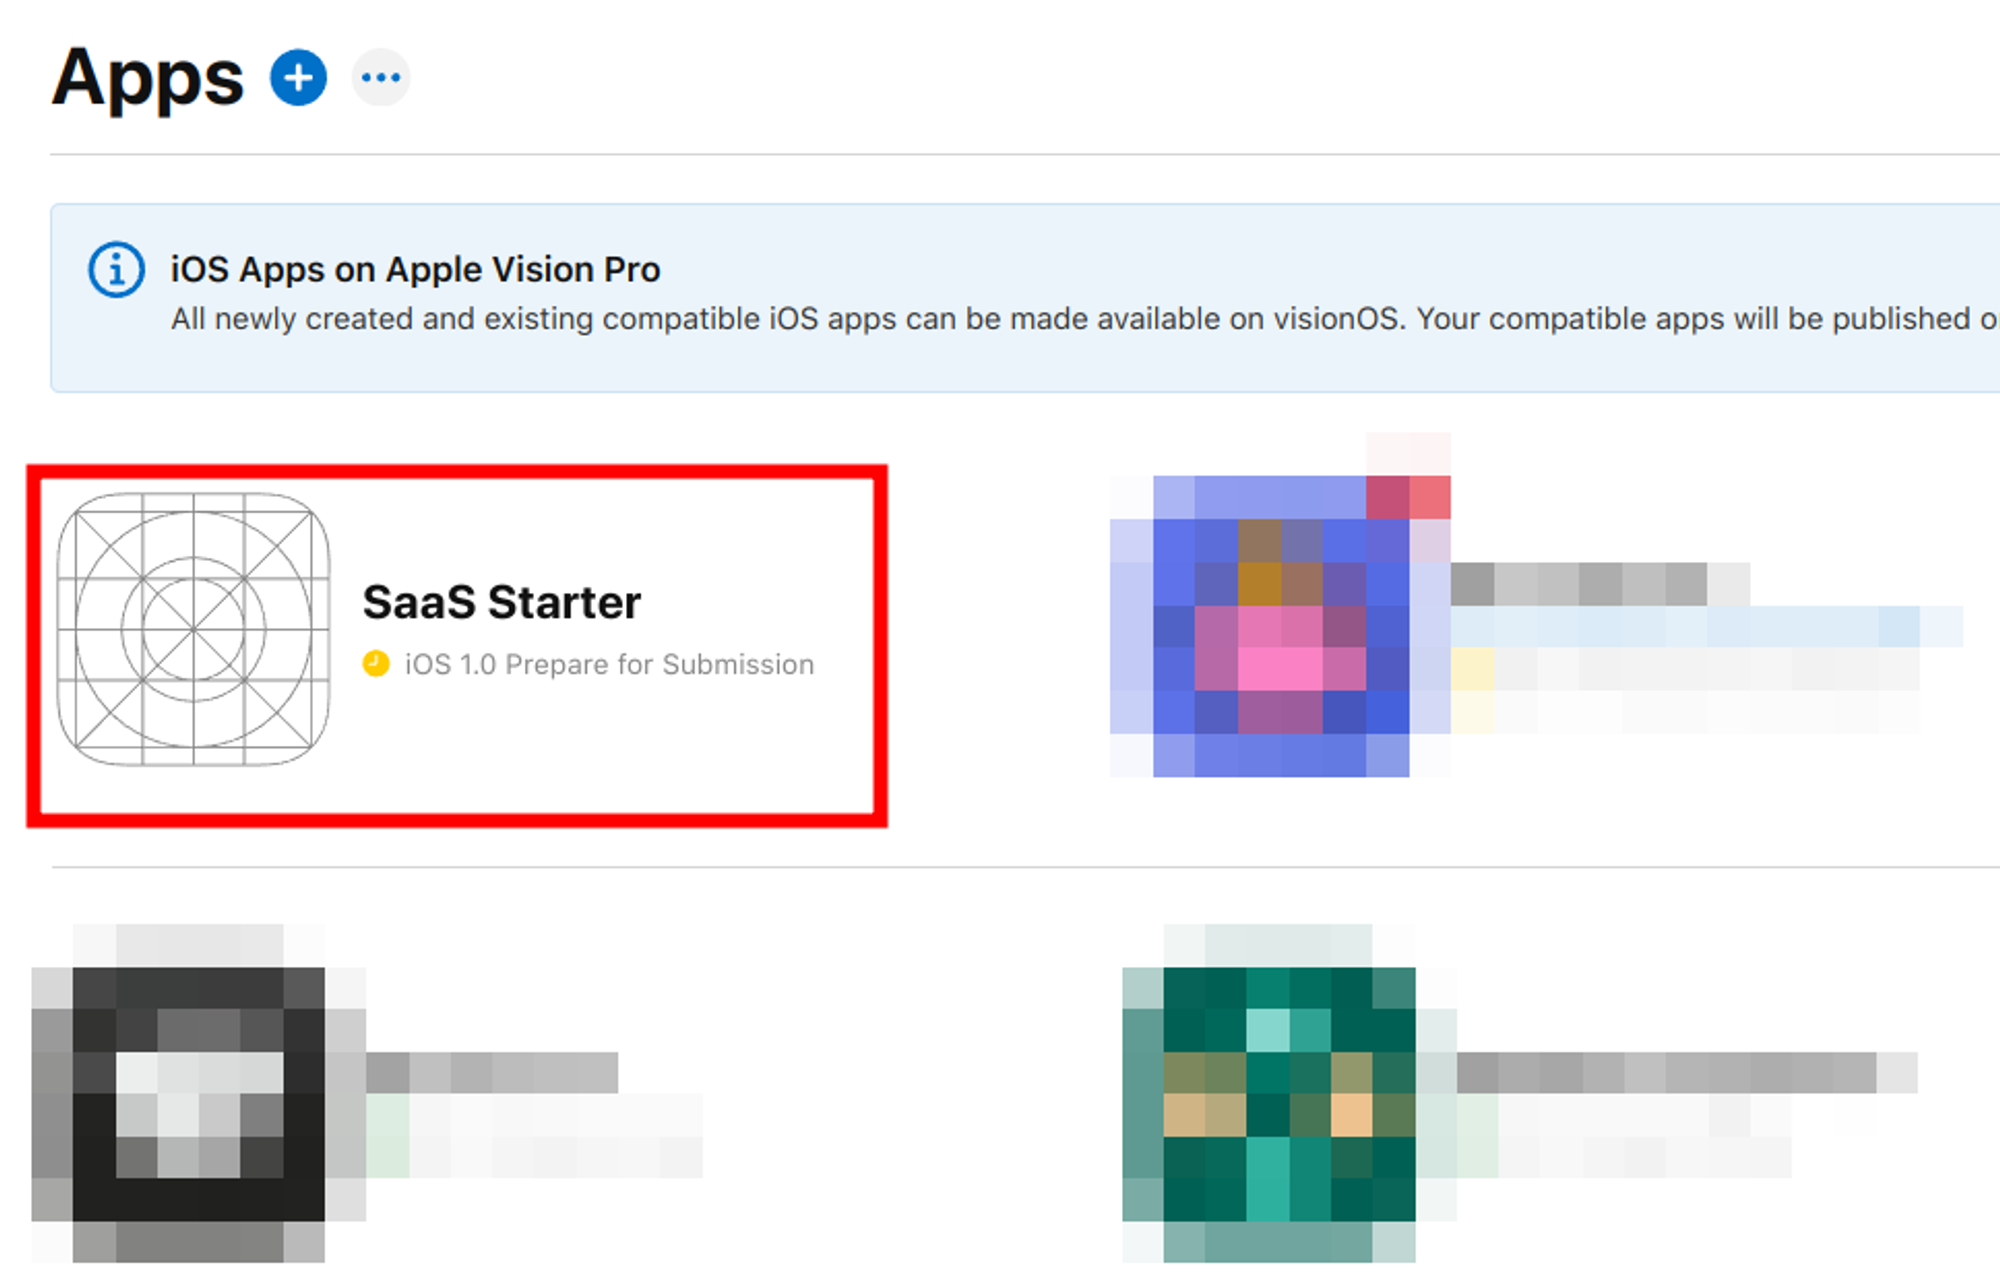
Visit App Store Connect. Then click on “My Apps”, and choose your app.
Click on “Subscriptions”, within the “Features” section in the sidebar
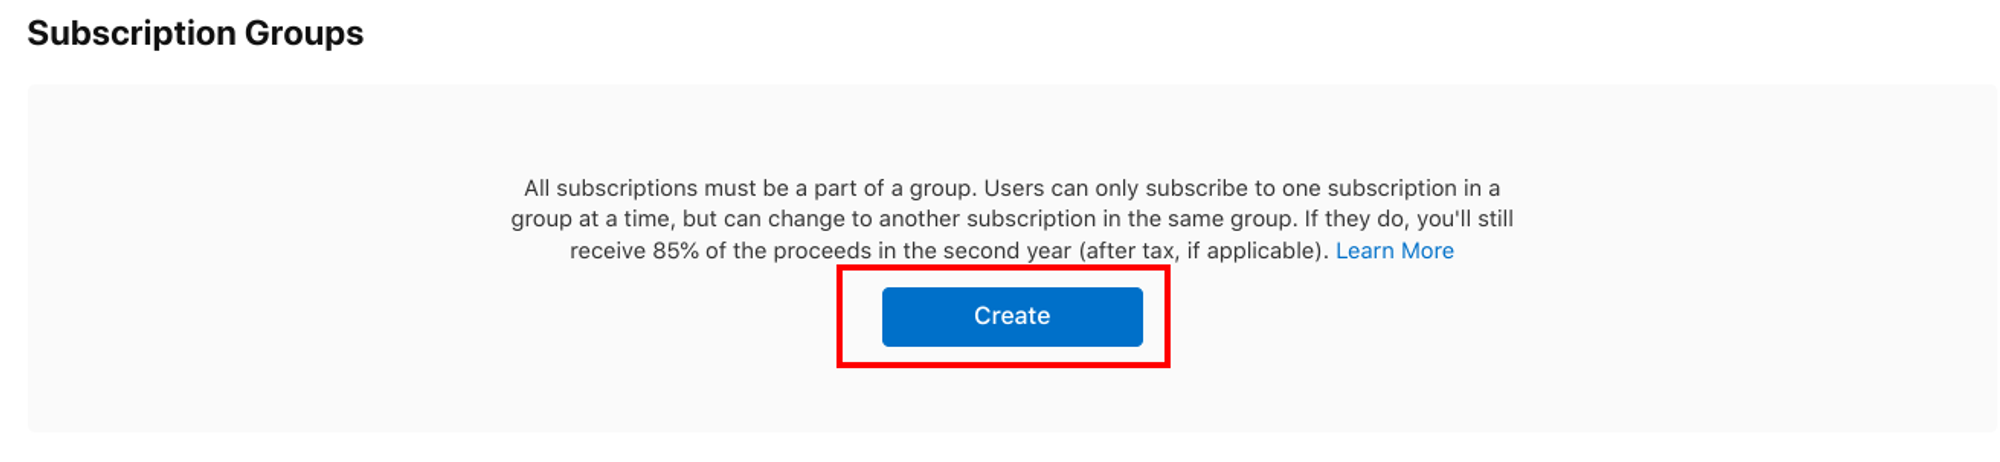
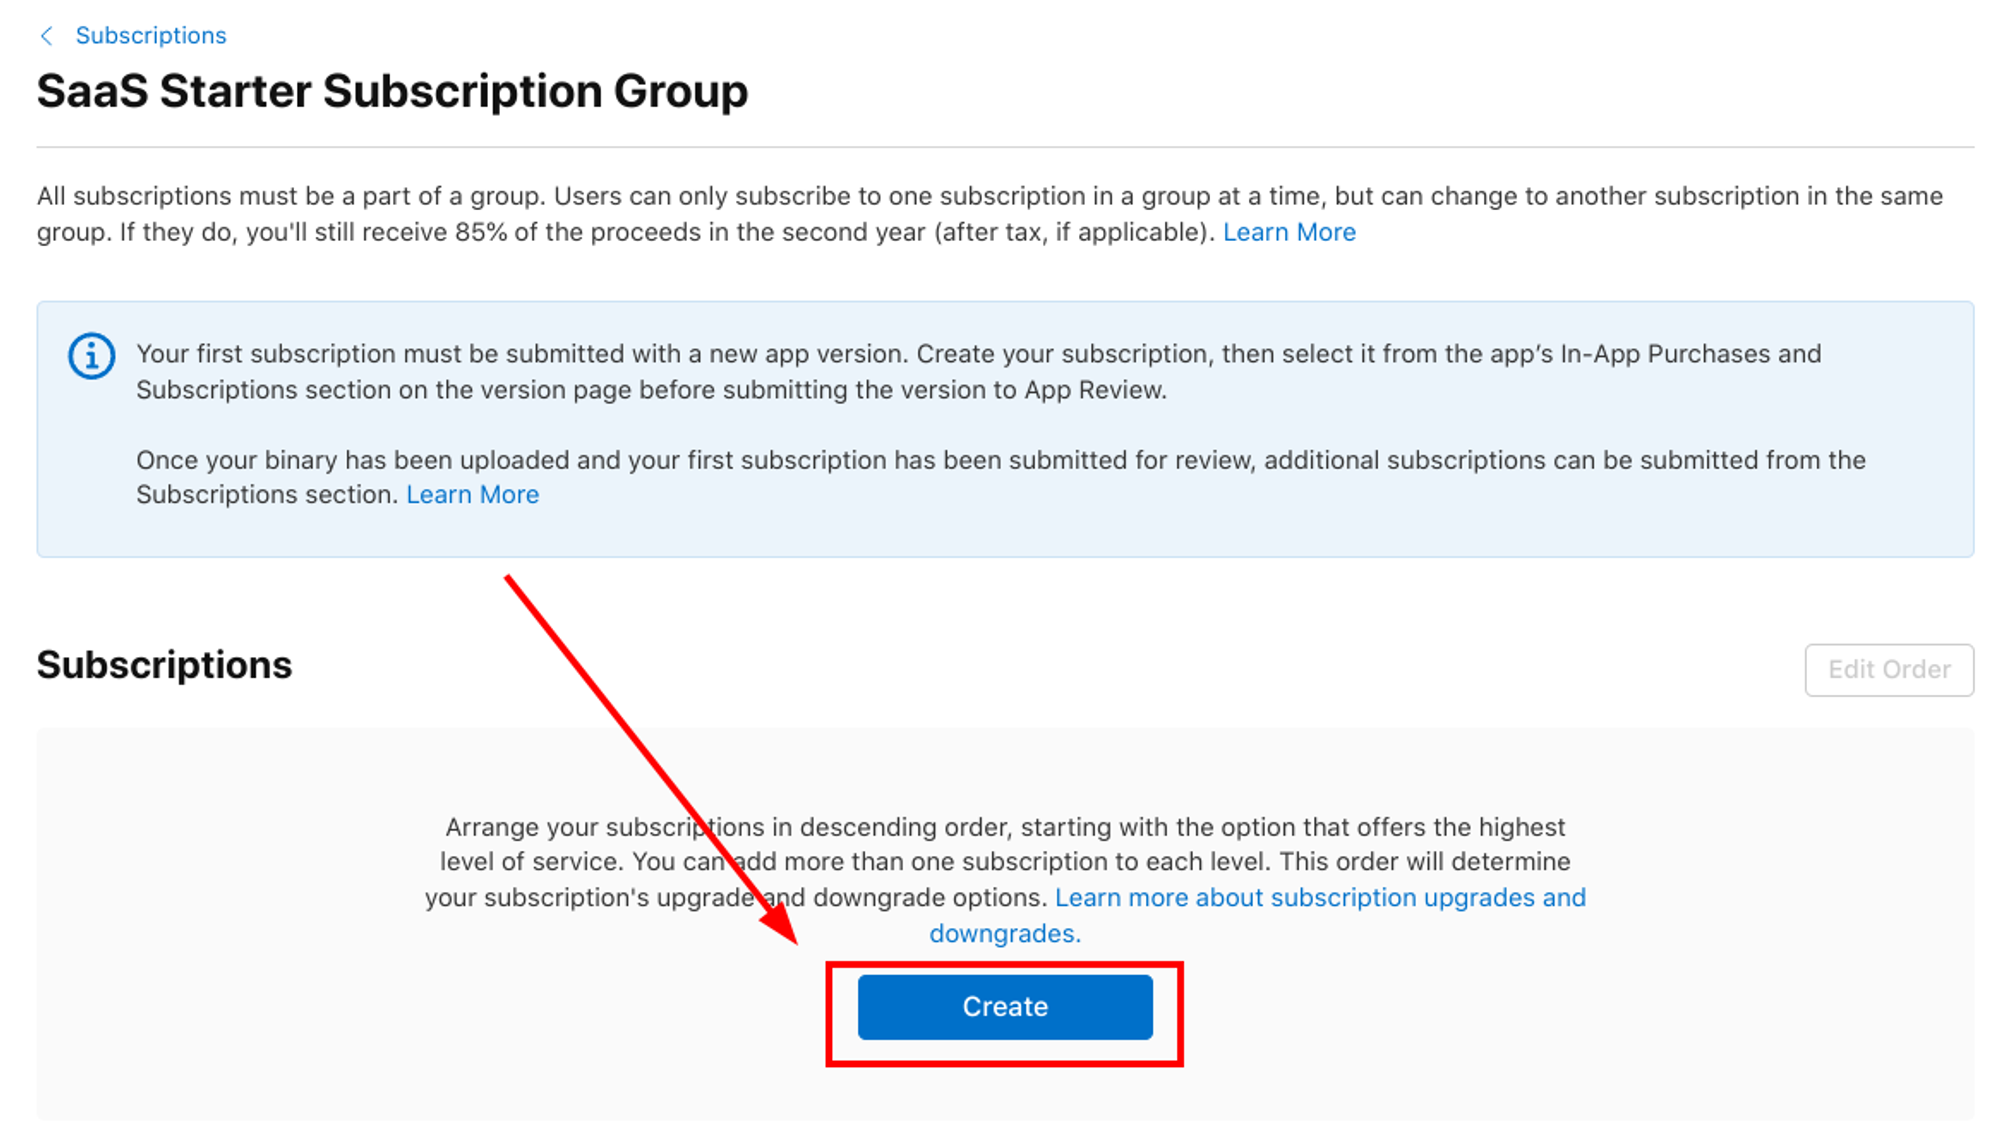
Under “Subscription Groups”, click on “Create”. As mentioned in the App Store Connect, All Subscriptions must be a part of a group. Subscription Groups are ways to organize your products in App Store Connect so users are able to switch between products.
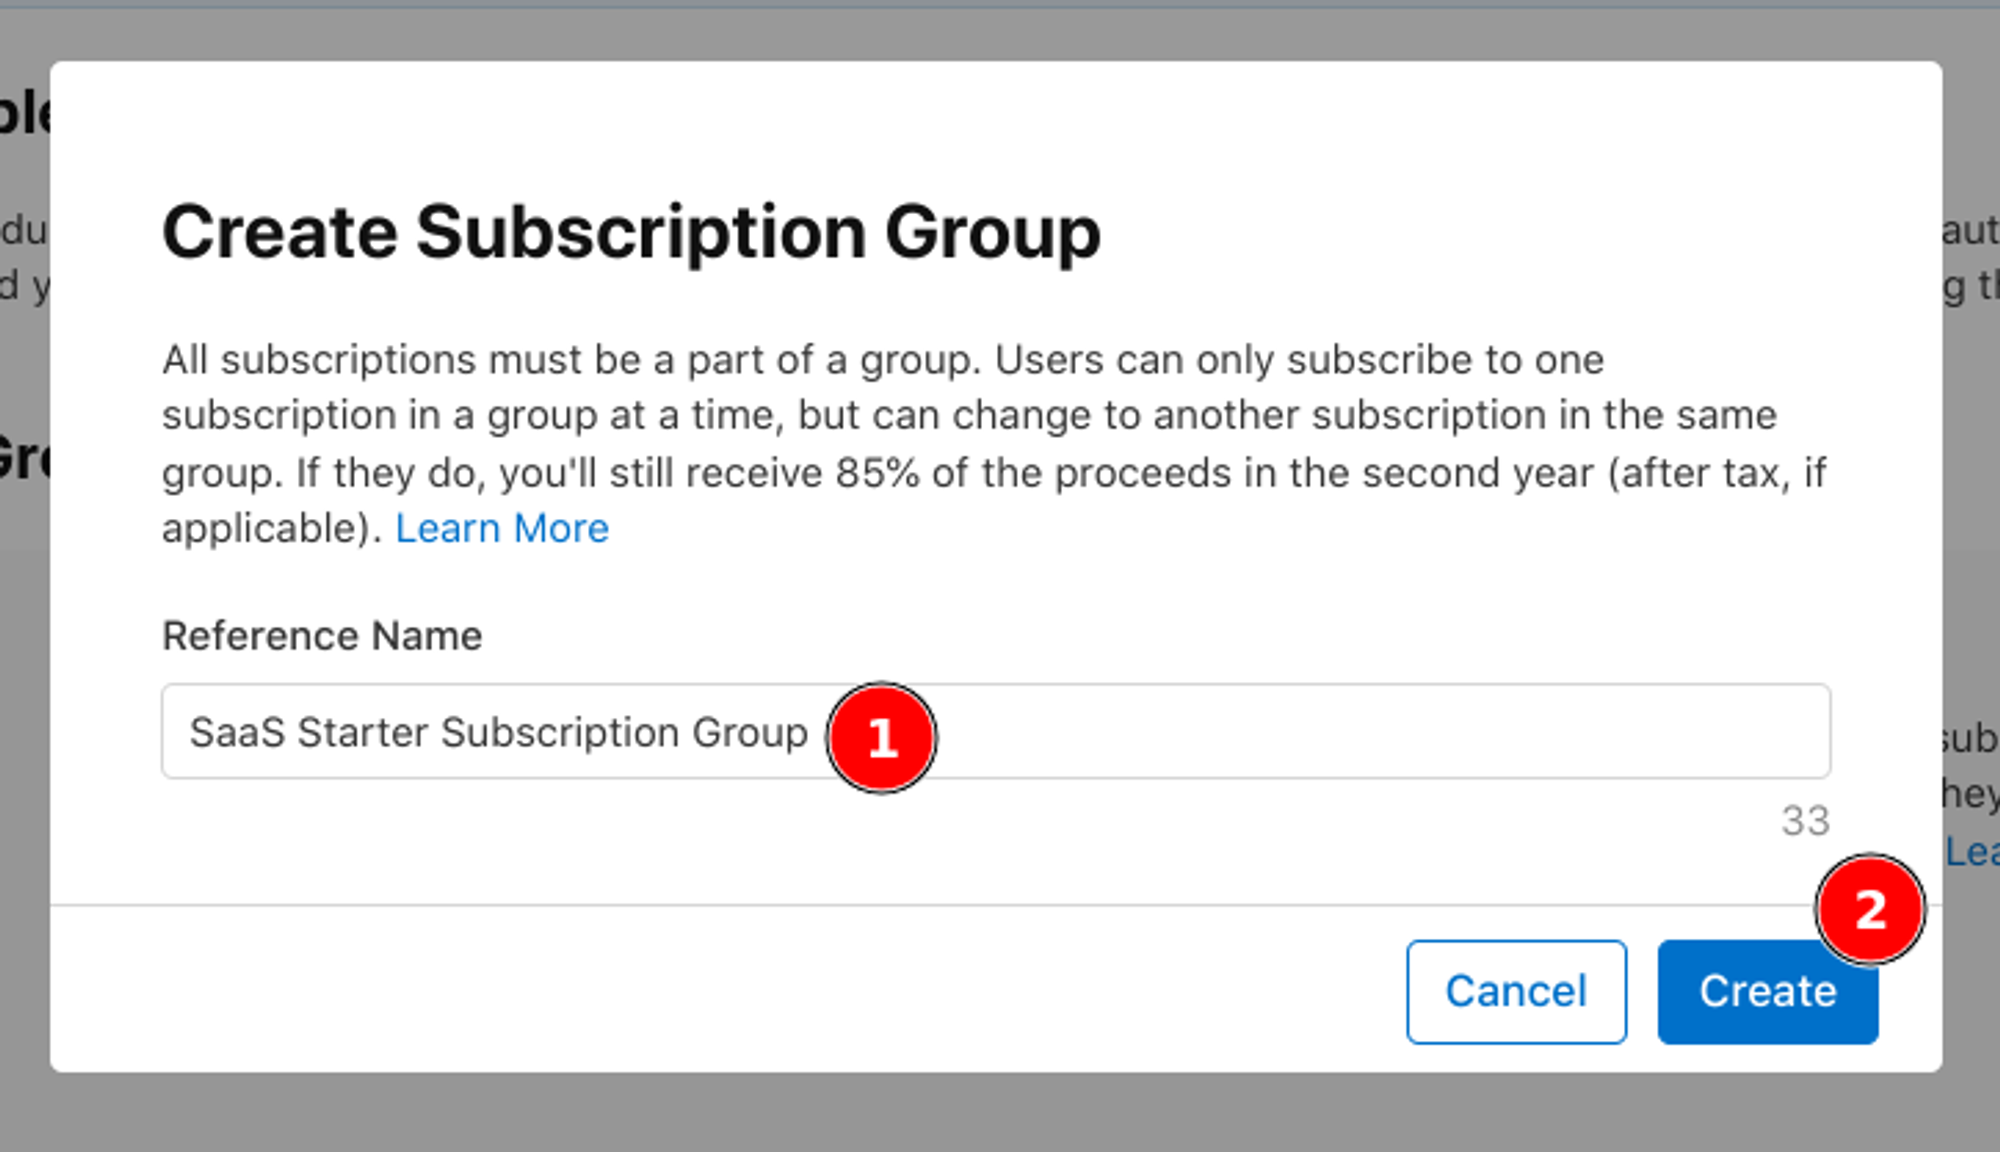
Choose a “Reference Name” for the Subscription Group, and click on “Create” to confirm.
The Reference Name is not user-facing. It’s just for you.
Adding a new product to the subscription group (App Store Connect)
Before we start adding new products to our app, I would like to define a useful example so you can follow along and tweak it based on your needs.
Let’s say we have an App that offers both a monthly and an annual subscription. Both come with a 7-day trial period, and give users access to premium features that are not available in the free version.
Besides the available subscriptions, we also want to offer a one-time in-app payment so our users can remove ads from the free version.
Annual Subscription
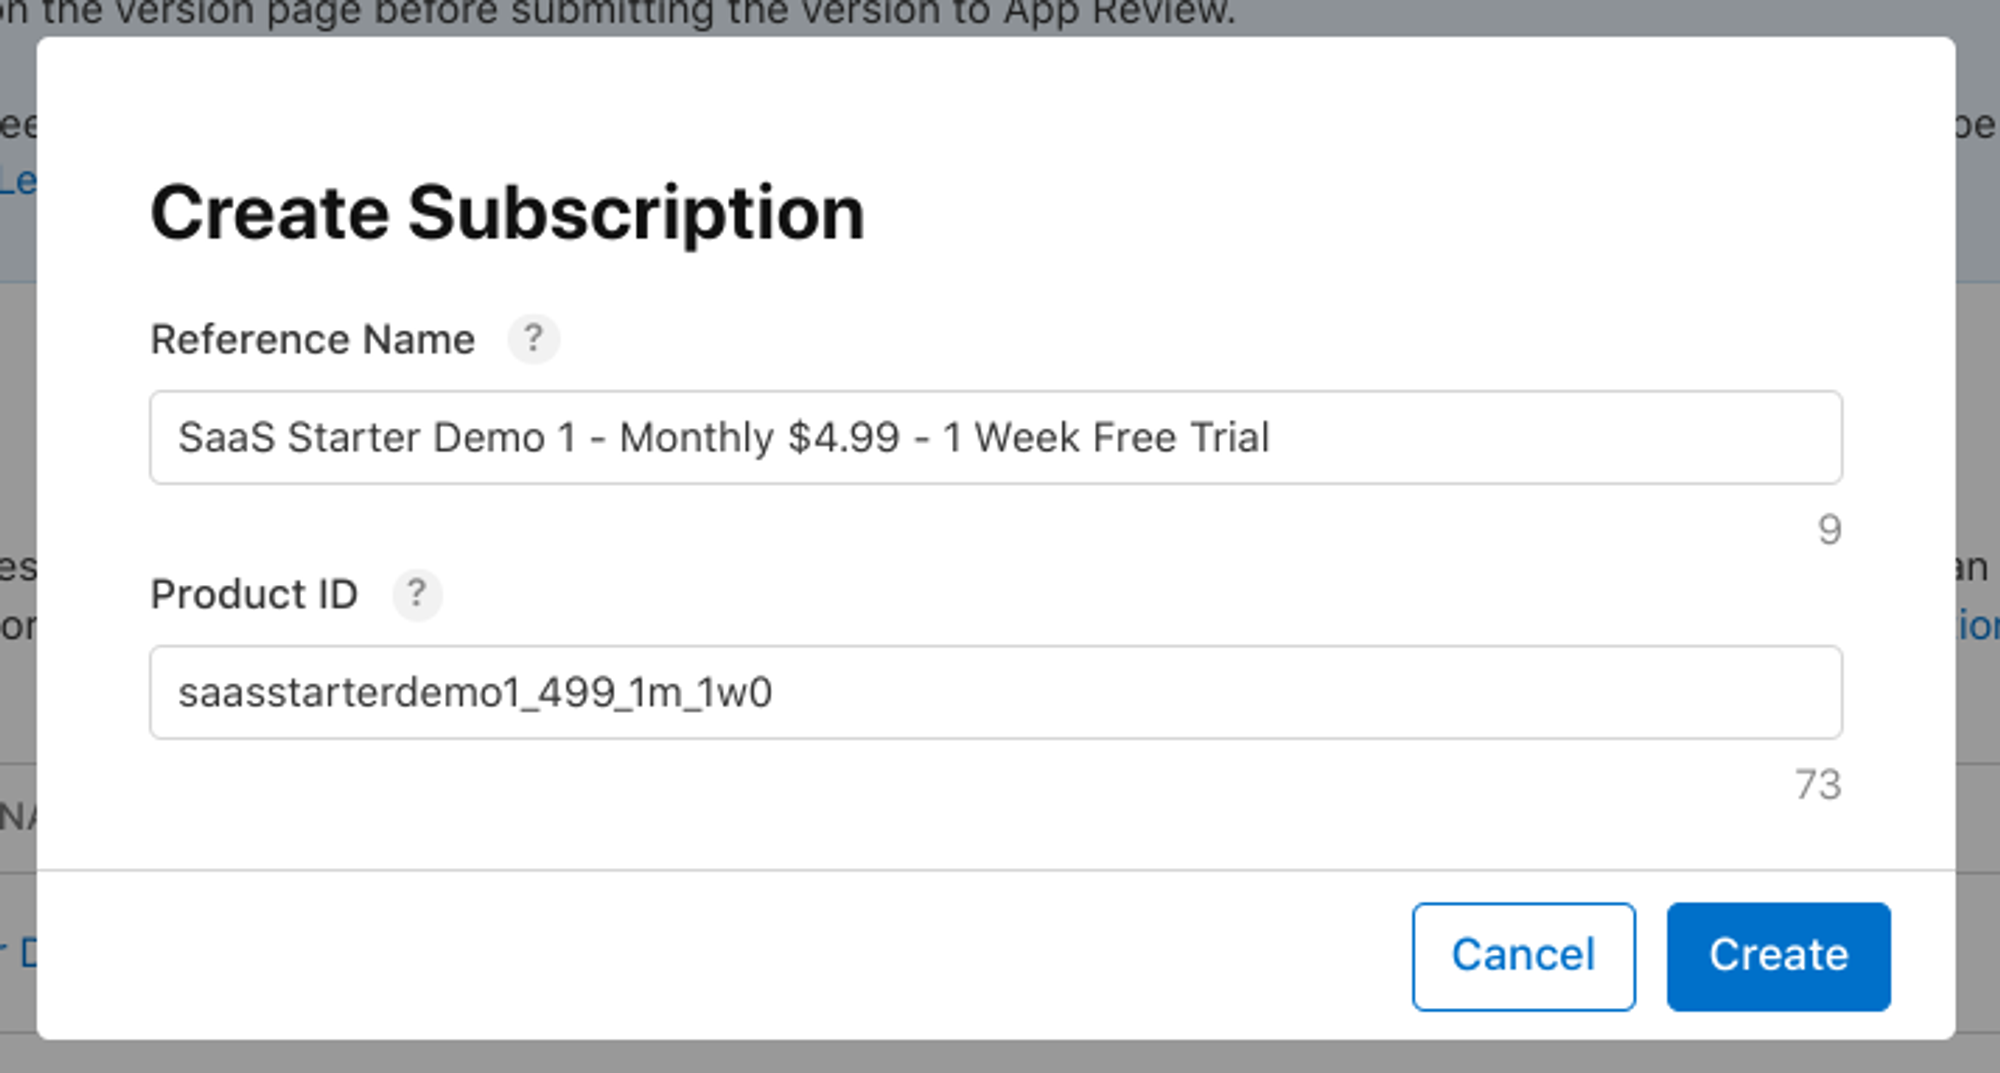
After creating the subscription group, click “Create” to add your first product.
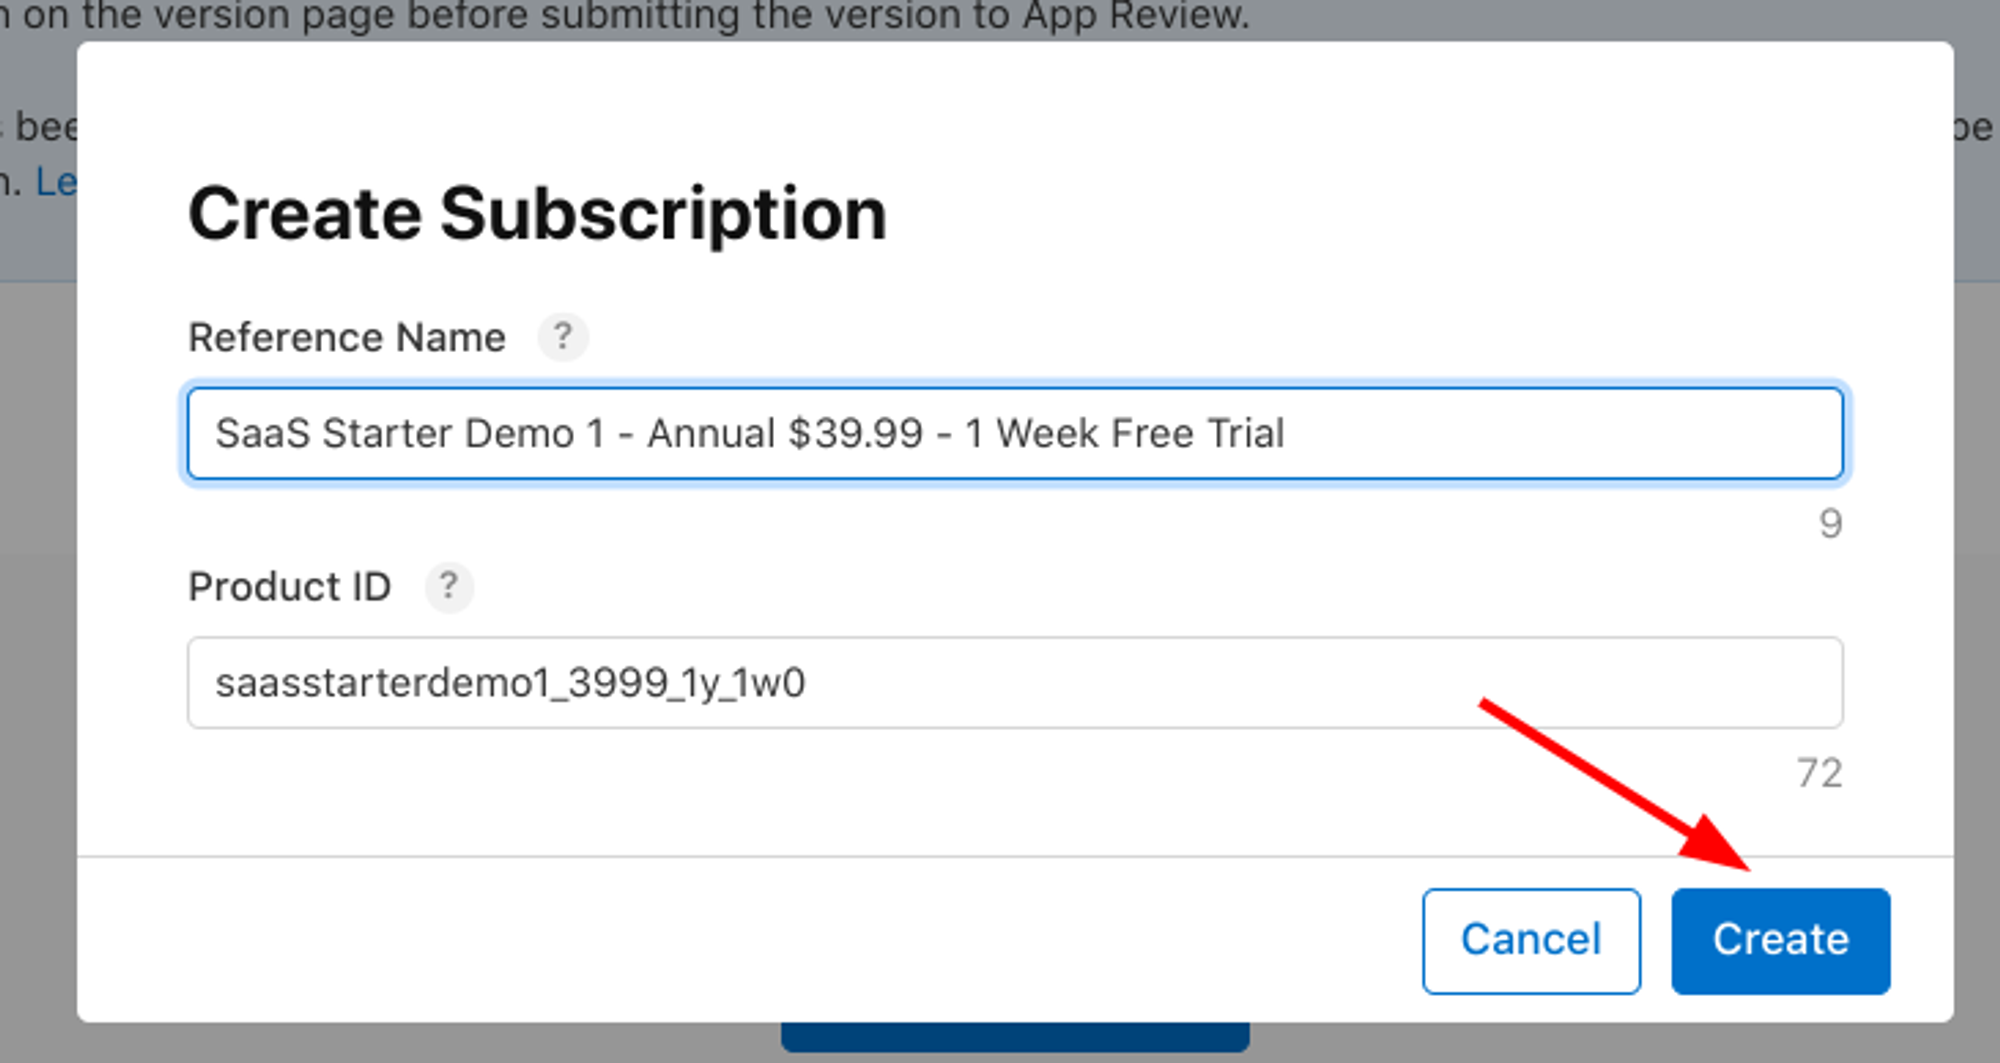
You’ll need to provide:
Reference Name: The reference name will be used on App Store Connect and in Sales and Trends reports from Apple. It won't be displayed to your users on the App Store. We recommend using a human readable description of the purchase you plan to set up. The name can't be longer than 64 characters.
Product ID: The product Id is a unique alphanumeric ID that is used for accessing your product in development and syncing with RevenueCat. After you use a Product ID for one product in App Store Connect, it can’t be used again across any of your apps, even if the product is deleted. It helps to be a little organized here from the beginning. RevenueCat recommend using a consistent naming scheme across all of your product identifiers such as:
<app>_<price>_<duration>_<intro duration><intro price>App: Some prefix that will be unique to your app, since the same product Id cannot but used in any future apps you create.
Price: The price you plan to charge for the product in your default currency.
Duration: The duration of the normal subscription period.
Intro duration: The duration of the introductory period, if any.
Intro price: The price of the introductory period in your default currency, if any.
Based on this information, I’ll use the following product id for my example:
saasstarterdemo1_3999_1y_1w0Name of my app: saas starter demo 1
Price: $39.99
Duration: 1 year
Intro/trial duration: 1 week
Intro/trial price: $0.00
Click on “Create” to confirm
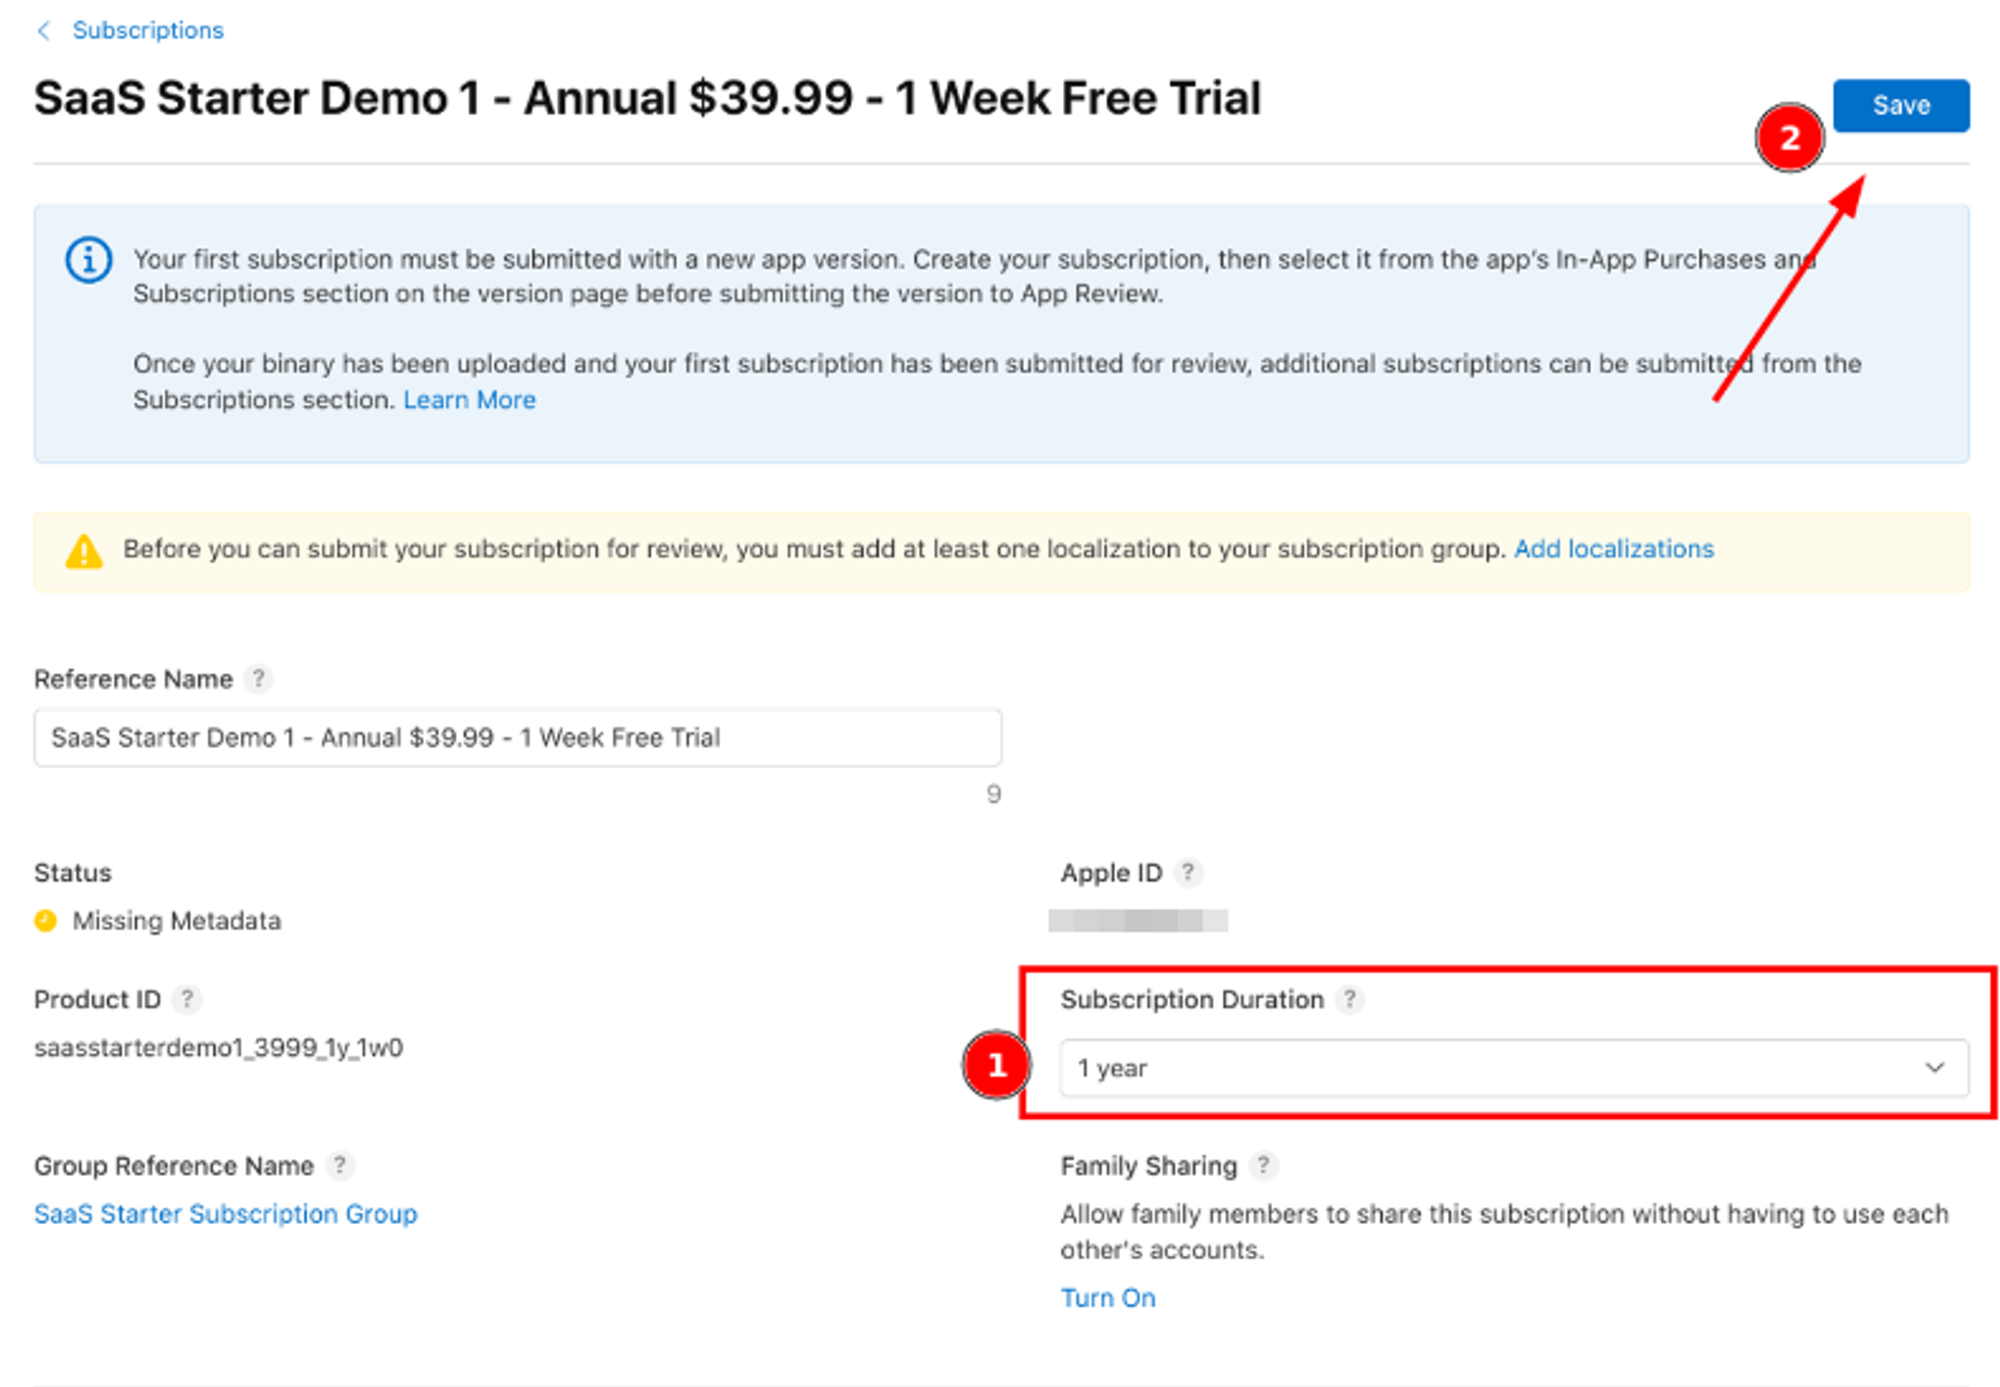
Setting duration
After creating the new product, you’ll need to select a duration for the subscription. Choose “1 year” in the dropdown menu, and click “Save”
Setting availability
Scroll to the “Availability” section, and click “Set up Availability”

Choose the countries you want to offer the subscriptions, and click “Done” to finish.
Don’t forget to click “Save” in the top right corner
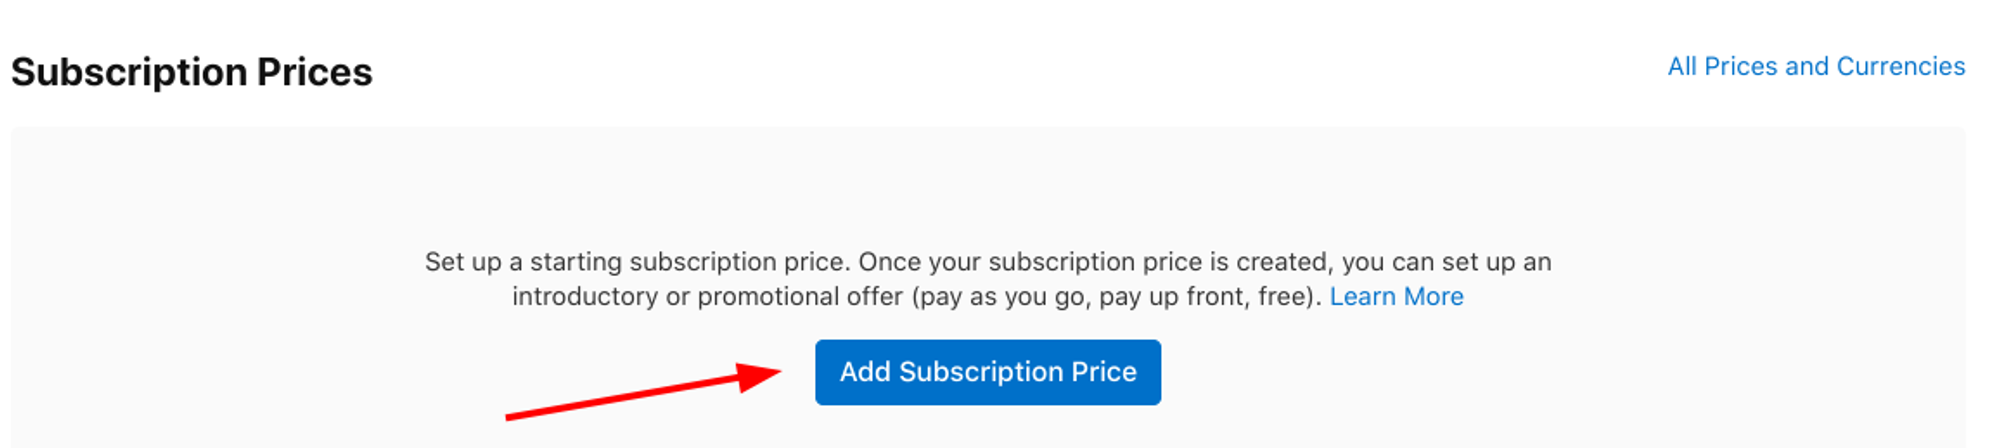
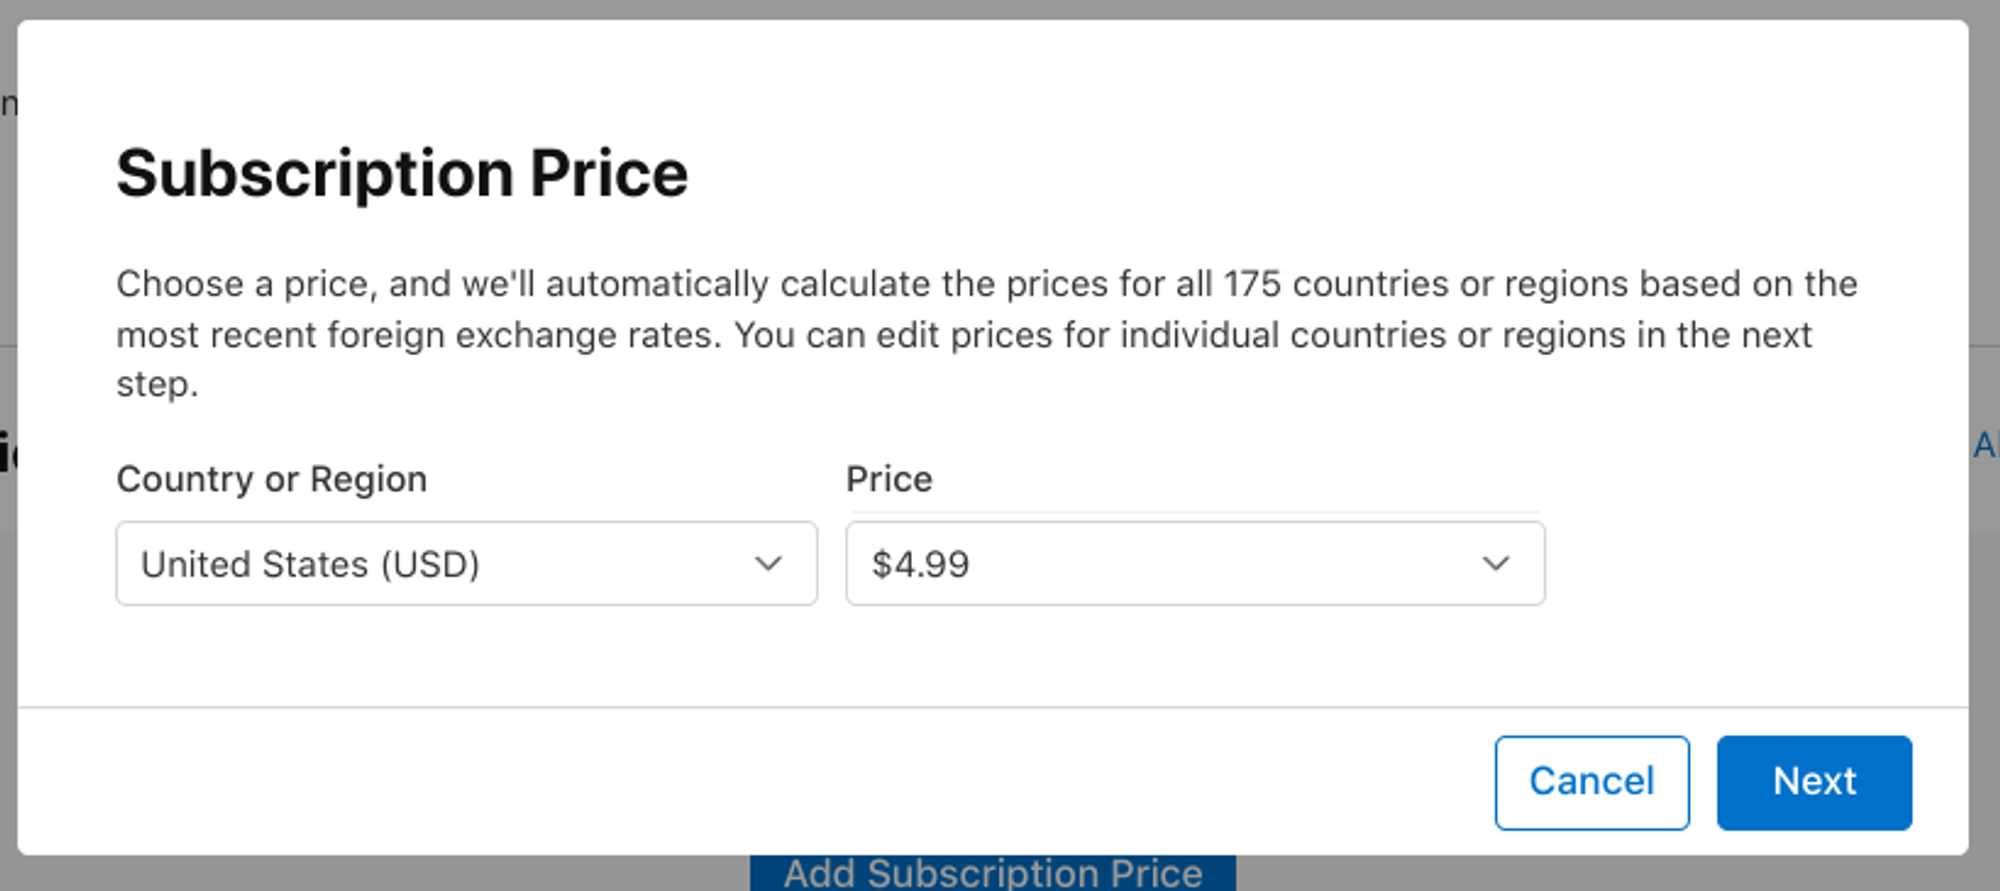
Setting price
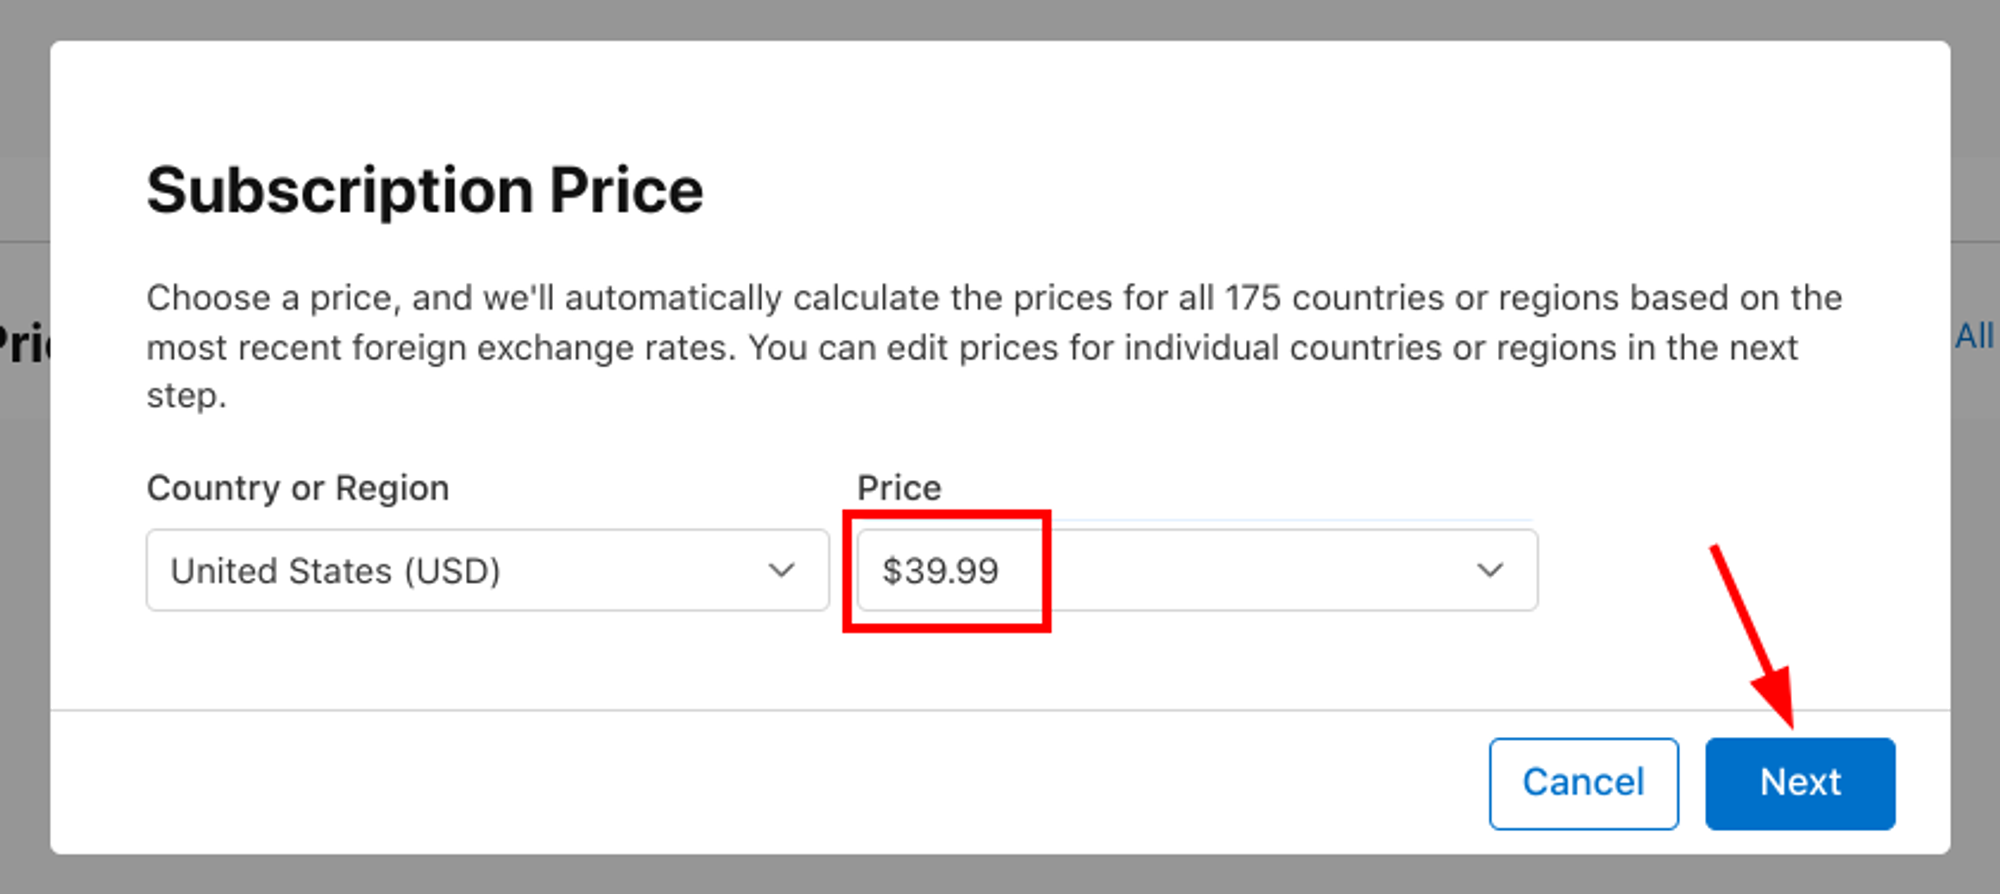
You’ll need to set the subscription price. Scroll to the “Subscription Prices” section, and click “Add Subscription Price”
Choose your Country or Region, and select $39.99 for the price. Click on “Next”
You can optionally change the price for specific countries. Once you are done with that, click “Next” again and “Confirm” to finish.
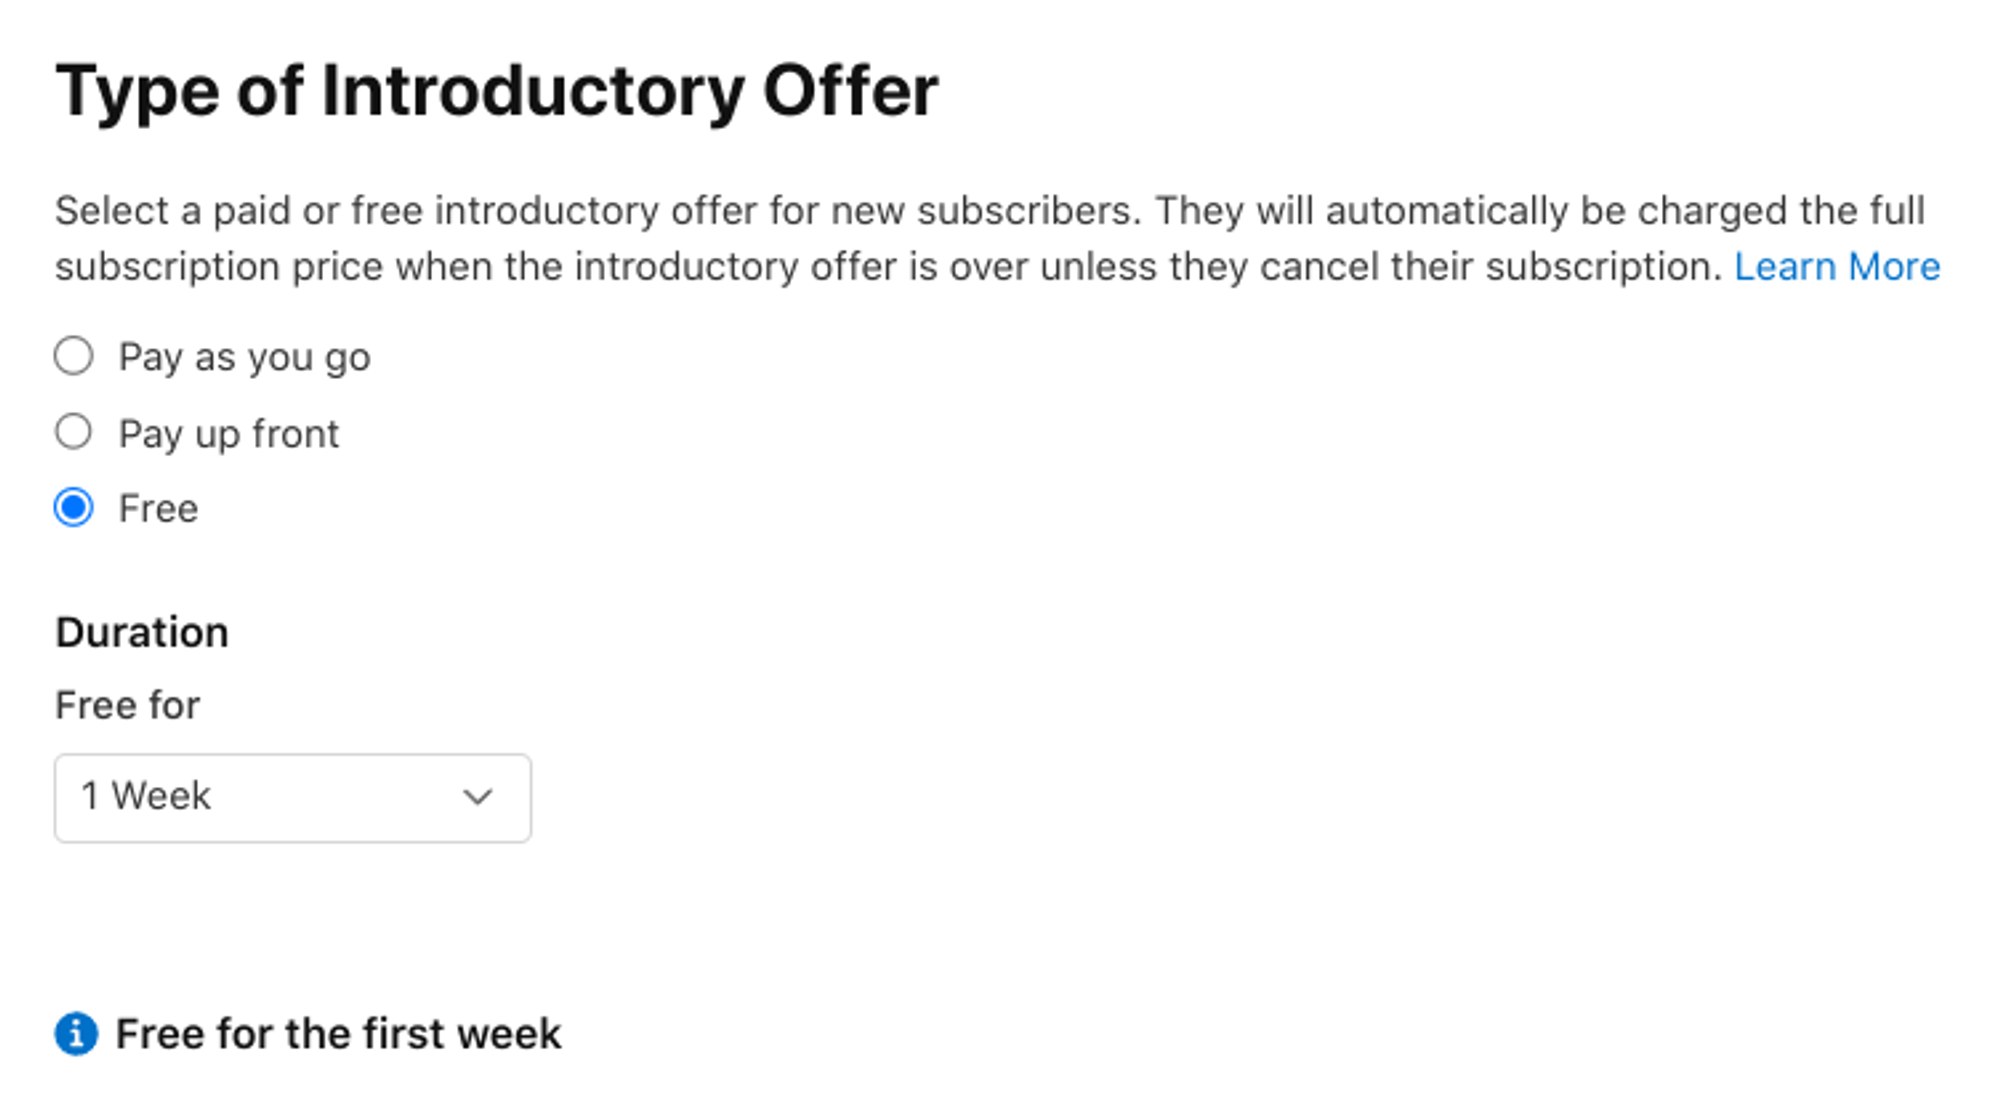
Setting Introductory Offers (Optional)
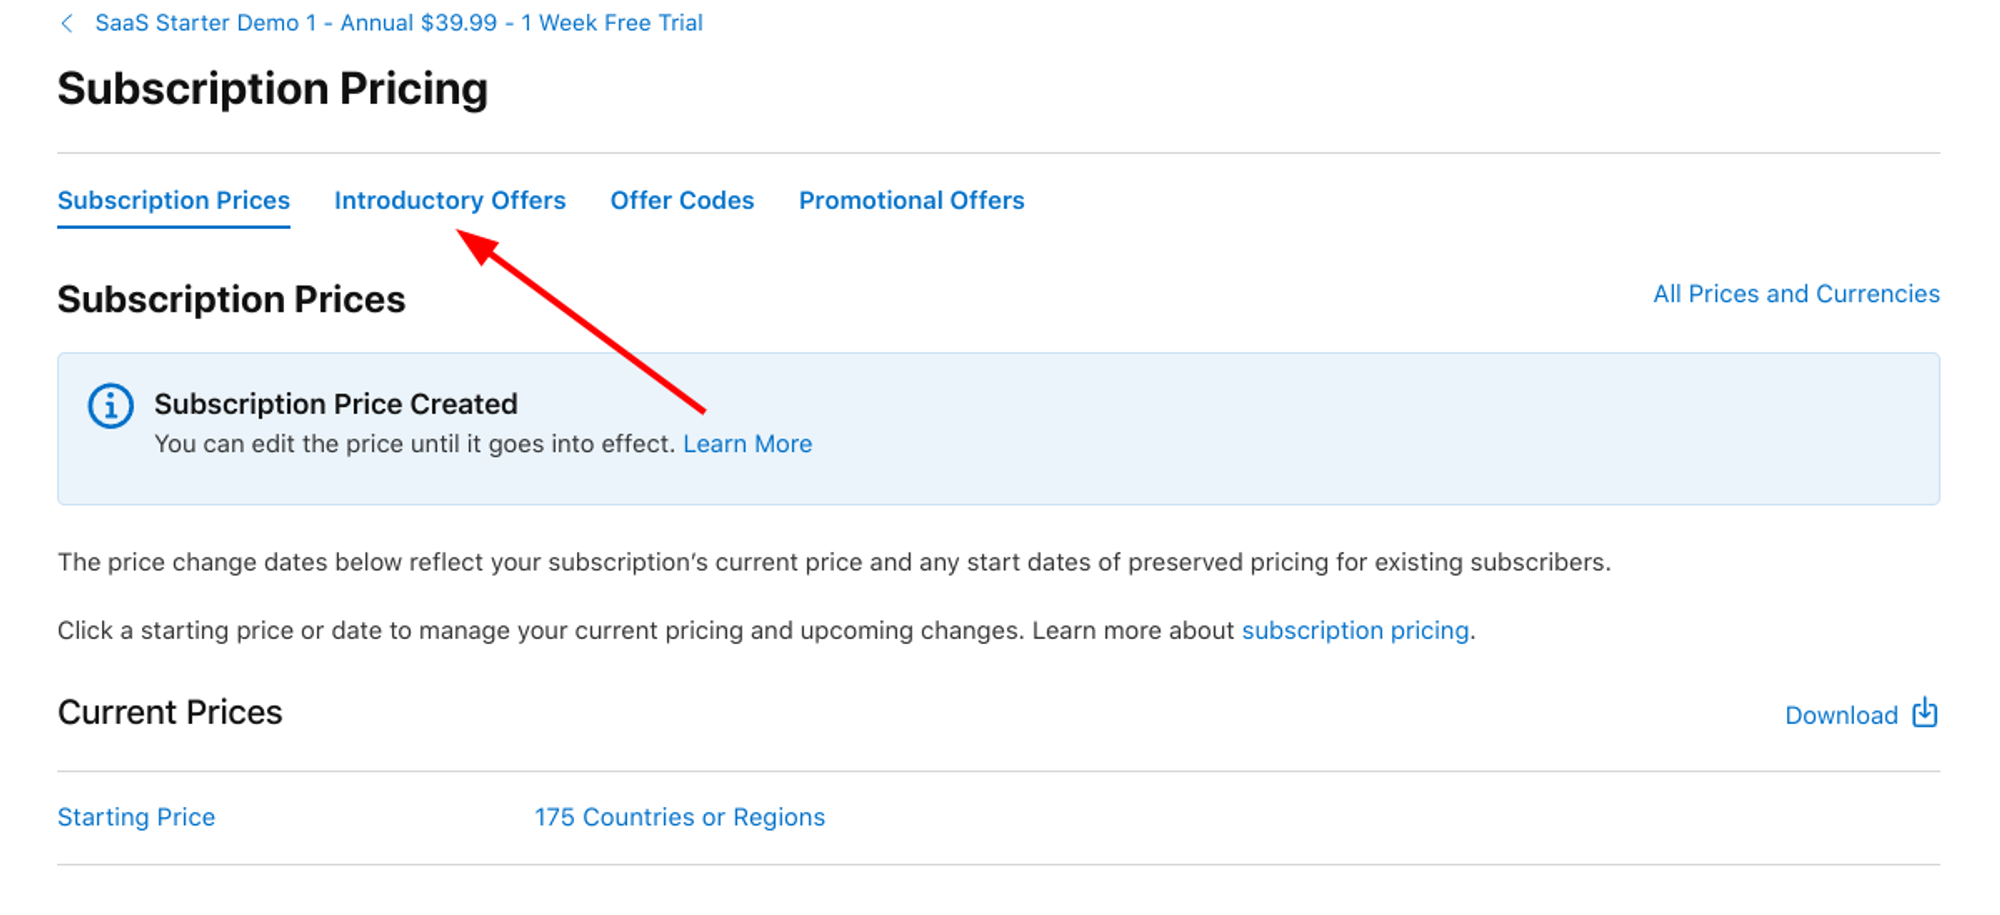
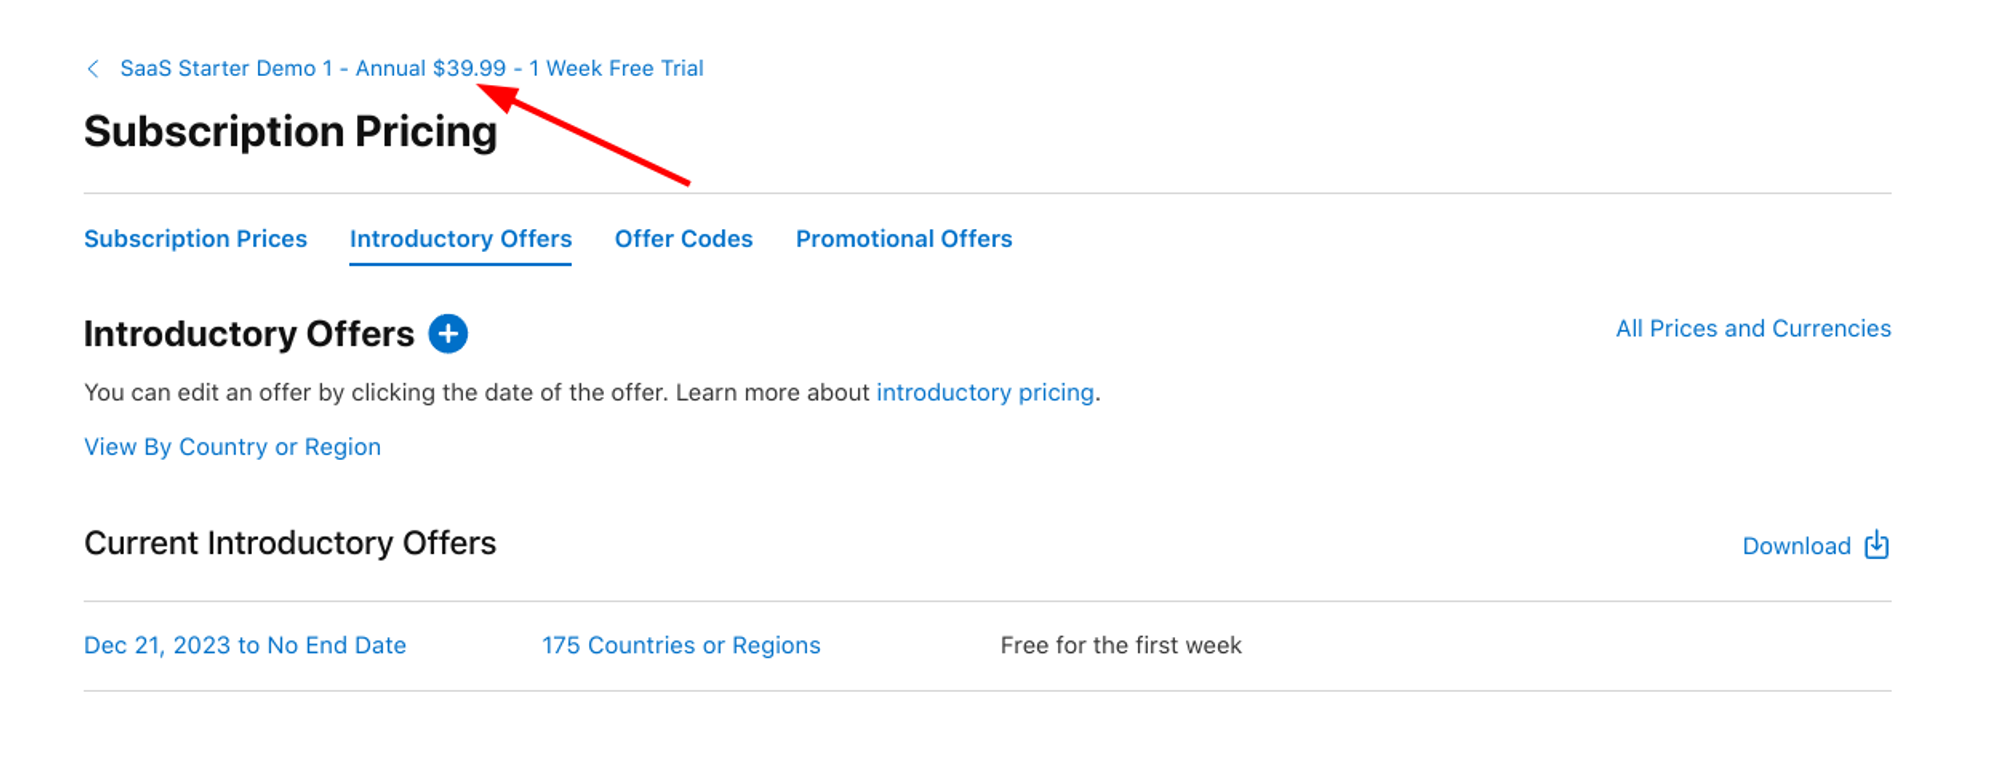
You’ll need to setup the 7-day trial period. Scroll to the “Subscription Prices” section, and click on “View all Subscription Pricing”

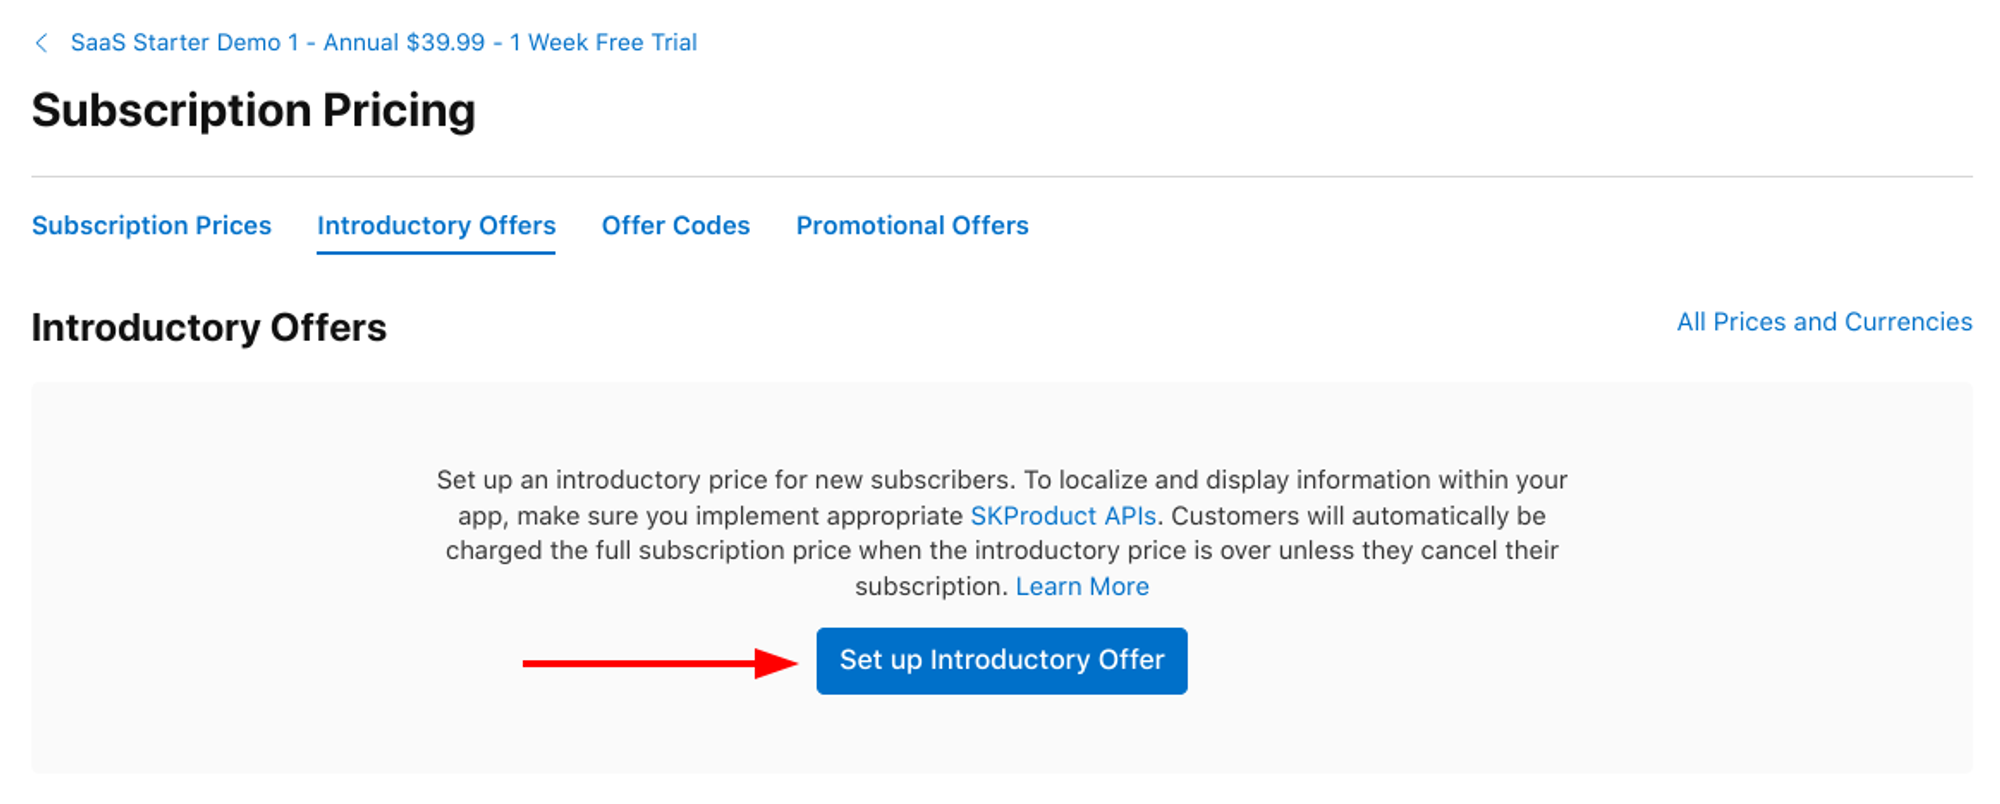
Click on the “Introductory Offers” tab, and click on “Set up Introductory Offer”
Choose which countries you want to offer the free trial, and click “Next”.
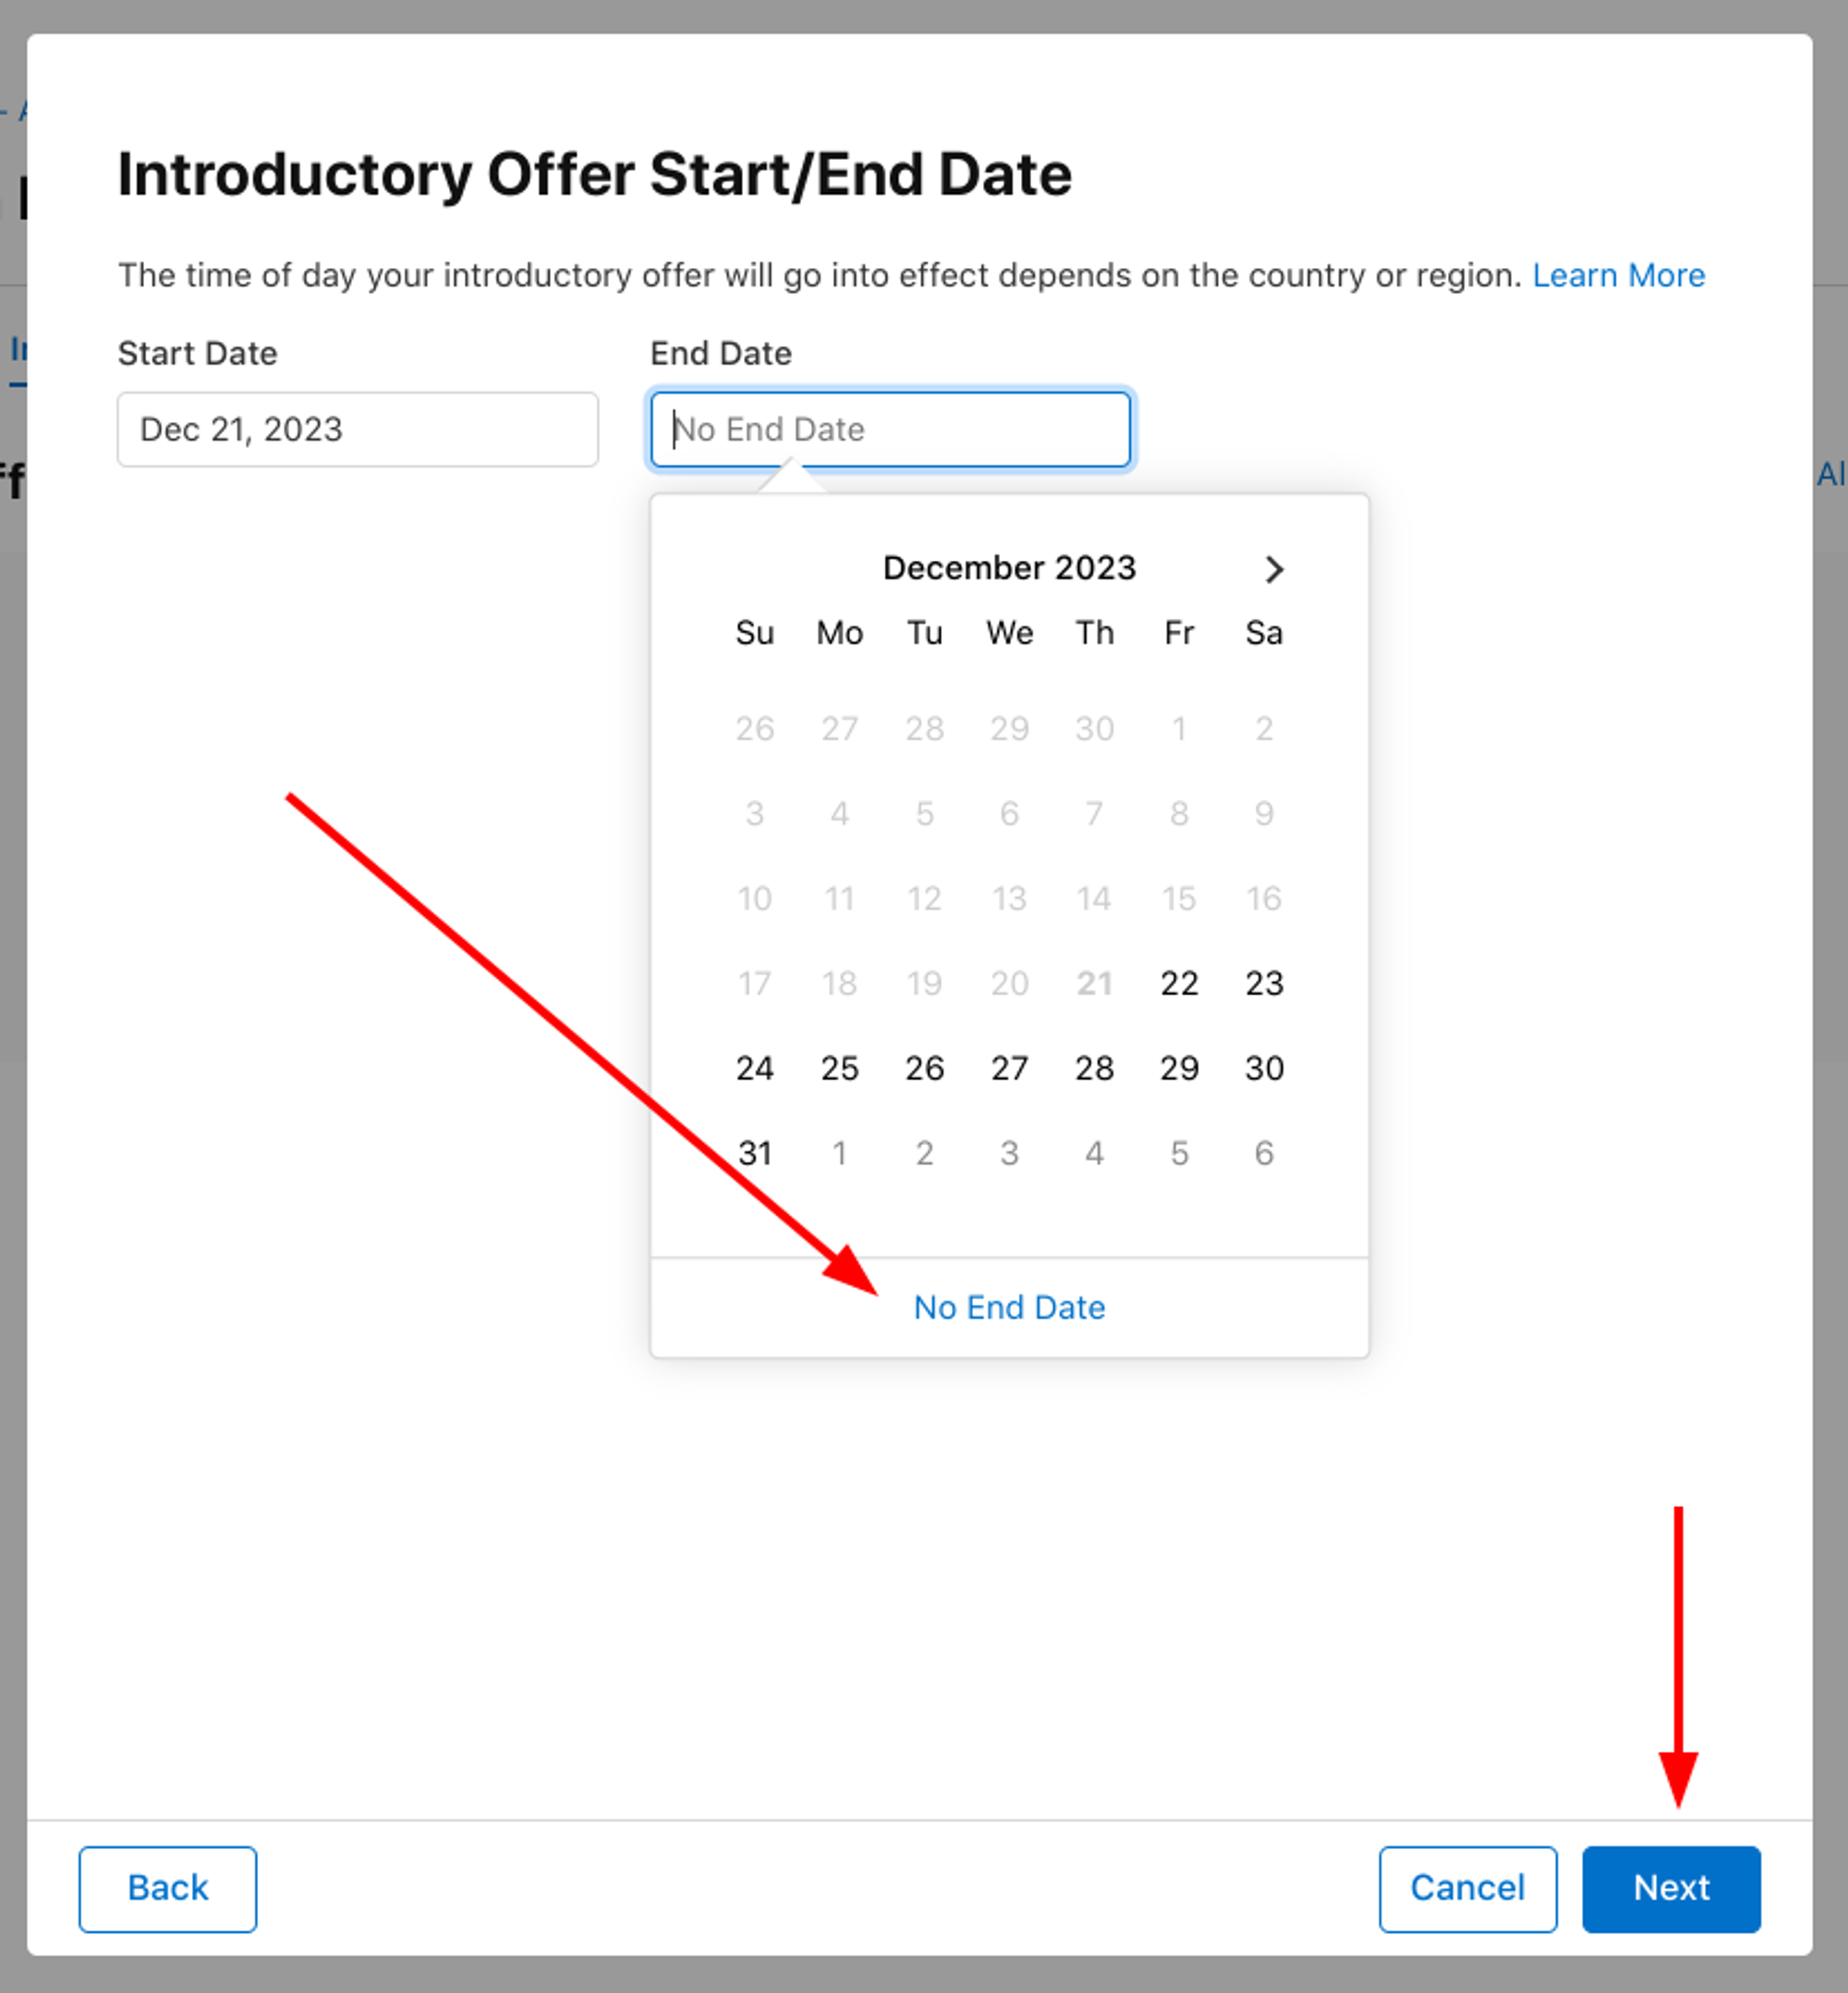
For the Start/End date, I went with:
Start Date: Current Date
End Date: “No end date”
Click “Next” to continue
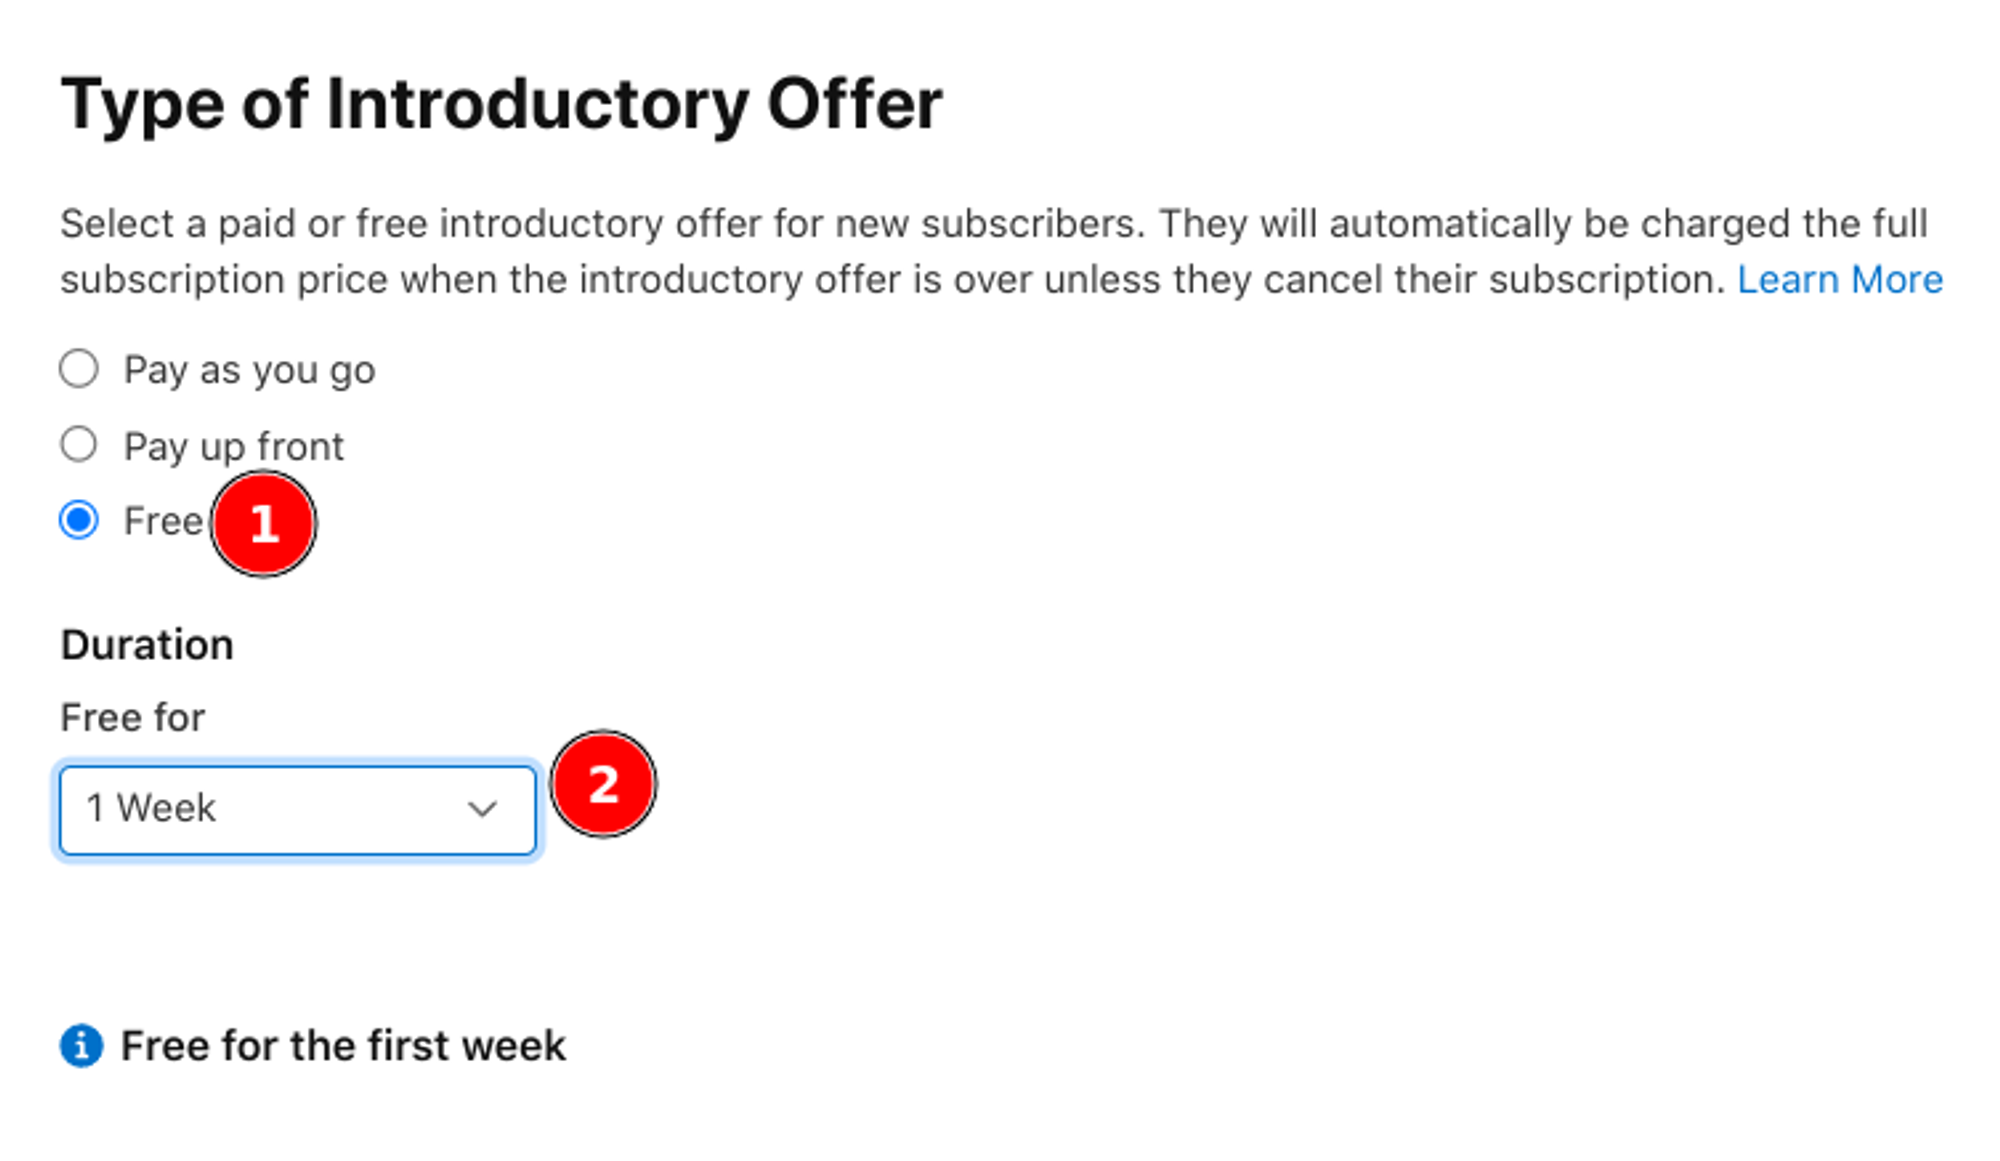
Choose “Free” as Type, and “1 Week” for duration. Click “Next” to continue, and finally “Confirm” to finish.
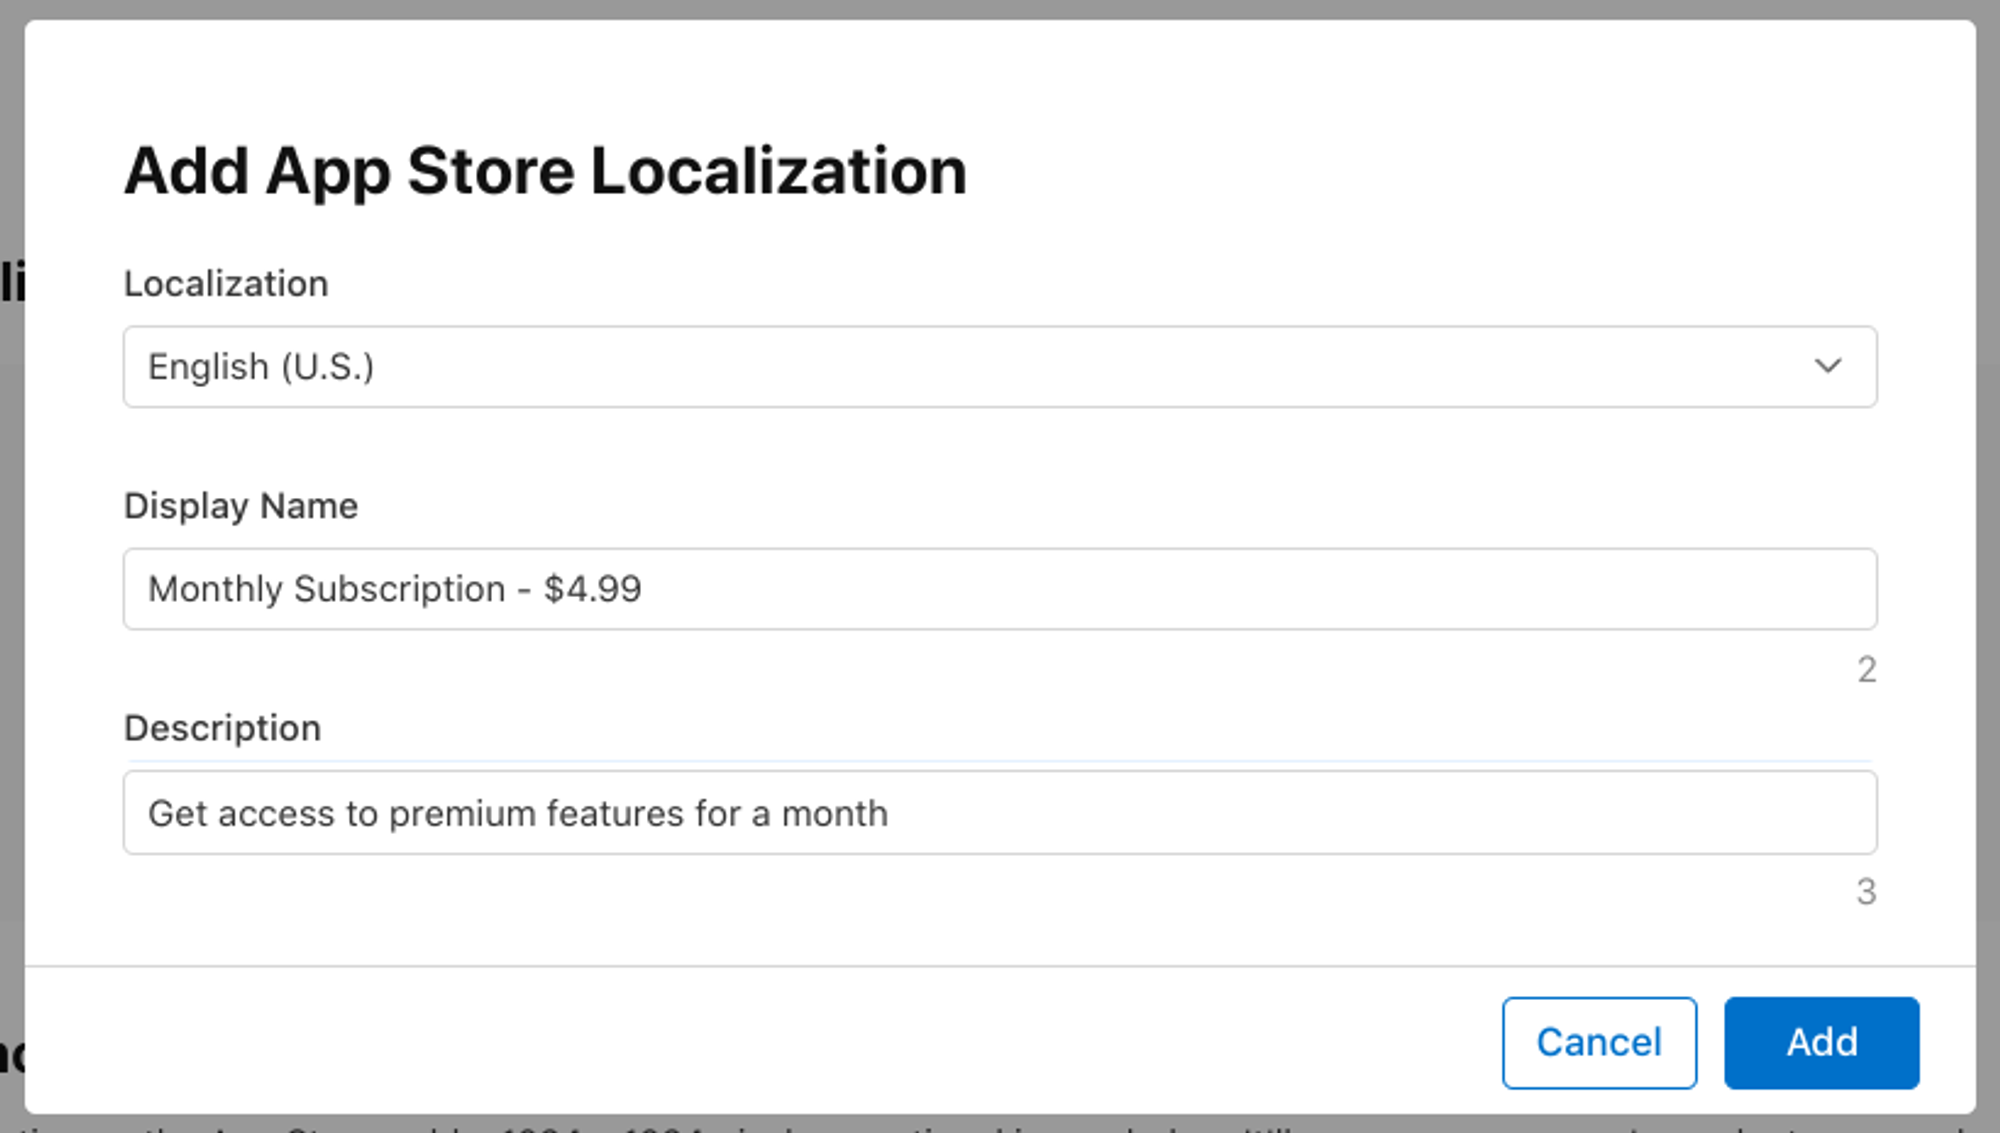
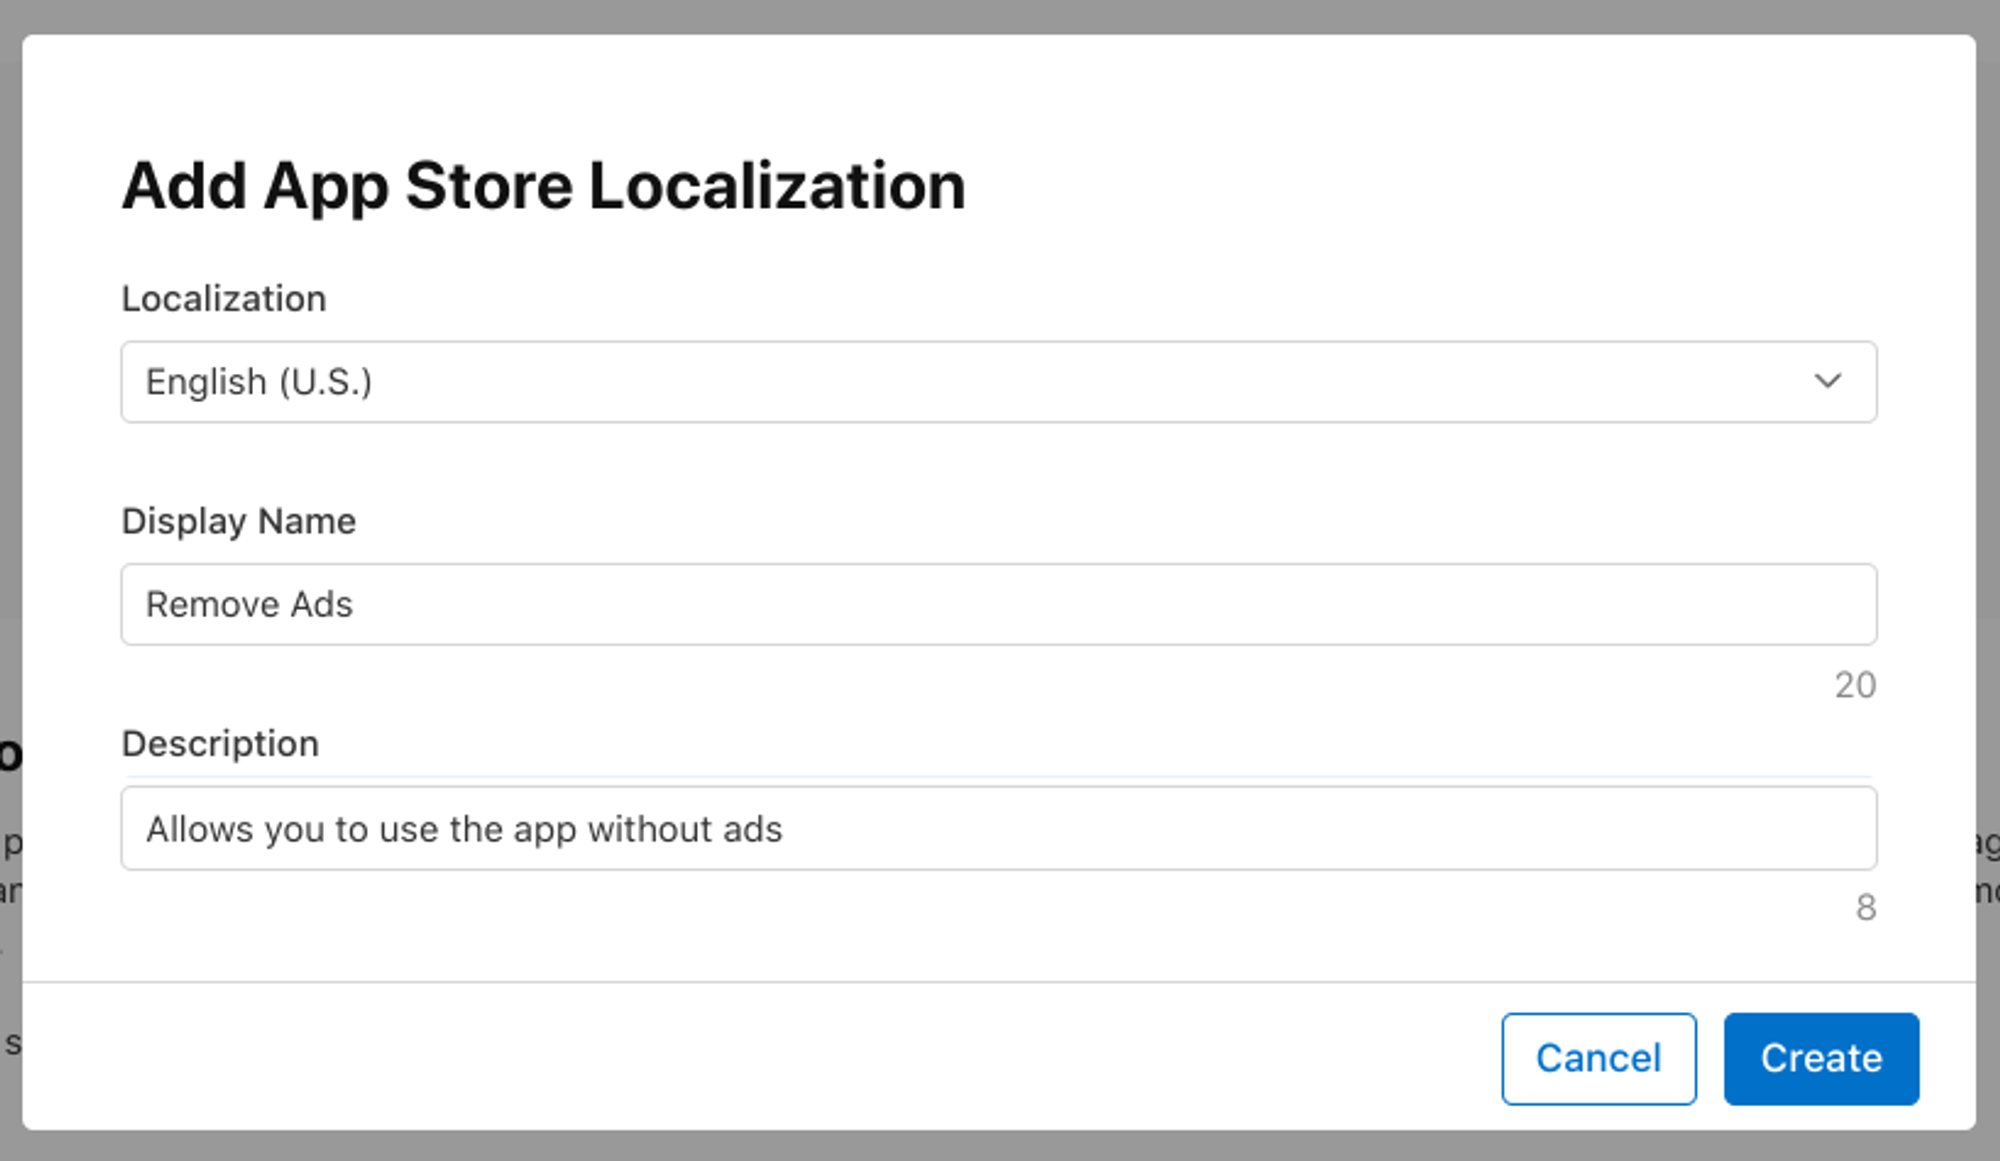
Adding Localizations
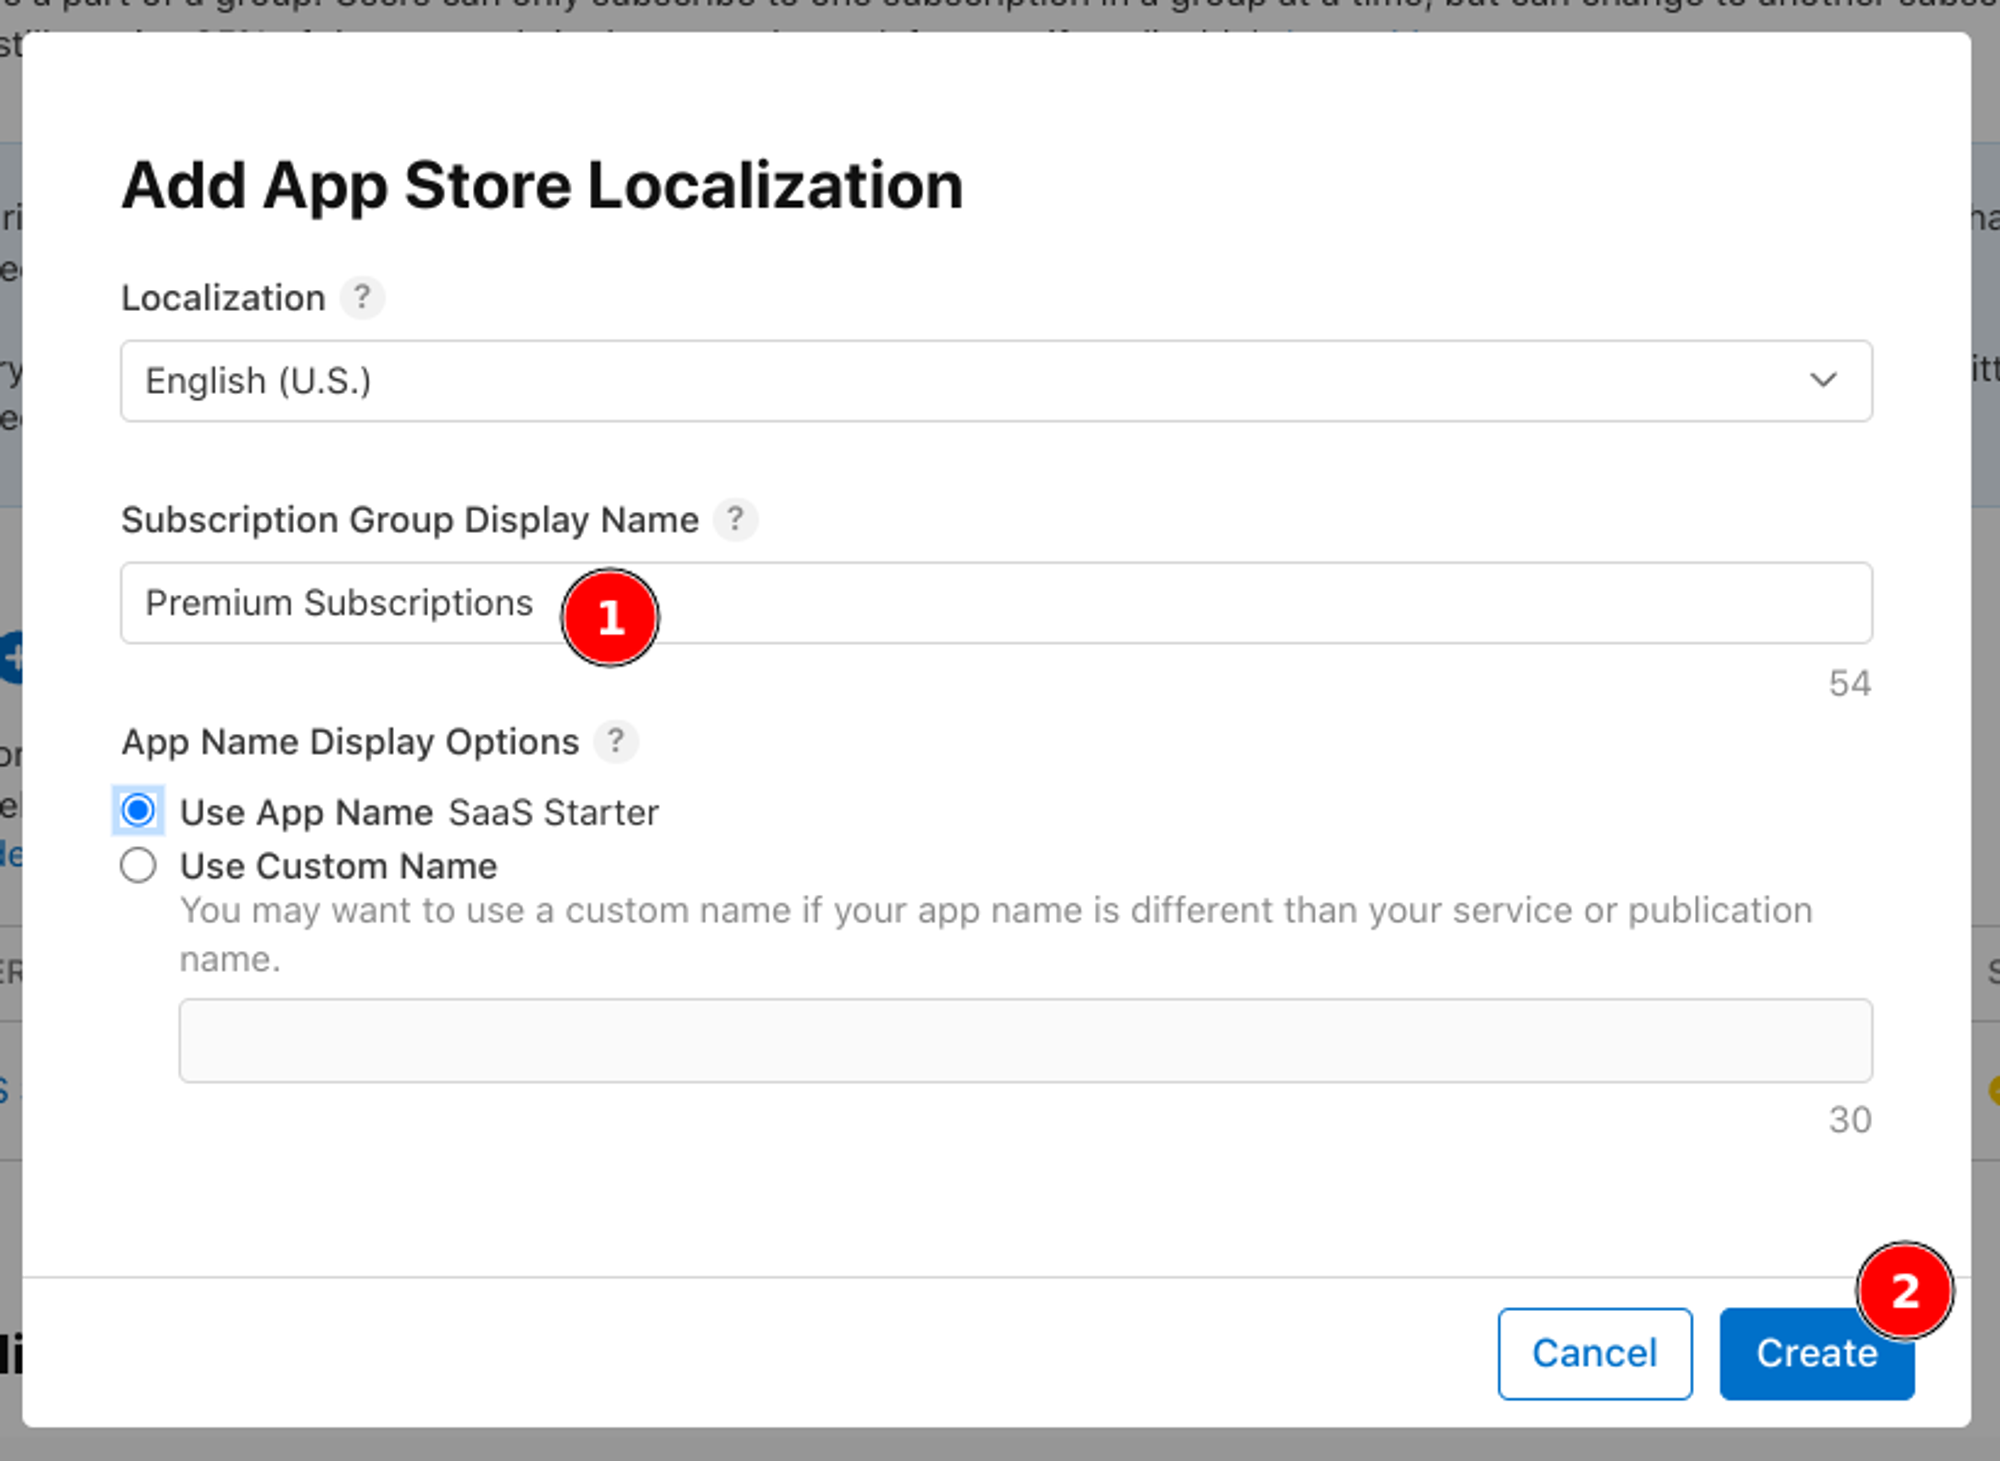
You’ll need to provide a name and description for the in-app purchase that the user will see.
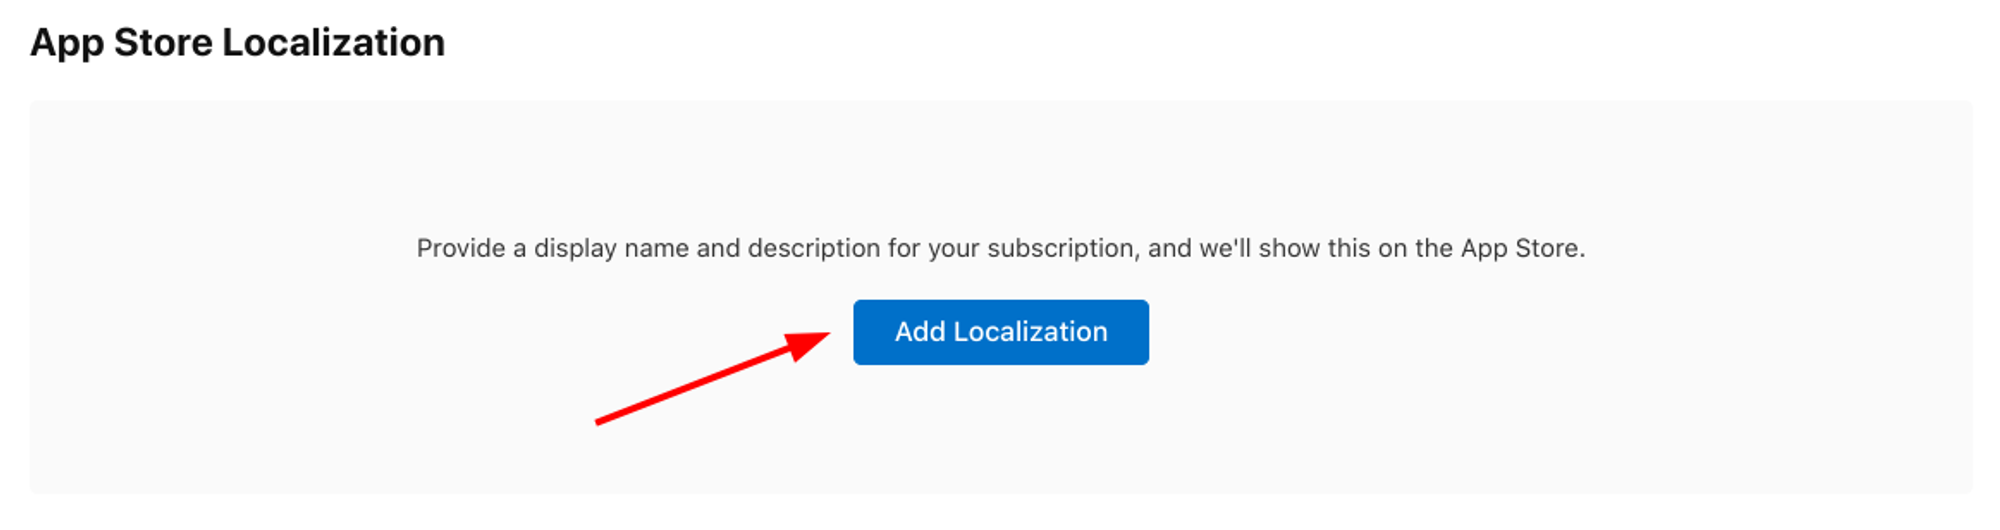
From the “Subscription Pricing” page, go back to the home page for your subscription.
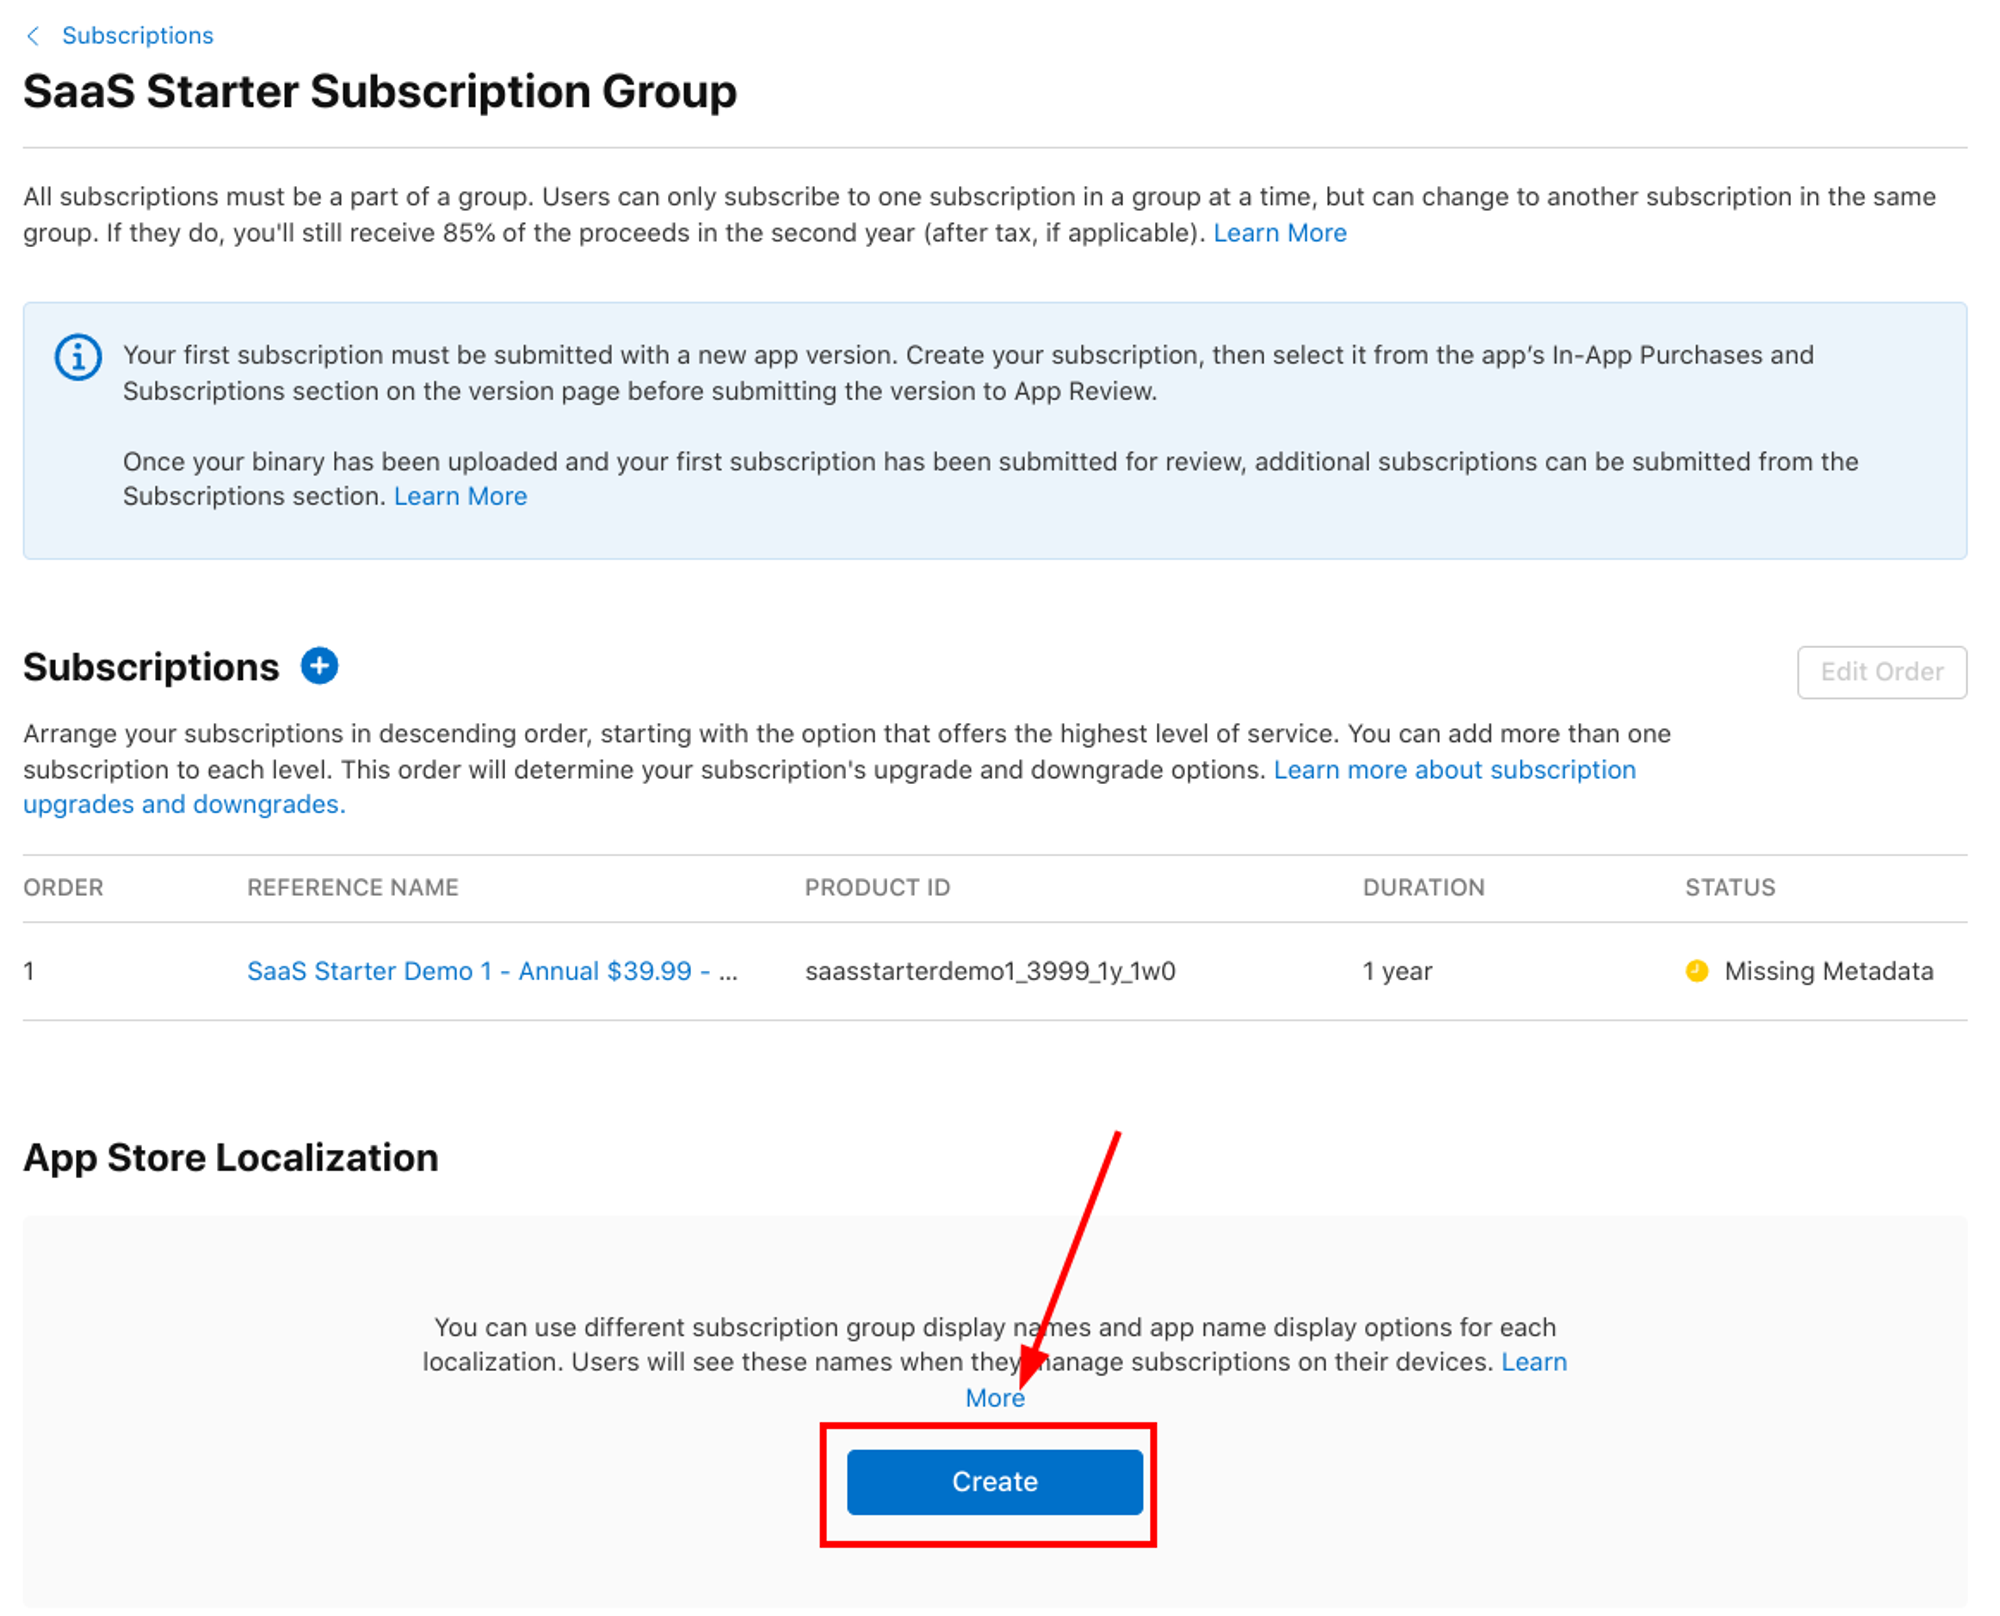
Scroll to the “App Store Localization” section. Click “Add Localization”.
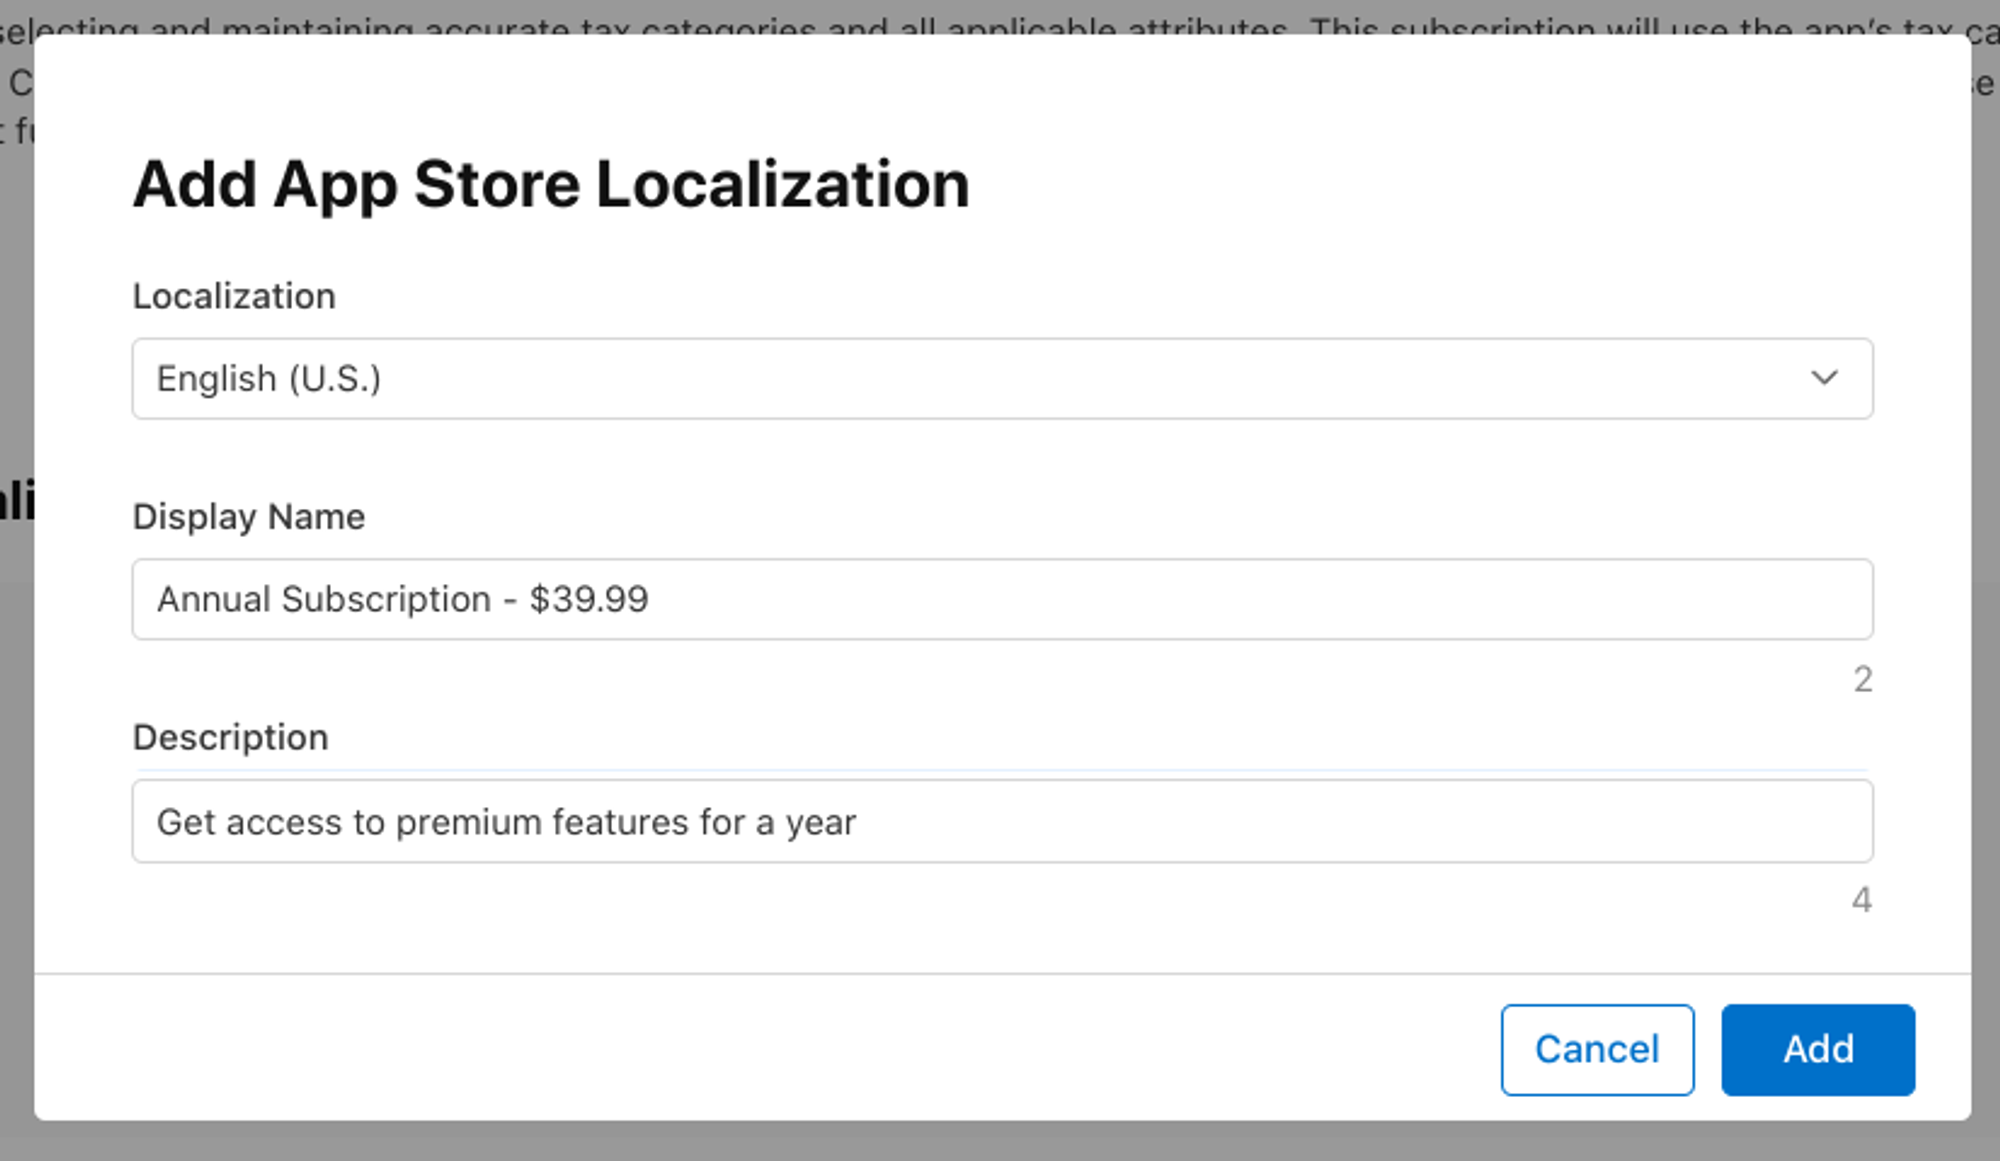
Add the required information for at least one language.
If you scroll up, you may see the following message:

Make sure to visit that page and setup localizations for the Subscription Group you created earlier.
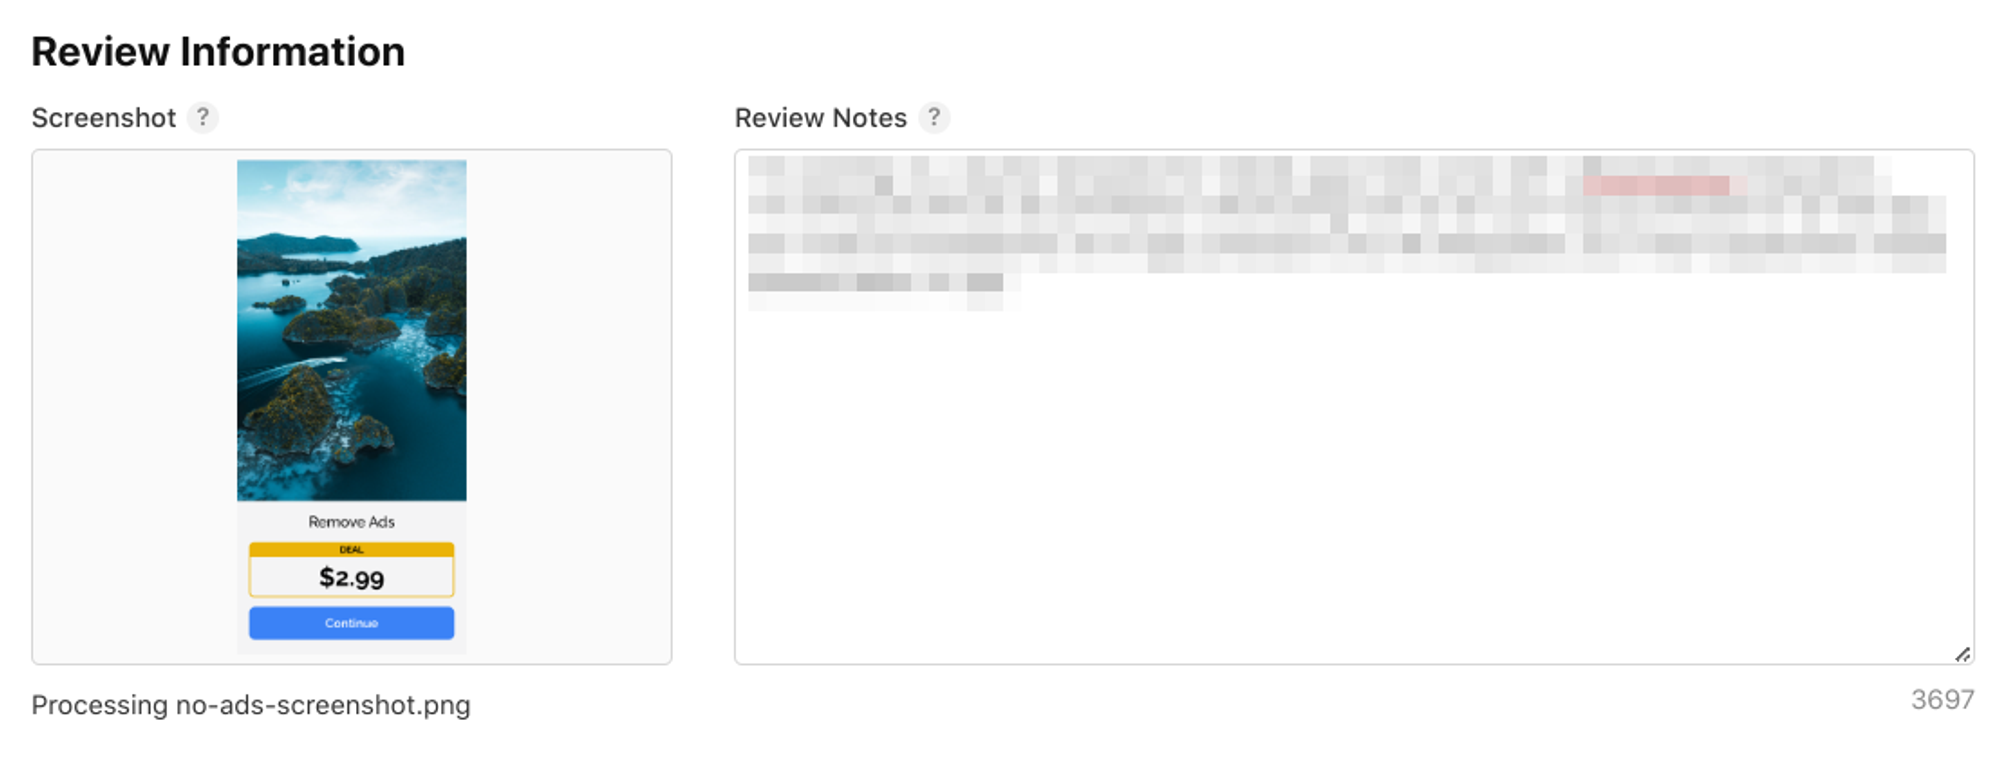
Adding Review Information
You’ll be asked to upload a screenshot of the paywall for an Apple reviewer. You also need to provide review notes to make the review process smoother.
Navigate to the “Review Information” section and complete the requested information. You can upload the screenshot later once you've build the paywall screen on your app.
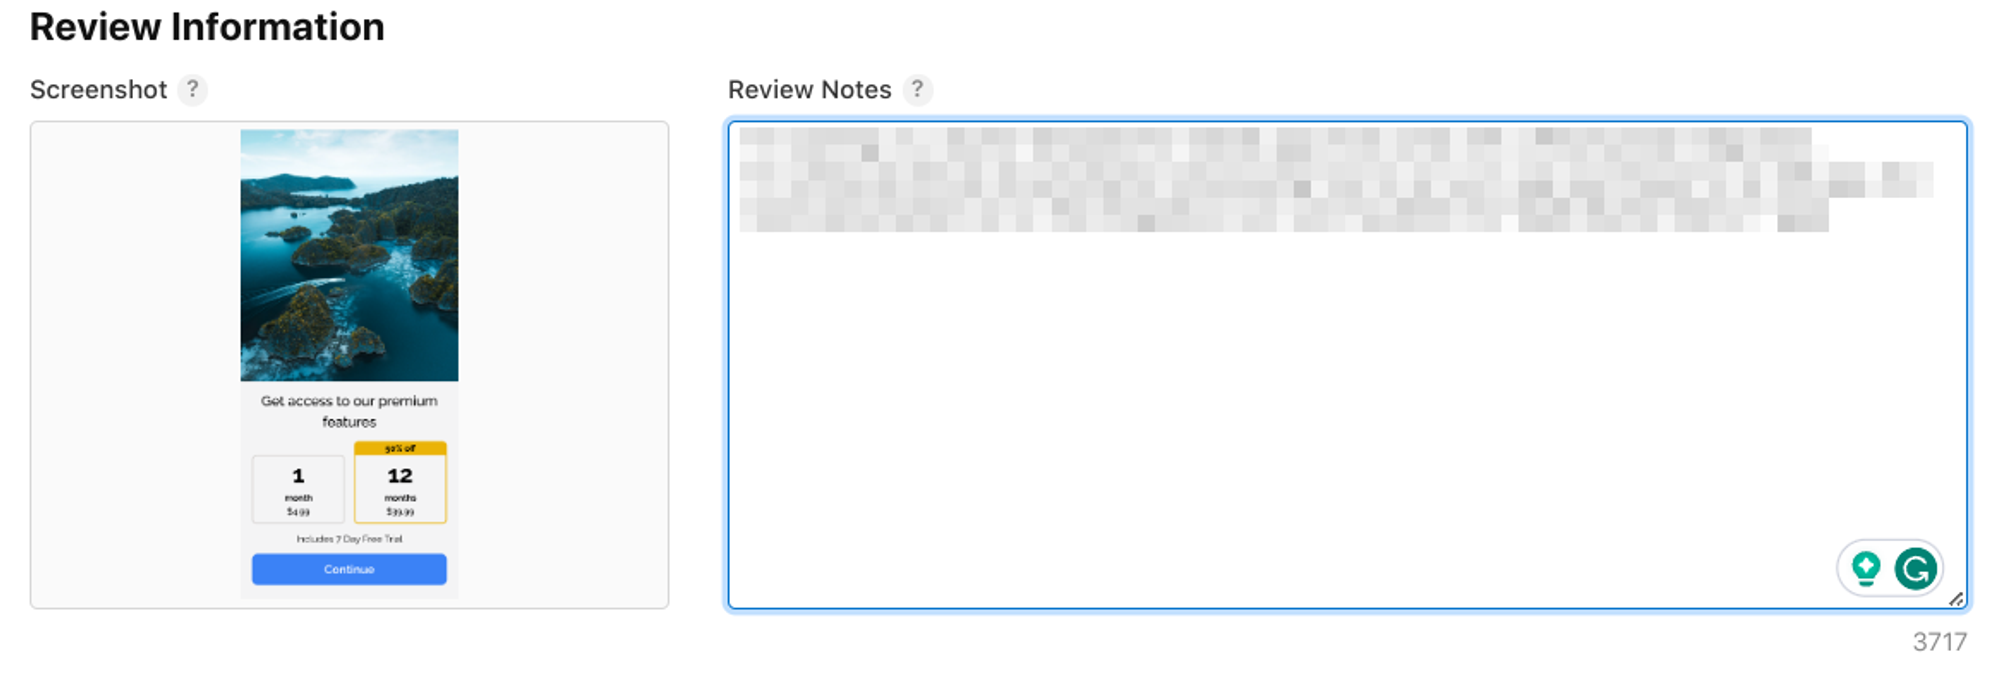
For the screenshot, you’ll need to upload an image with one of the following sizes: https://developer.apple.com/help/app-store-connect/reference/screenshot-specifications
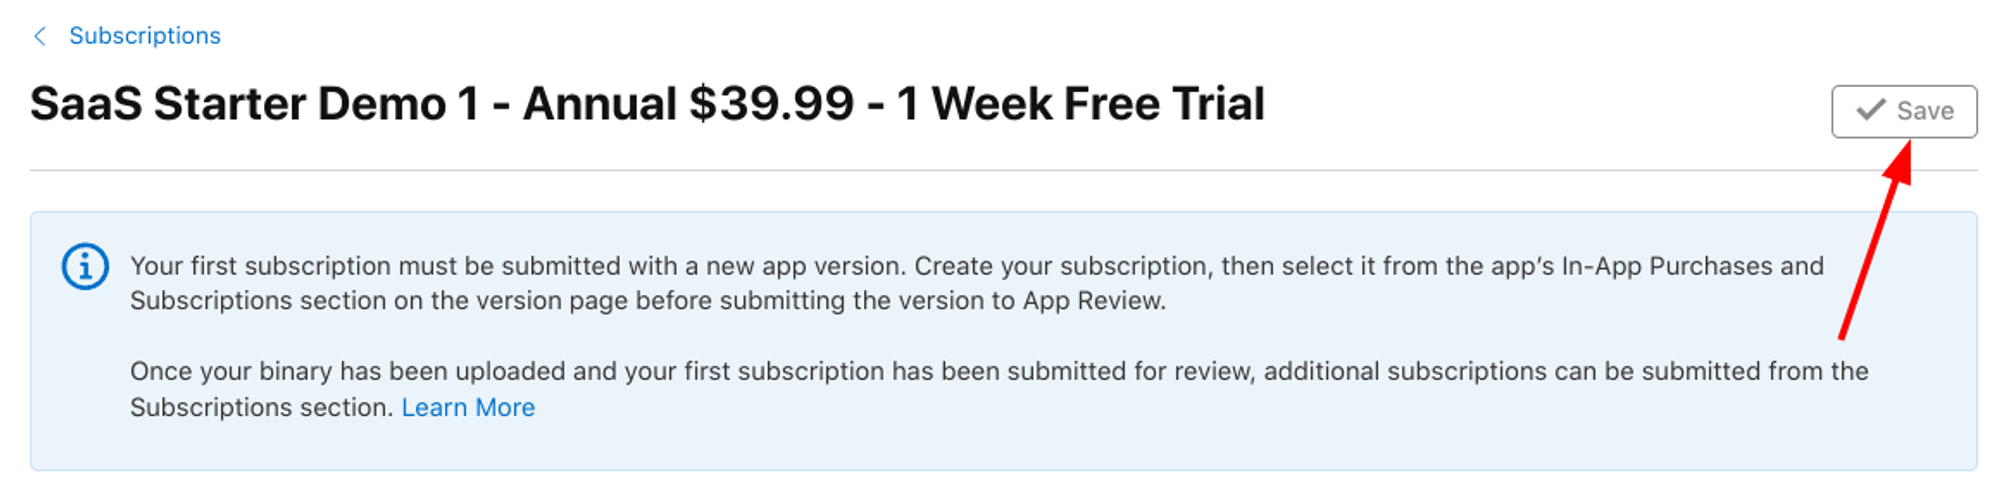
Finally, click “Save” in the top right corner
Monthly Subscription
For the monthly subscription, you need to follow the exact same steps mentioned in the “Annual Subscription” section above.
Here’s the information I’m using for my example app:

One-time payment to remove ads
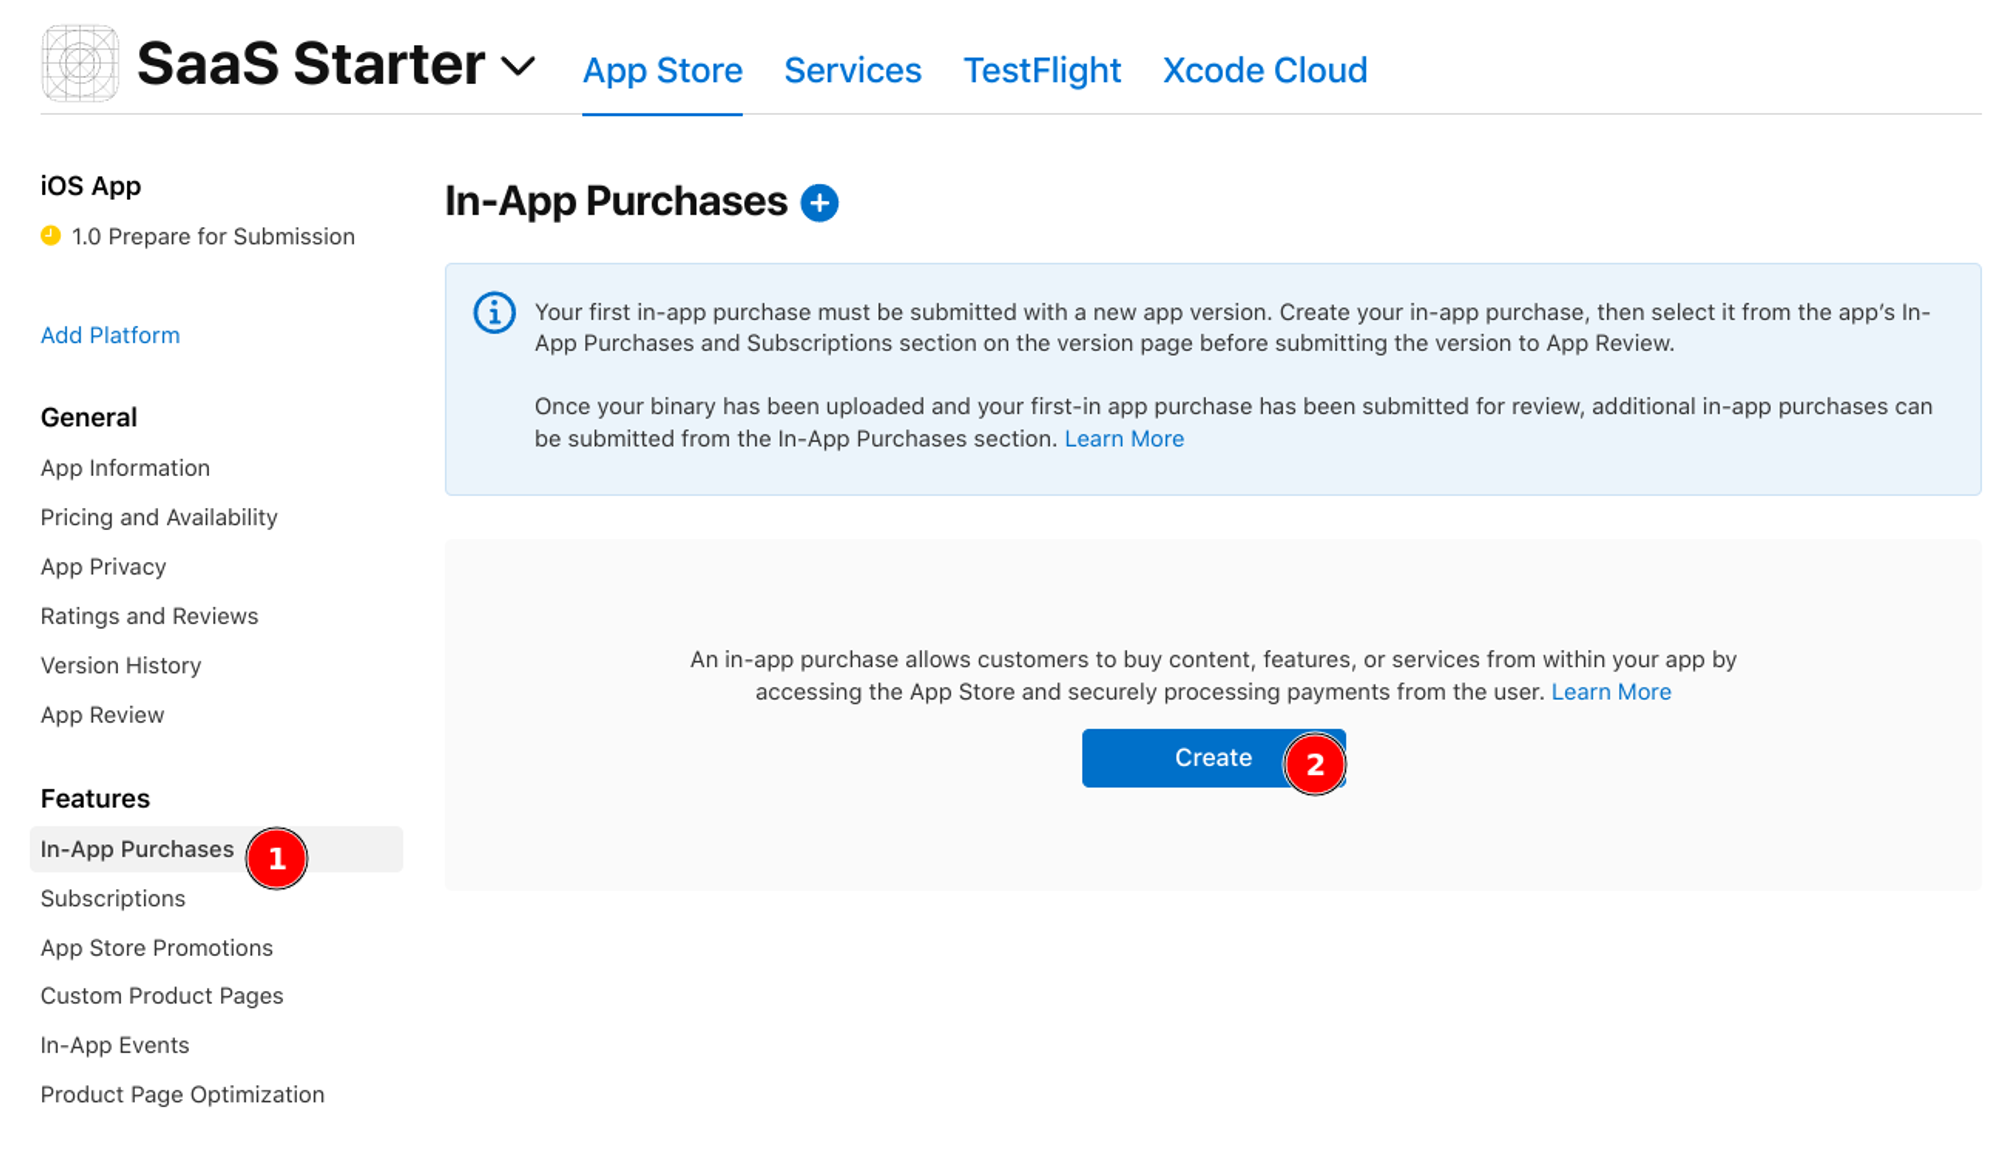
For one-time payments, you’ll need to go back to you app page in App Store Connect, and click on “In-App Purchases” in the sidebar (under the “Features” section). Then, click on “Create”
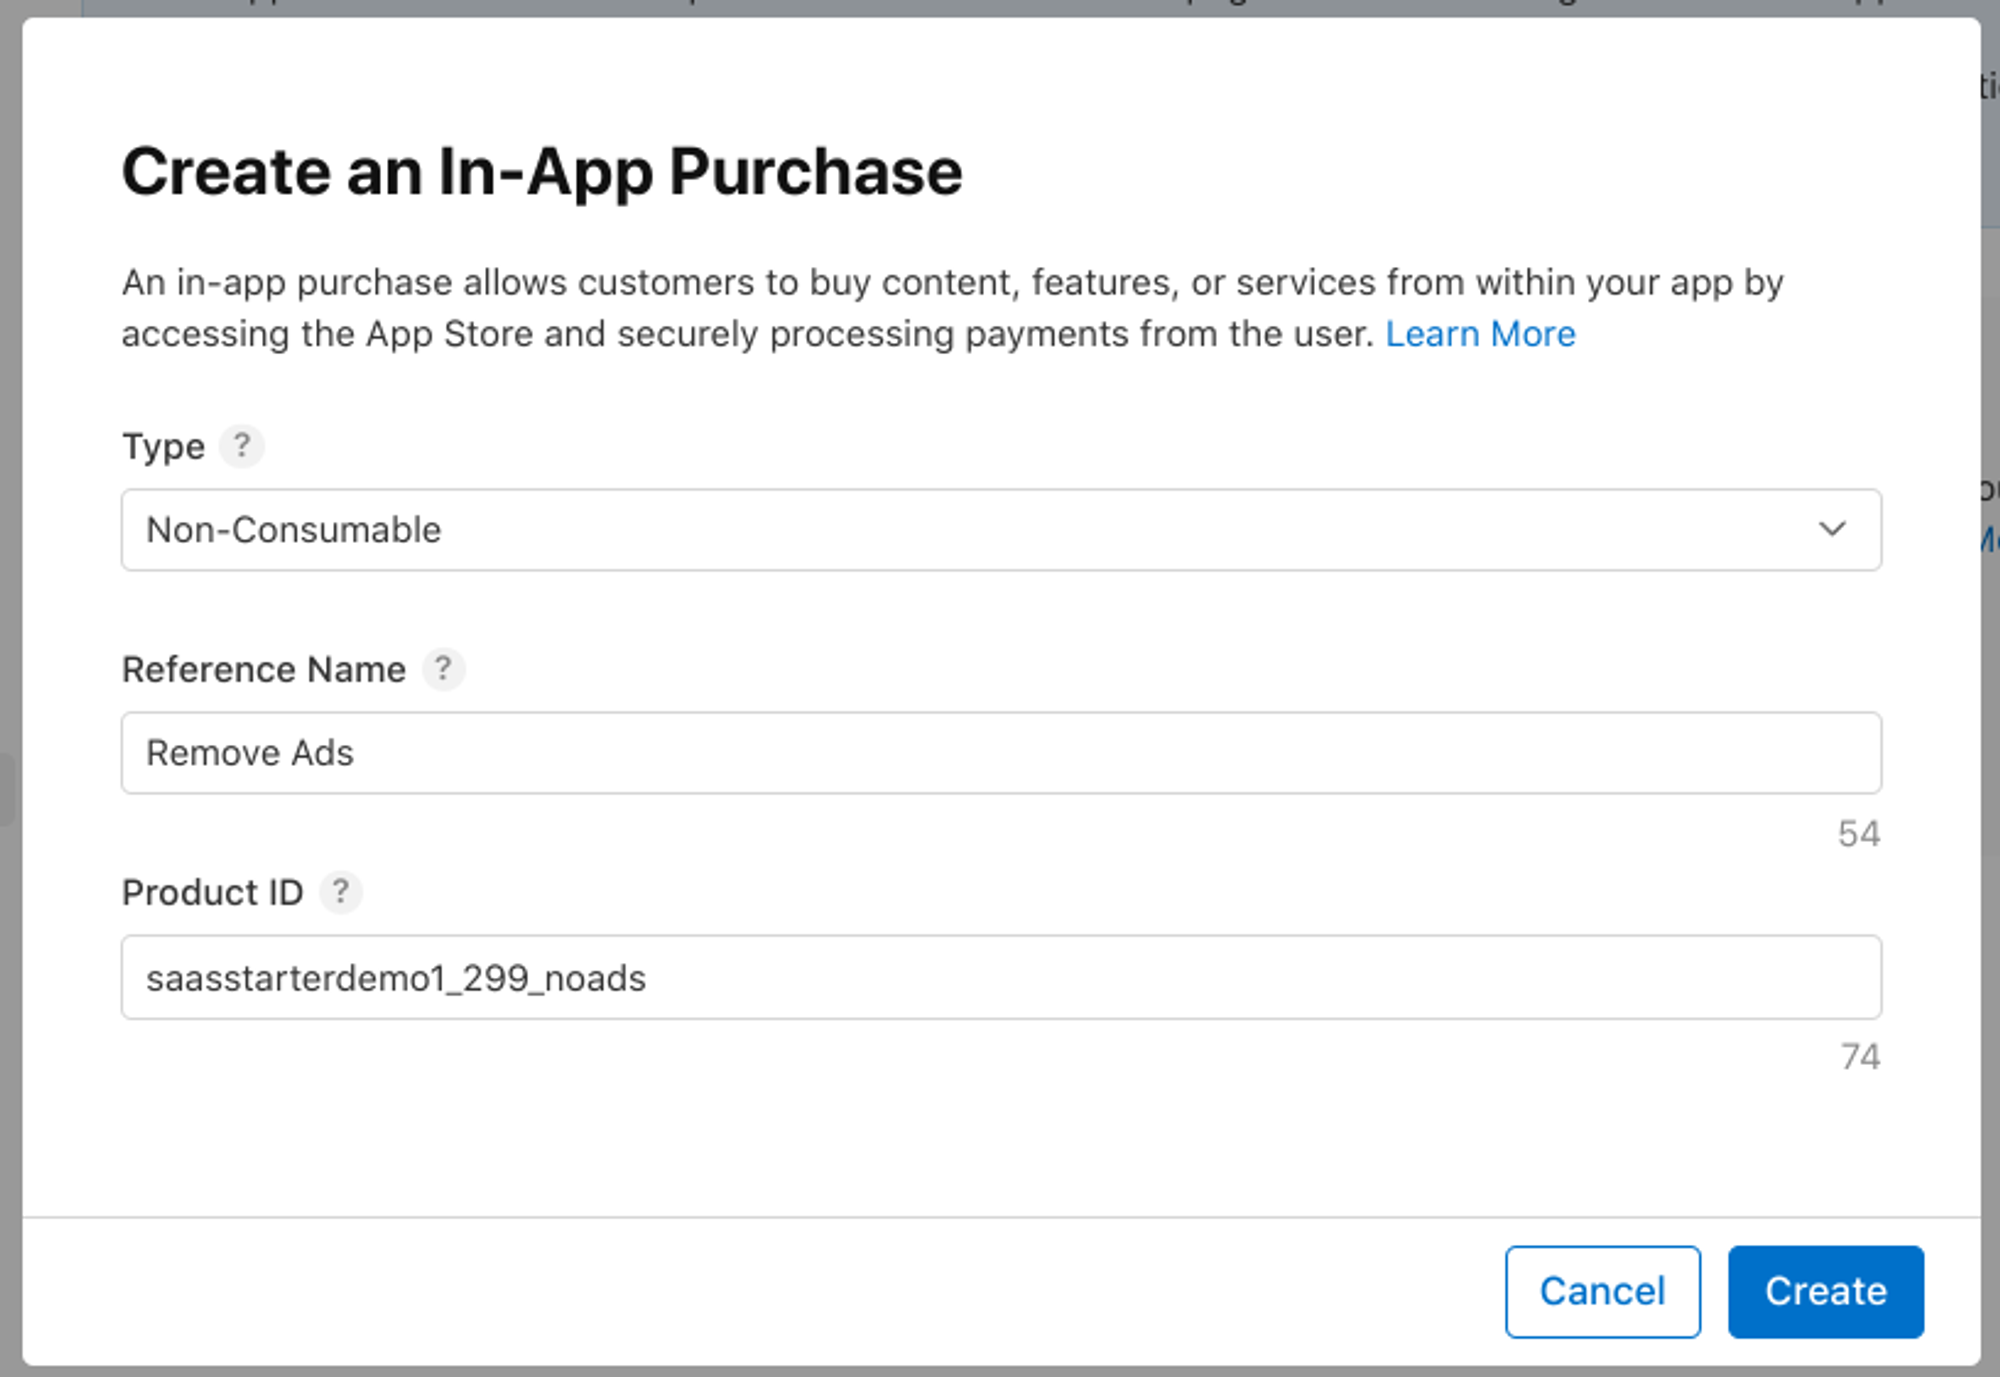
For “Type,” choose “Non-Consumable” because the “Remove ads” feature we’ll offer in our example app does not expire. Add your “Reference Name” and “Product ID” following a clear convention like you did before. Here’s what I used as example
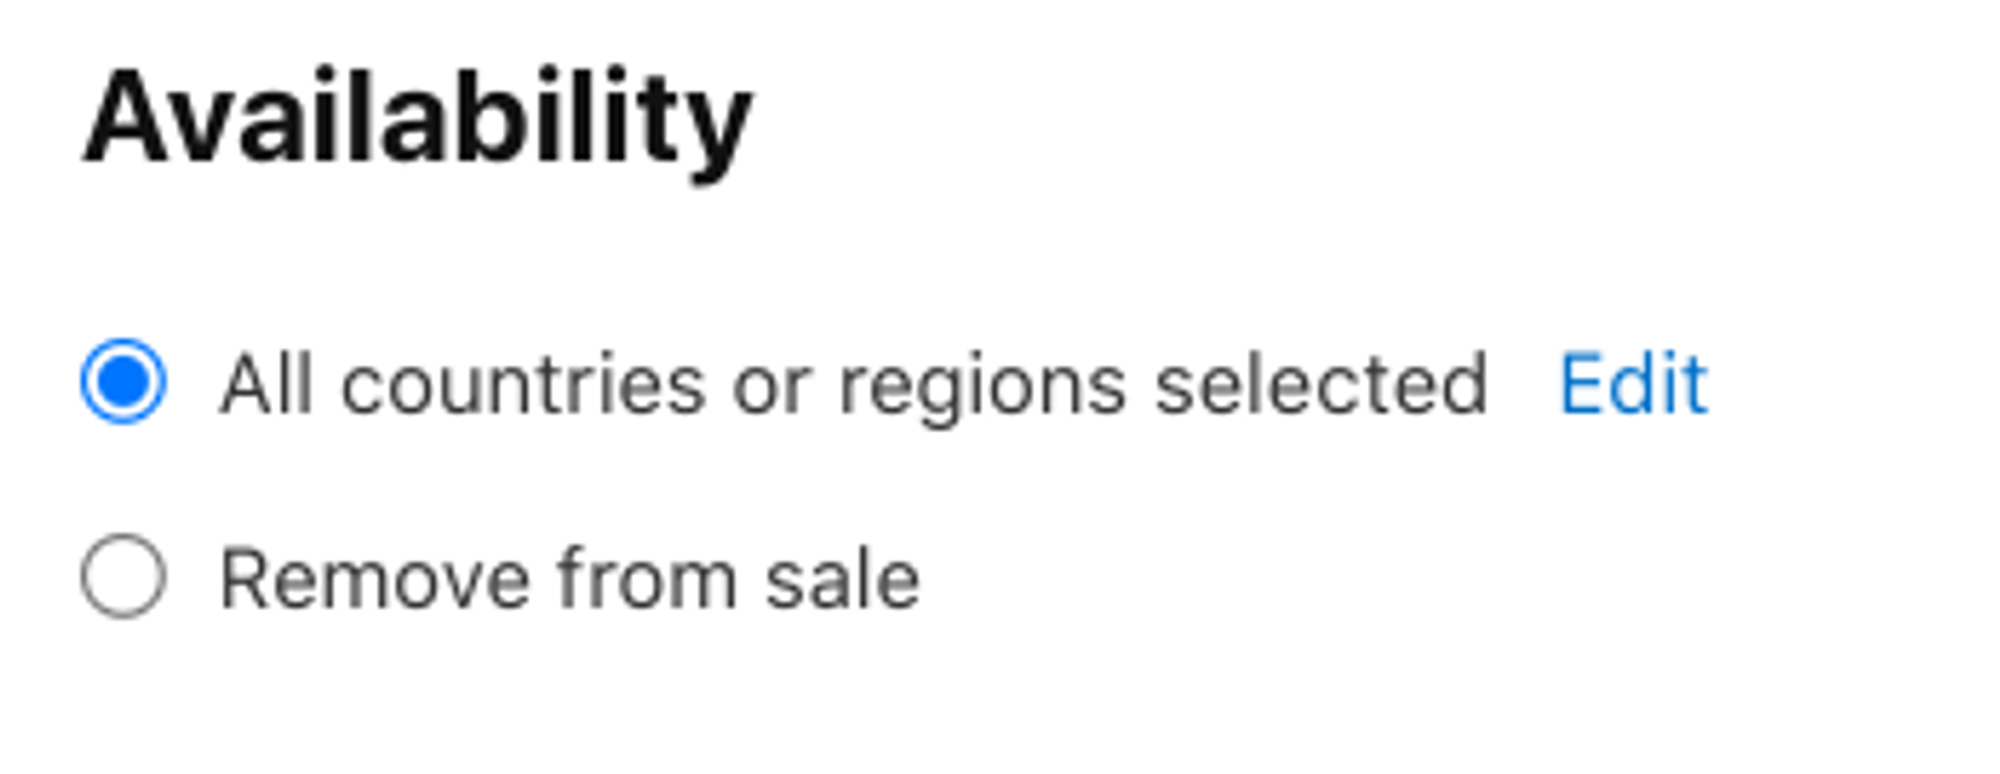
As you did with the subscriptions before, you’ll need to setup “Availability”
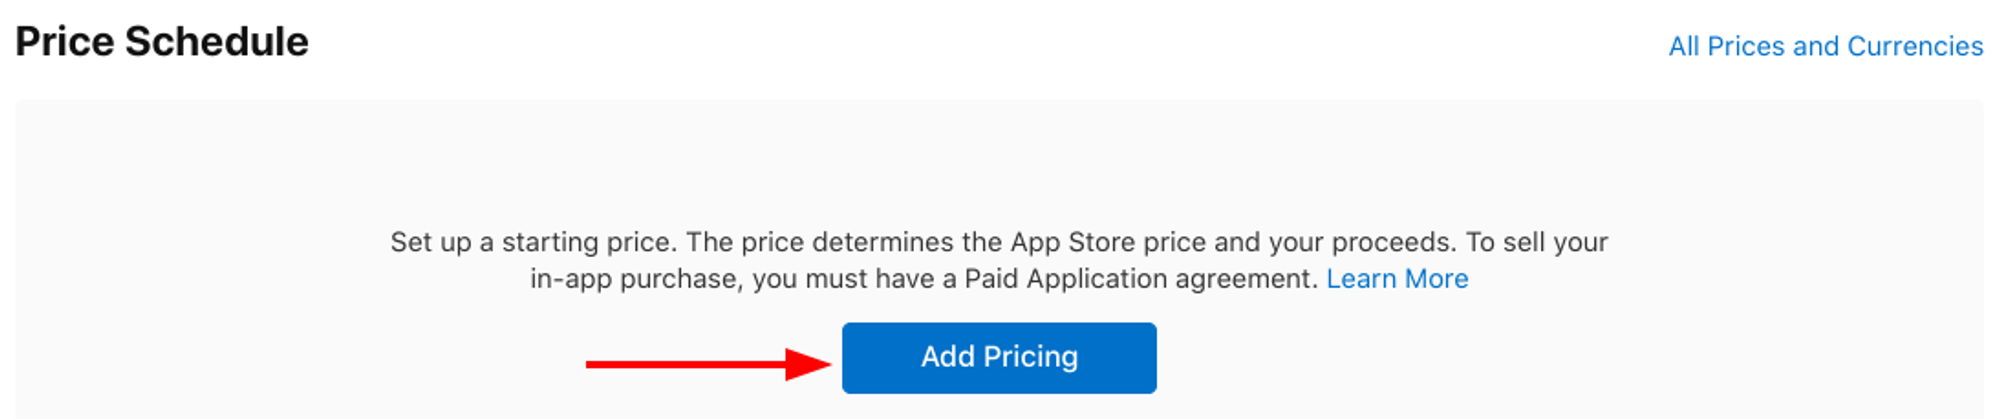
Next, you’ll need to provide a price. Scroll to the “Price Schedule” section and click on “Add Pricing”
Choose a country and a price, then click “Next”. Review the prices for different countries if you like, then click “Confirm” to finish.
Scroll to the “App Store Localization” section, and choose a “Display Name” and “Description” as you did before in the subscriptions. Then, click on “Create”
Finally, complete the “Review Information” section with the screenshot and notes as before.
Google Play Billing Setup (Android)
To set up products for Android devices, start by logging into Google Play Console.
Set up a Google Payments merchant account
This step is only required if you are setting up payments in Google Play Console for the first time.
Select your app in Google Play Console.
In the sidebar, scroll to the “Monetize” section and click on “Subscription”.
If you don’t see this message, feel free to skip the rest of this step.
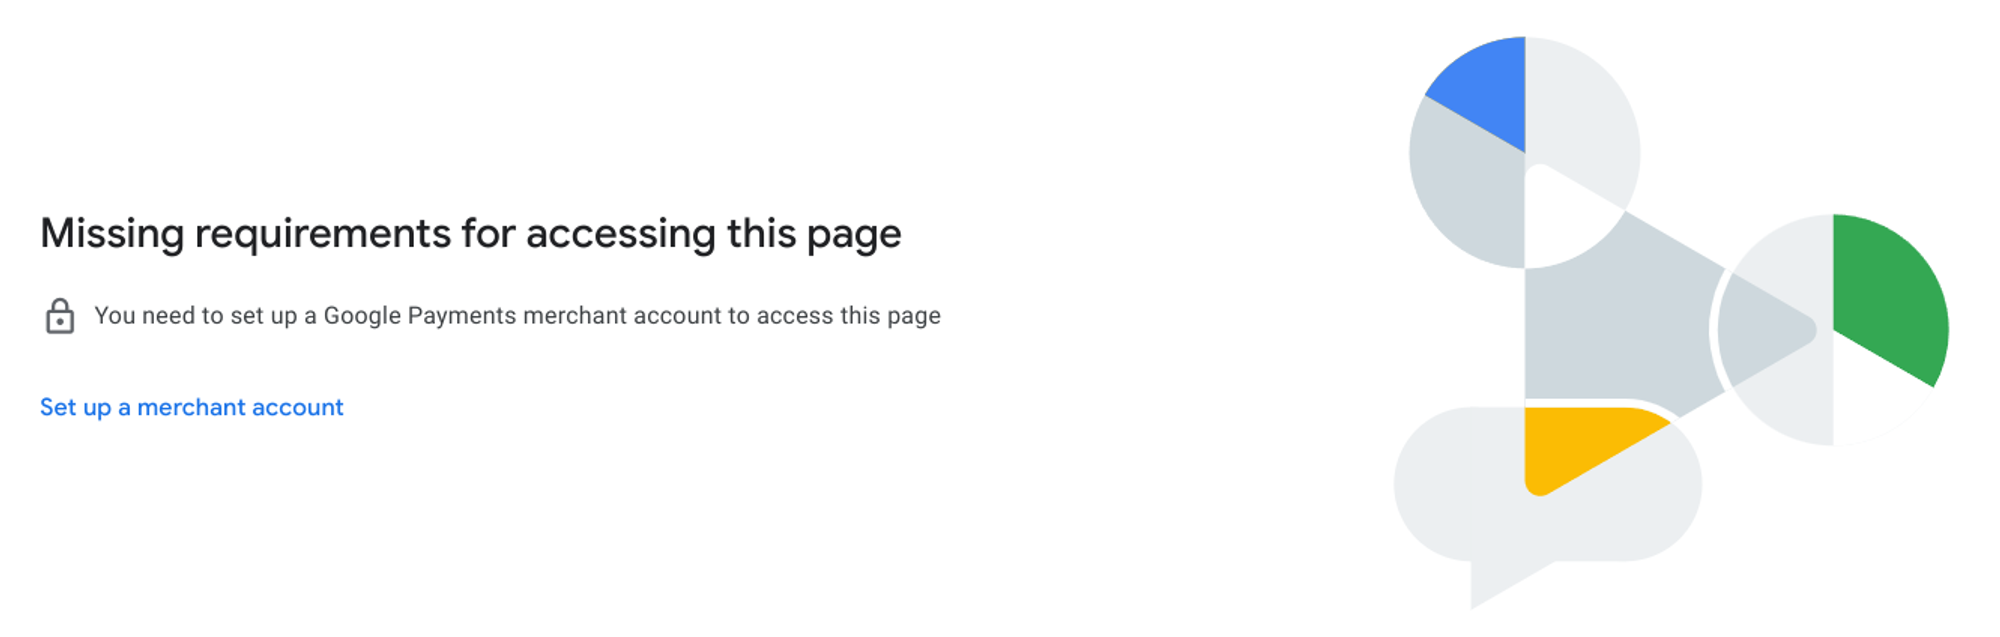
Click on “Set up a merchant account”, then click on “Create payments profile”

You’ll see a list of Payments Profiles. In my case, I already had a profile generated, but you can select “Create payments profile.” In any case, you’ll need to provide additional information.
Complete the form with the requested information, and click “Submit” to finish.
Introduction
I’ll guide you through the process to replicate the same subscriptions and in-app purchases I described above for iOS. This includes:
An annual subscription ($39.99) - 1 week free trial
A monthly subscription ($4.99) - 1 week trial
A one-time purchase to remove ads ($2.99)
On Android, there are a few differences with the keywords I used for the iOS setup. On Android, You’ll only need to create one subscription that will serve both the annual and the monthly plans (called “Base plans” here). Then, each plan can have one or more “Offers” associated. We’ll add offers for the free trial.
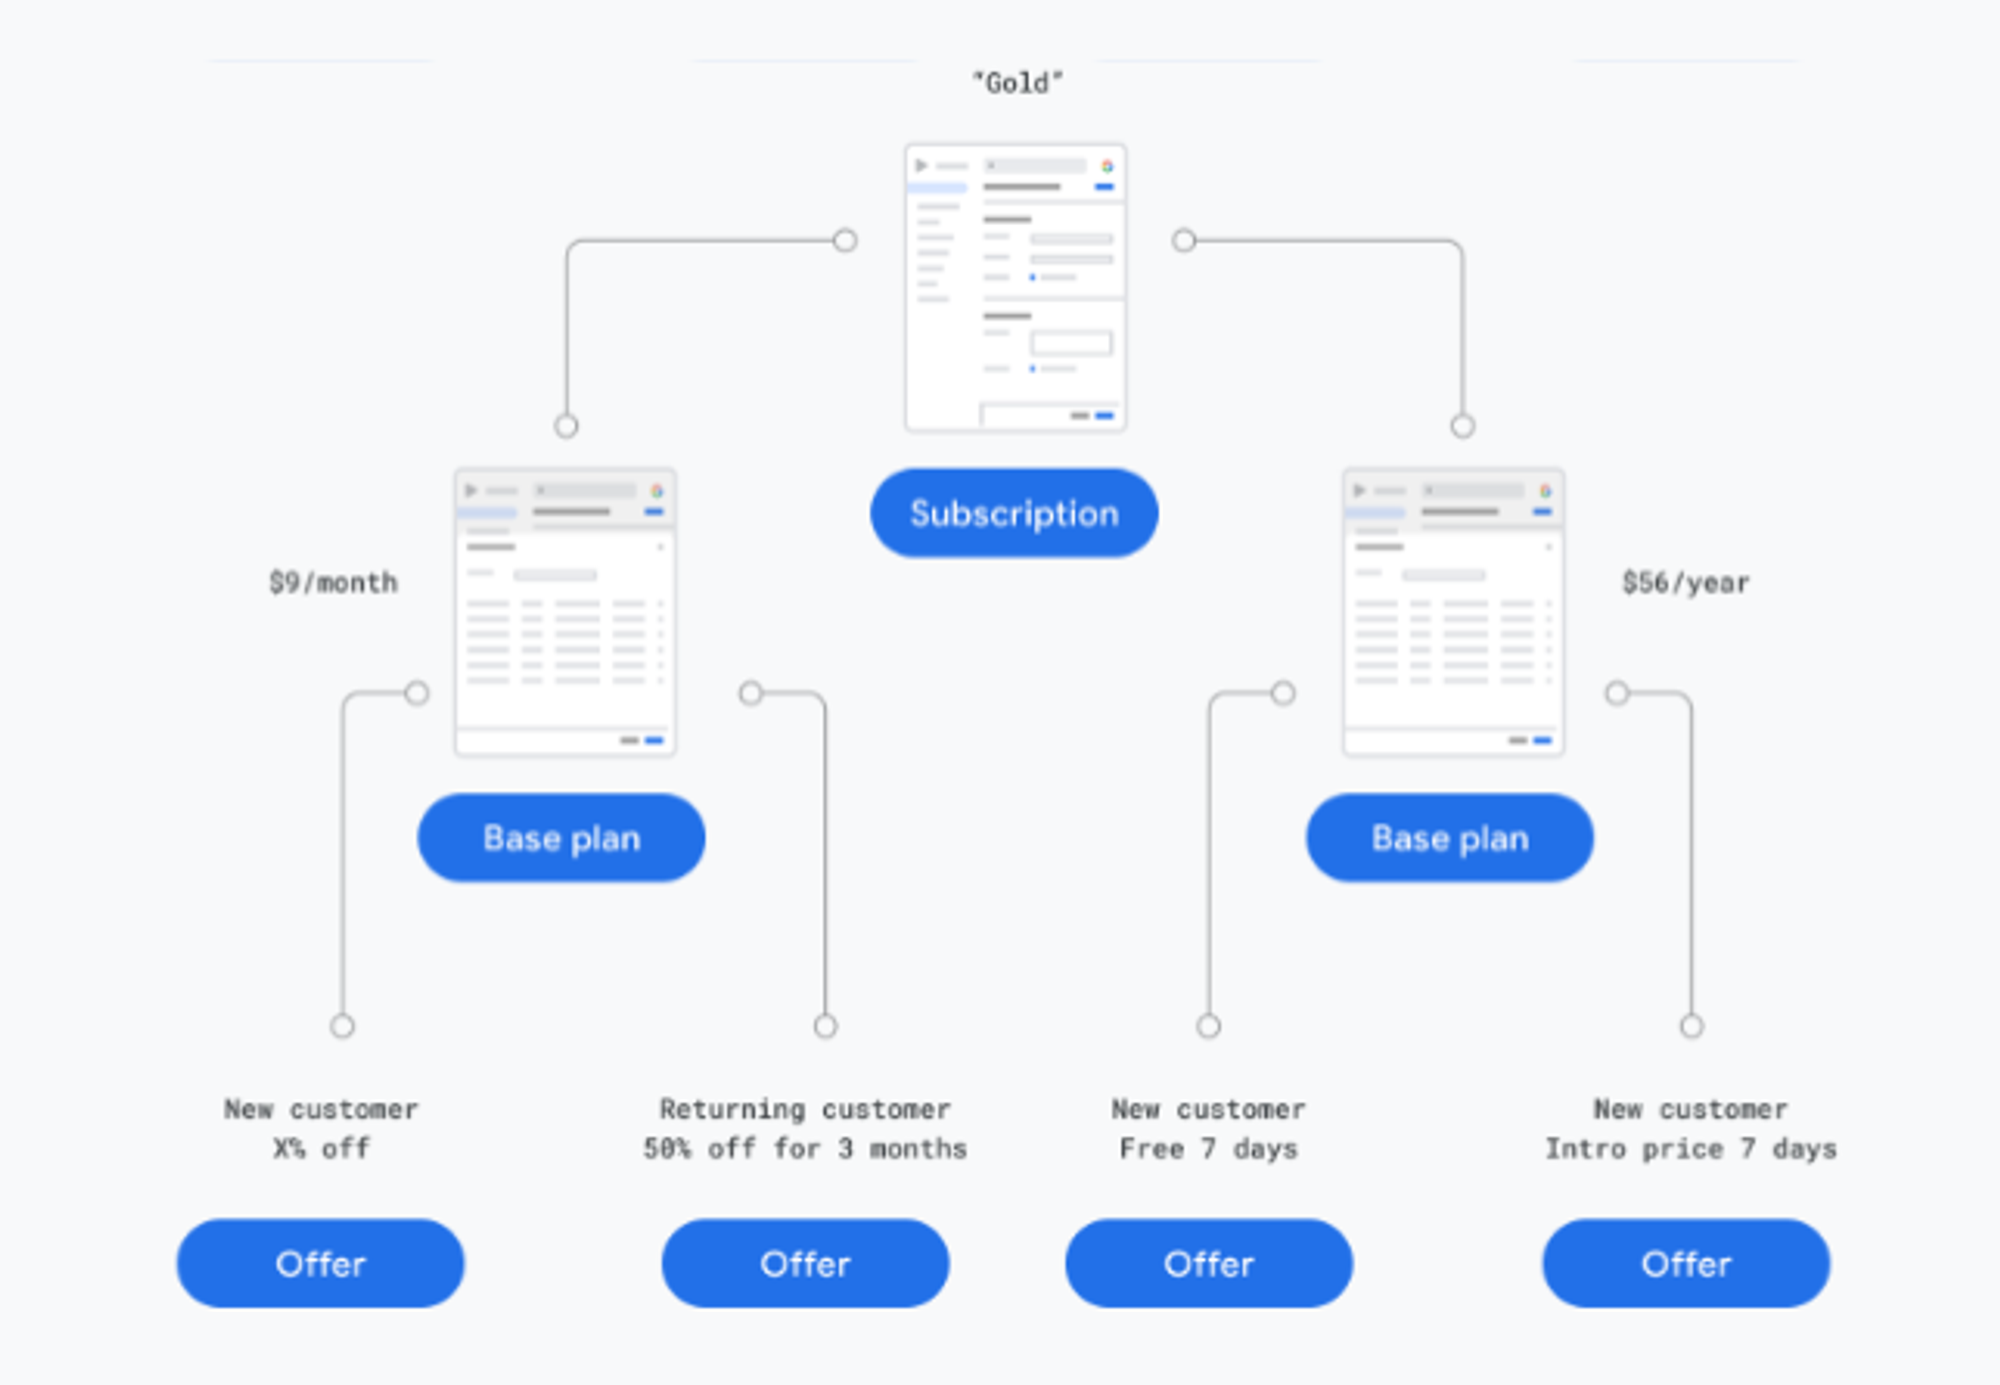
Subscription: Represents a user benefit, such as “Access to Premium features.” Independent of how it’s paid.
Base Plans: Specify the duration, price, availability (countries), etc. You can create pre-paid plans (non-renewing) too.
Offers: Allow eligible users to access a subscription at a discounted price. You can target offers at different user segments for acquisition and retention, or to incentivize users to upgrade.
Creating a new Subscription for the Annual and Monthly base plans
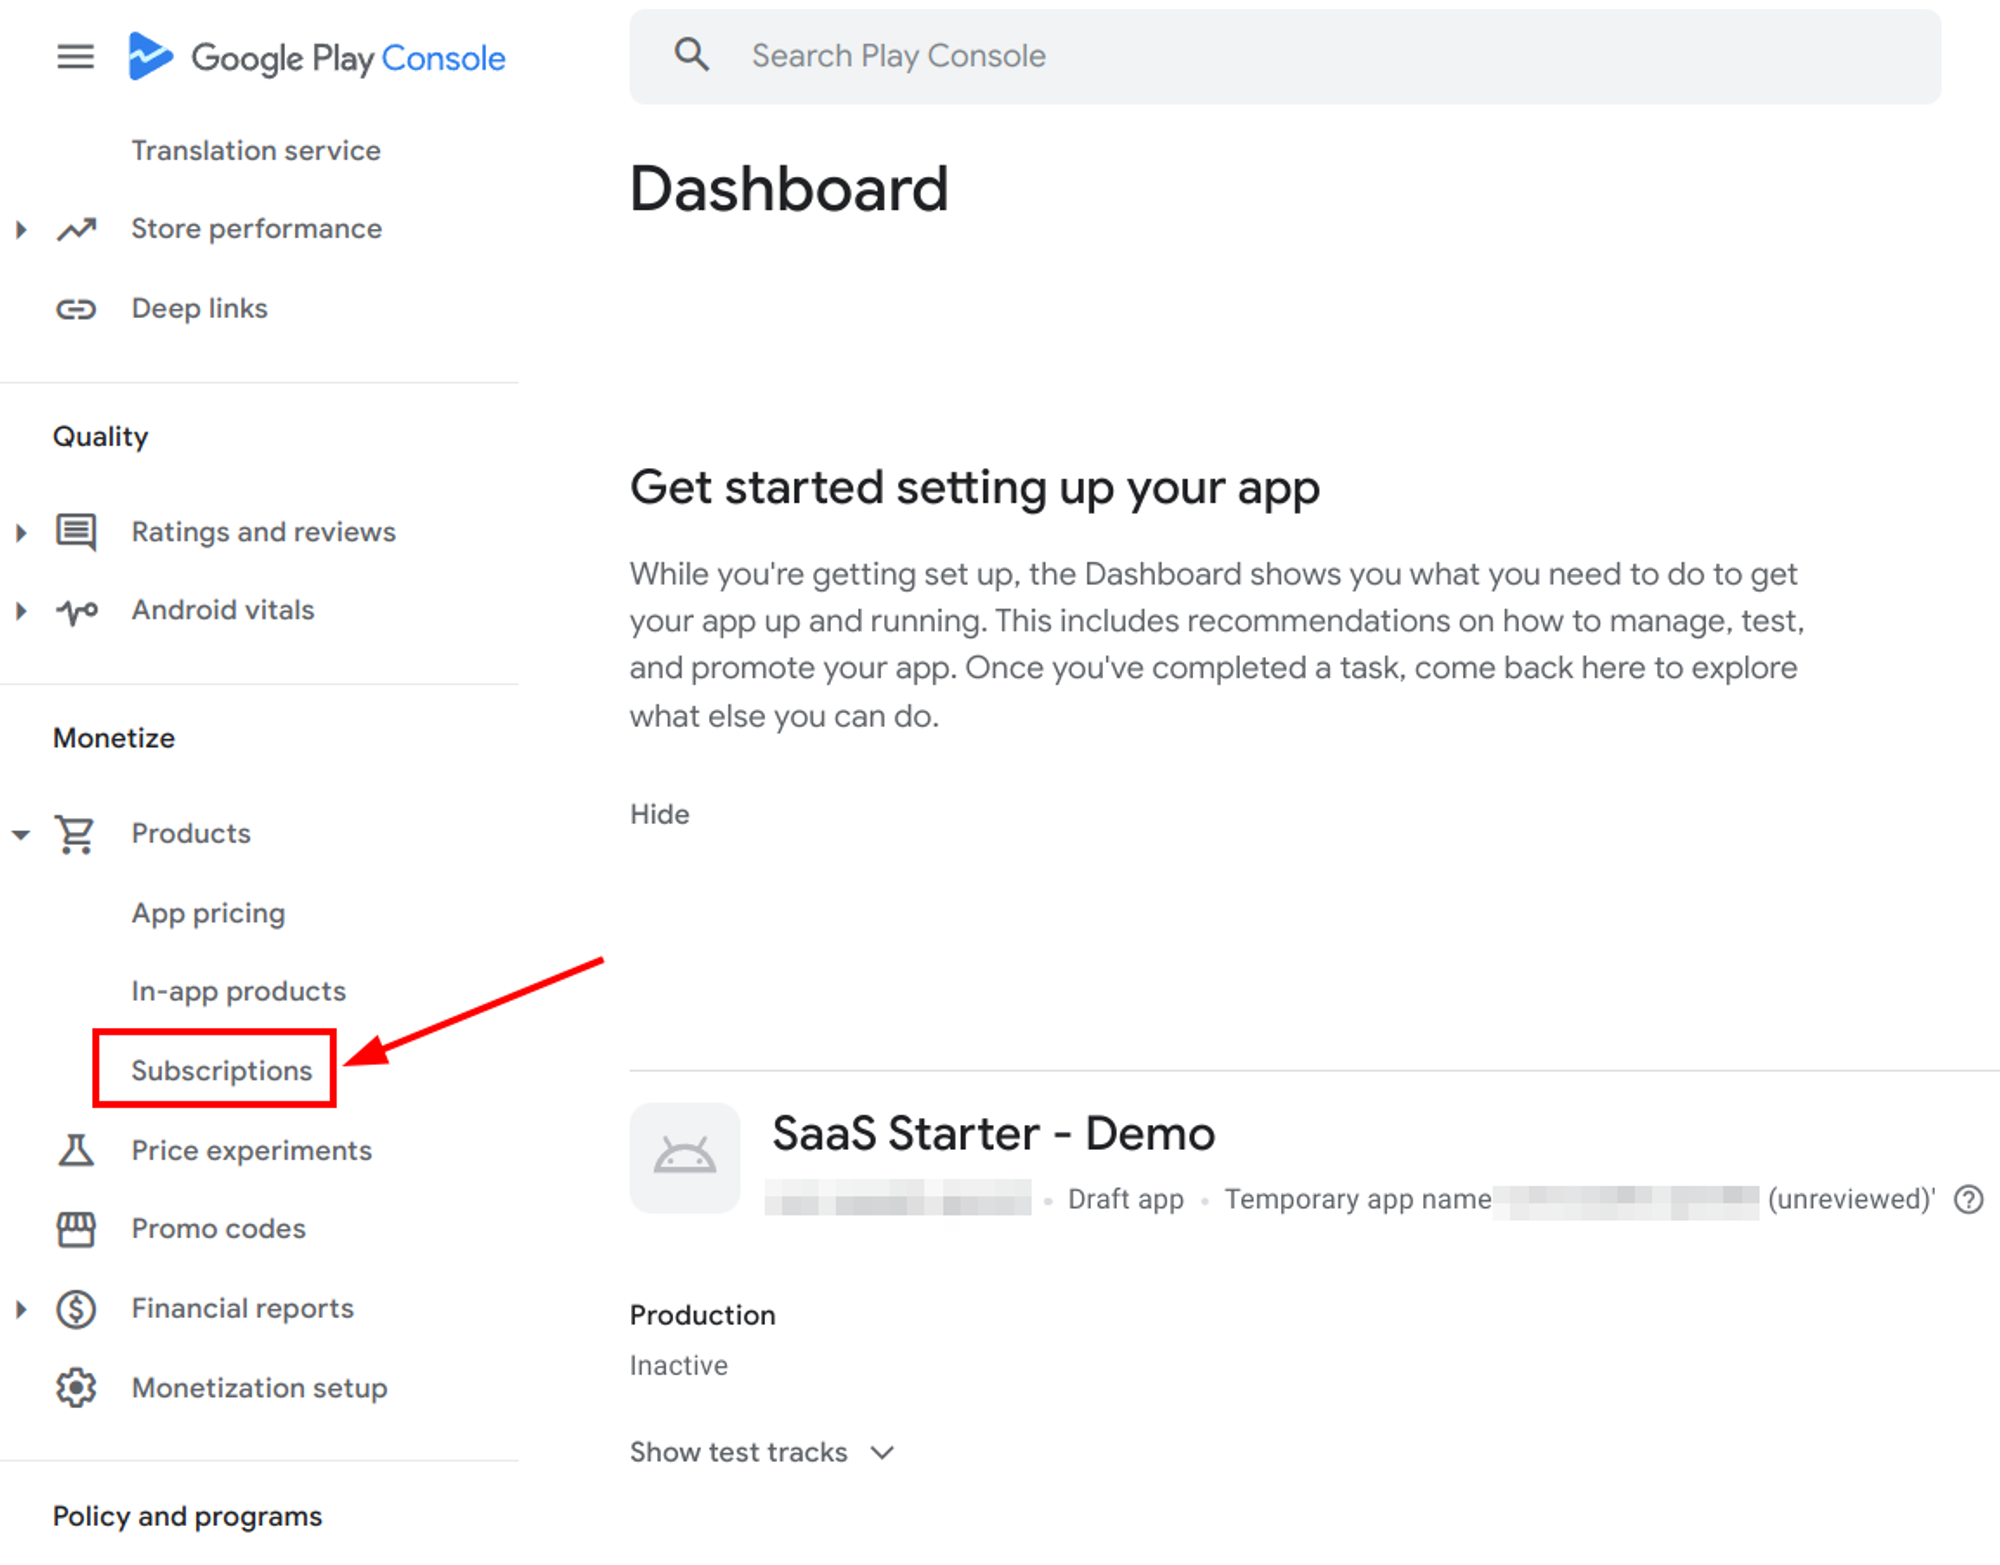
Once you logged in into Google Play Console, select your app from the app list.
In the sidebar, scroll to the “Monetize” section, and click on “Subscription”.
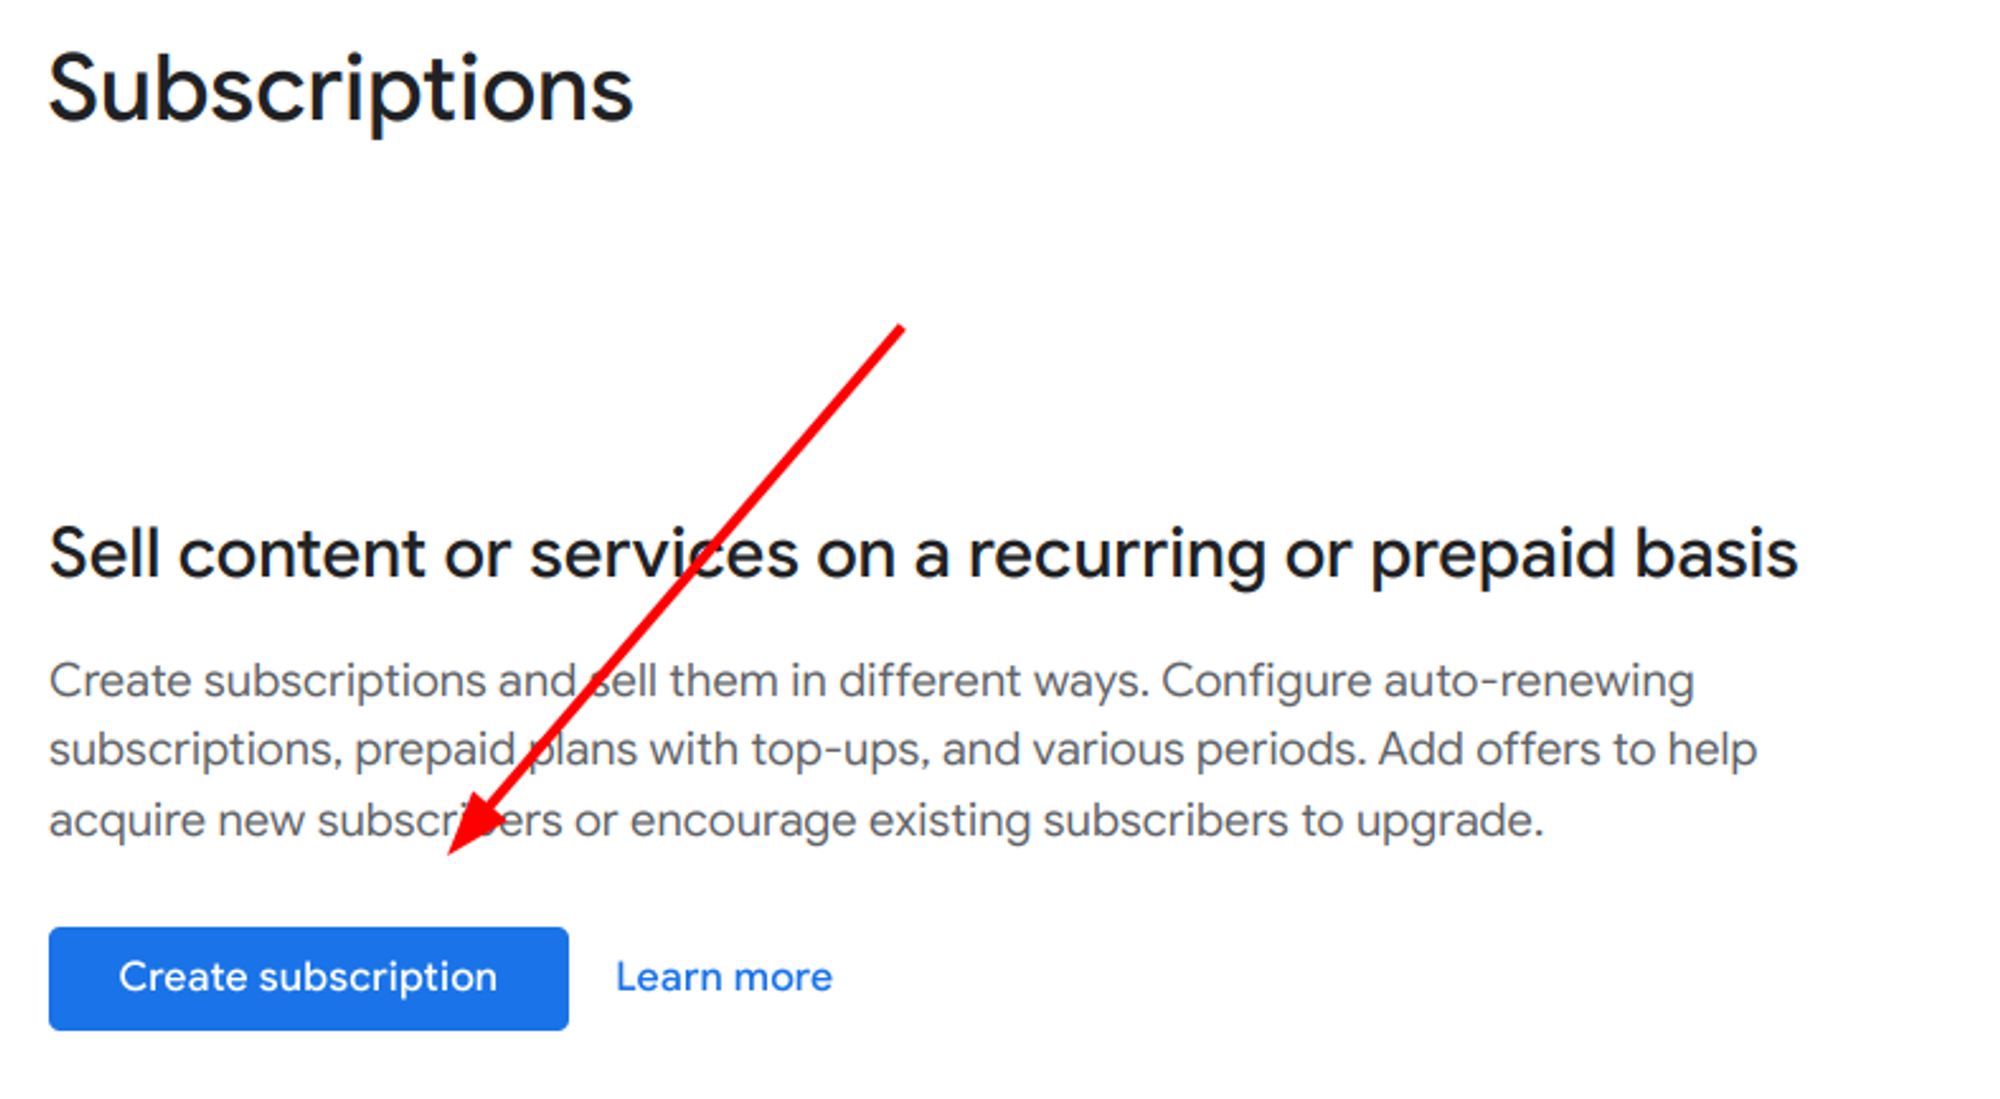
Click on “Create subscription”
You’ll need to provide a “Product ID” and a “Name”. For the Product ID, RevenueCat has a set of recommendations you can find in this link. I’m sharing an example below using the following structure:
appname_subscriptioninfo_version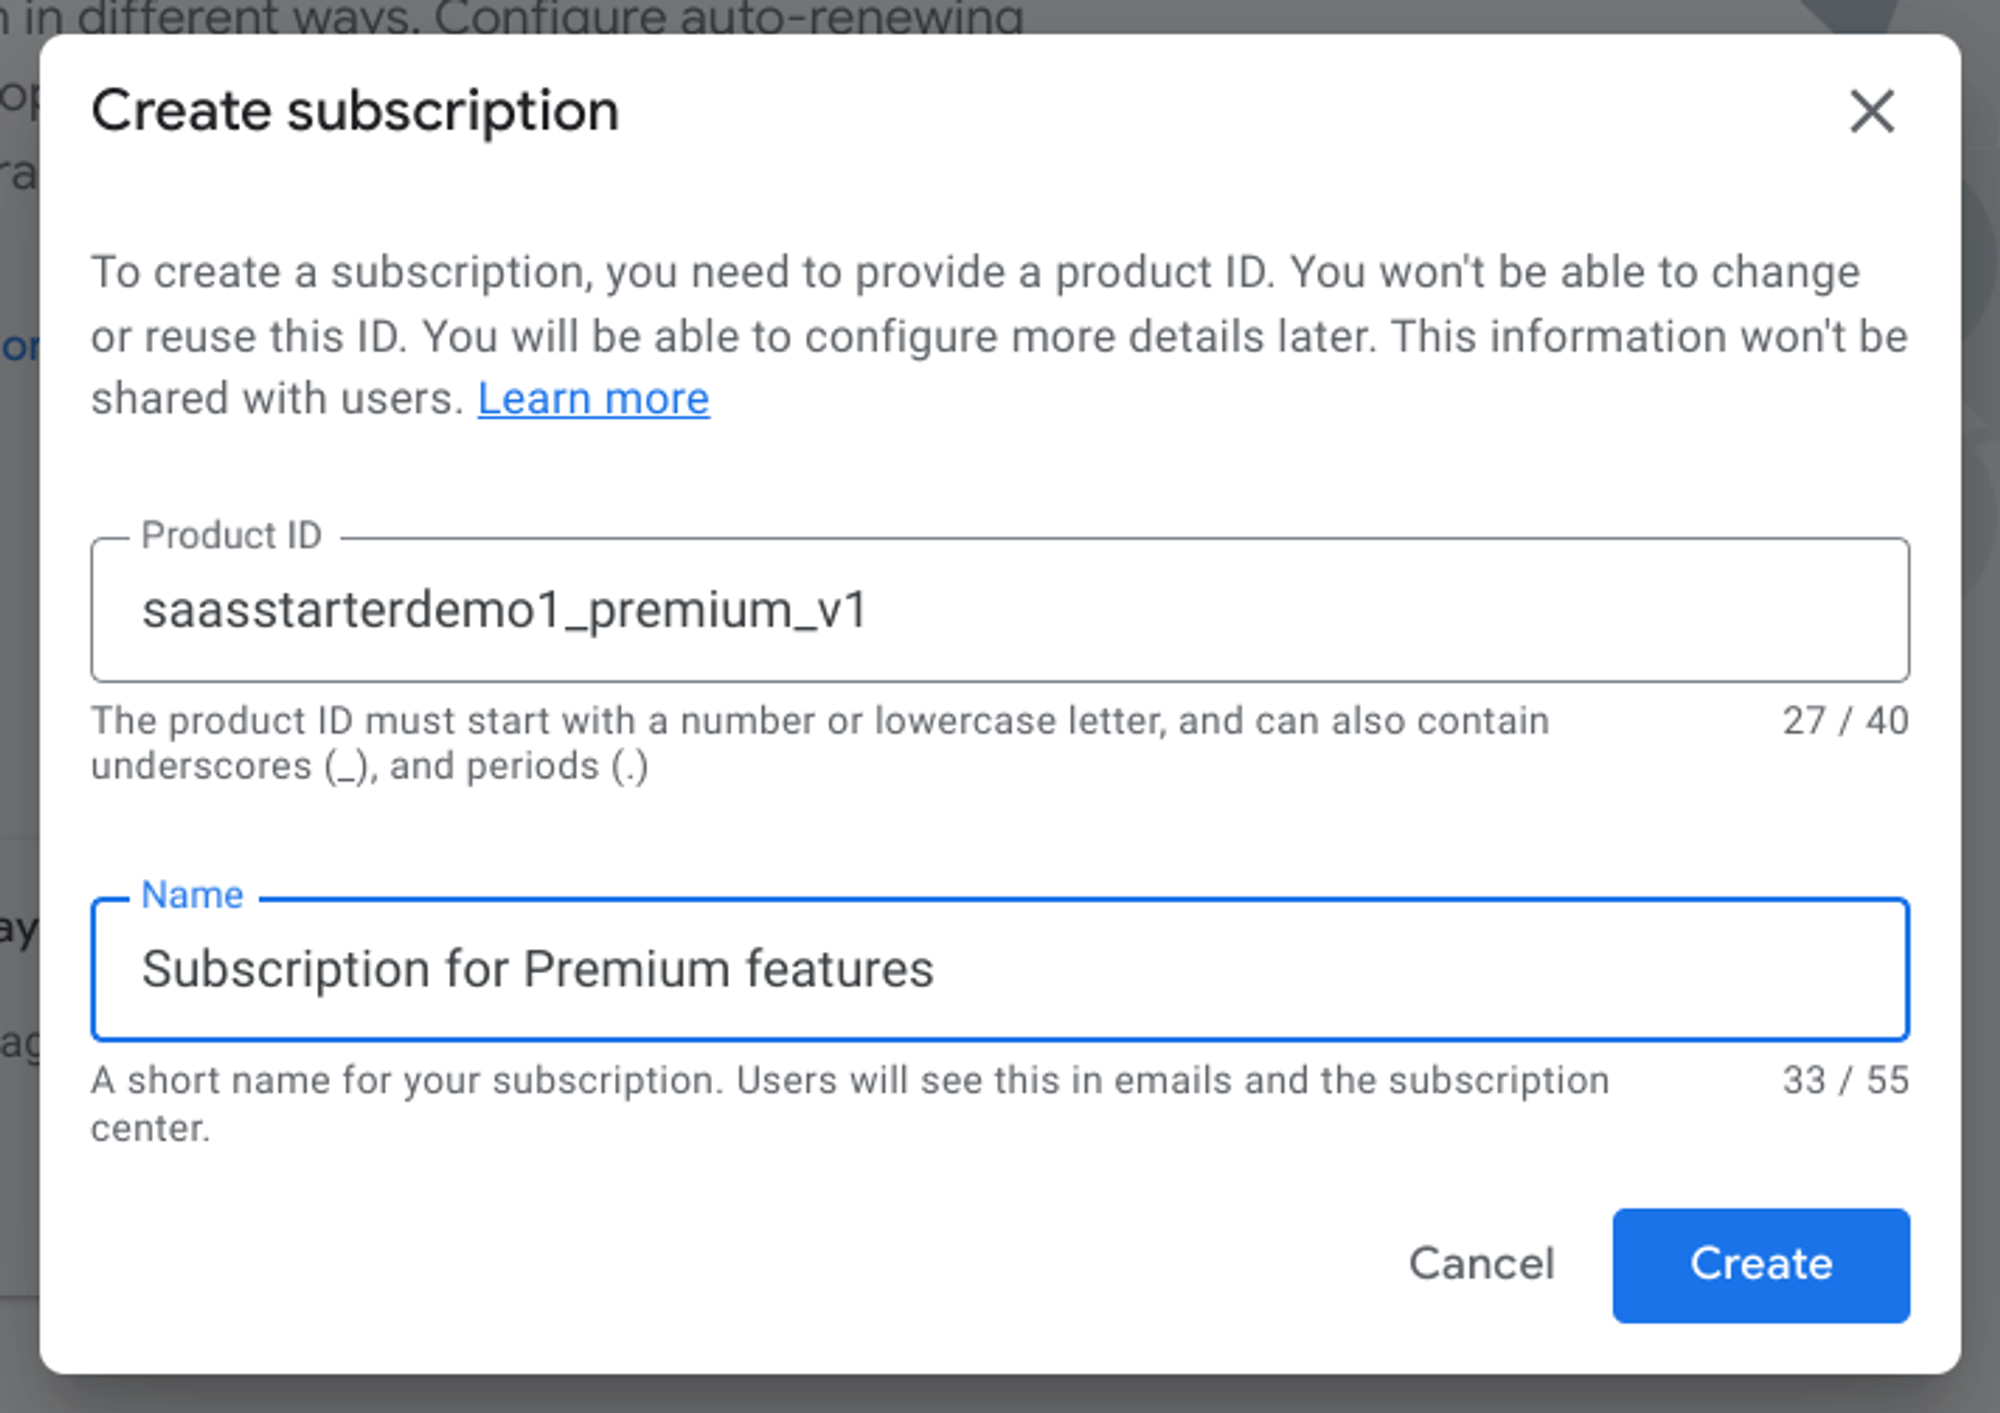
Click “Create” to proceed.
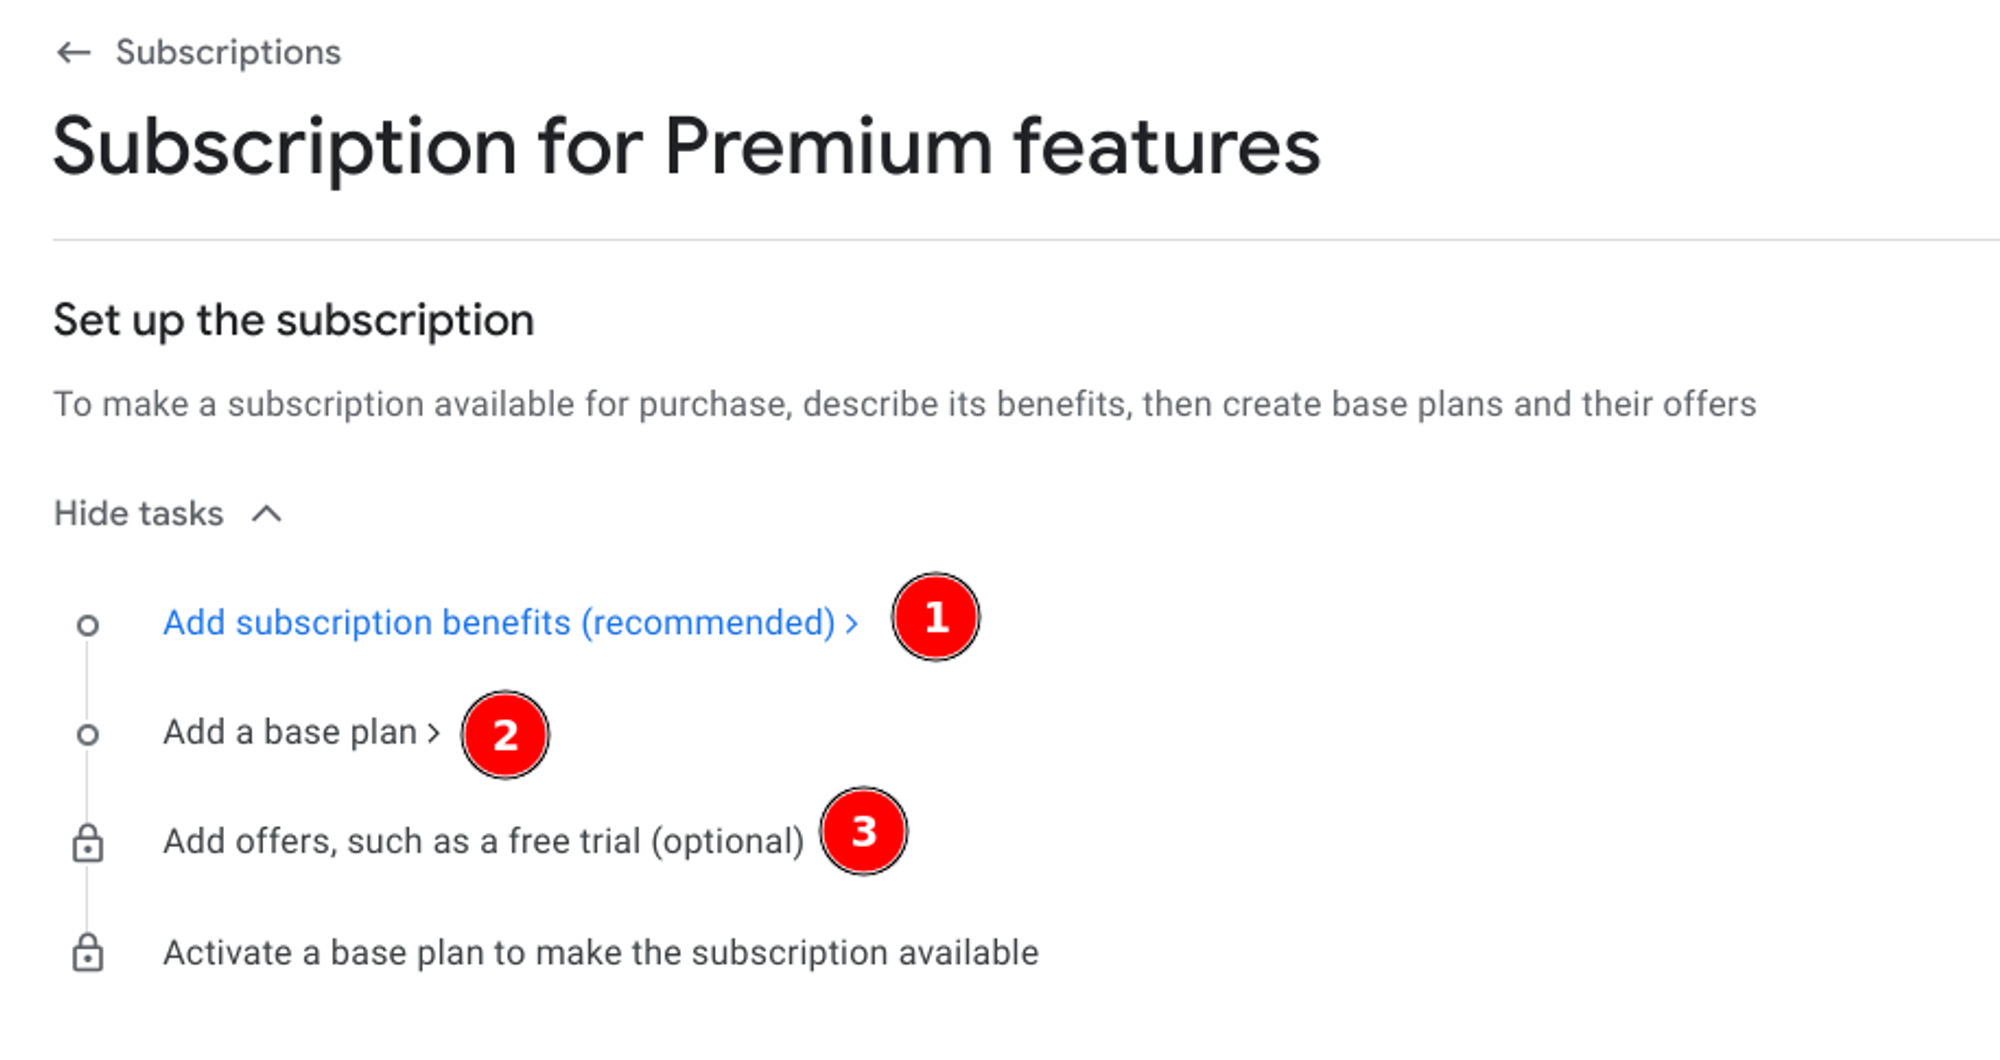
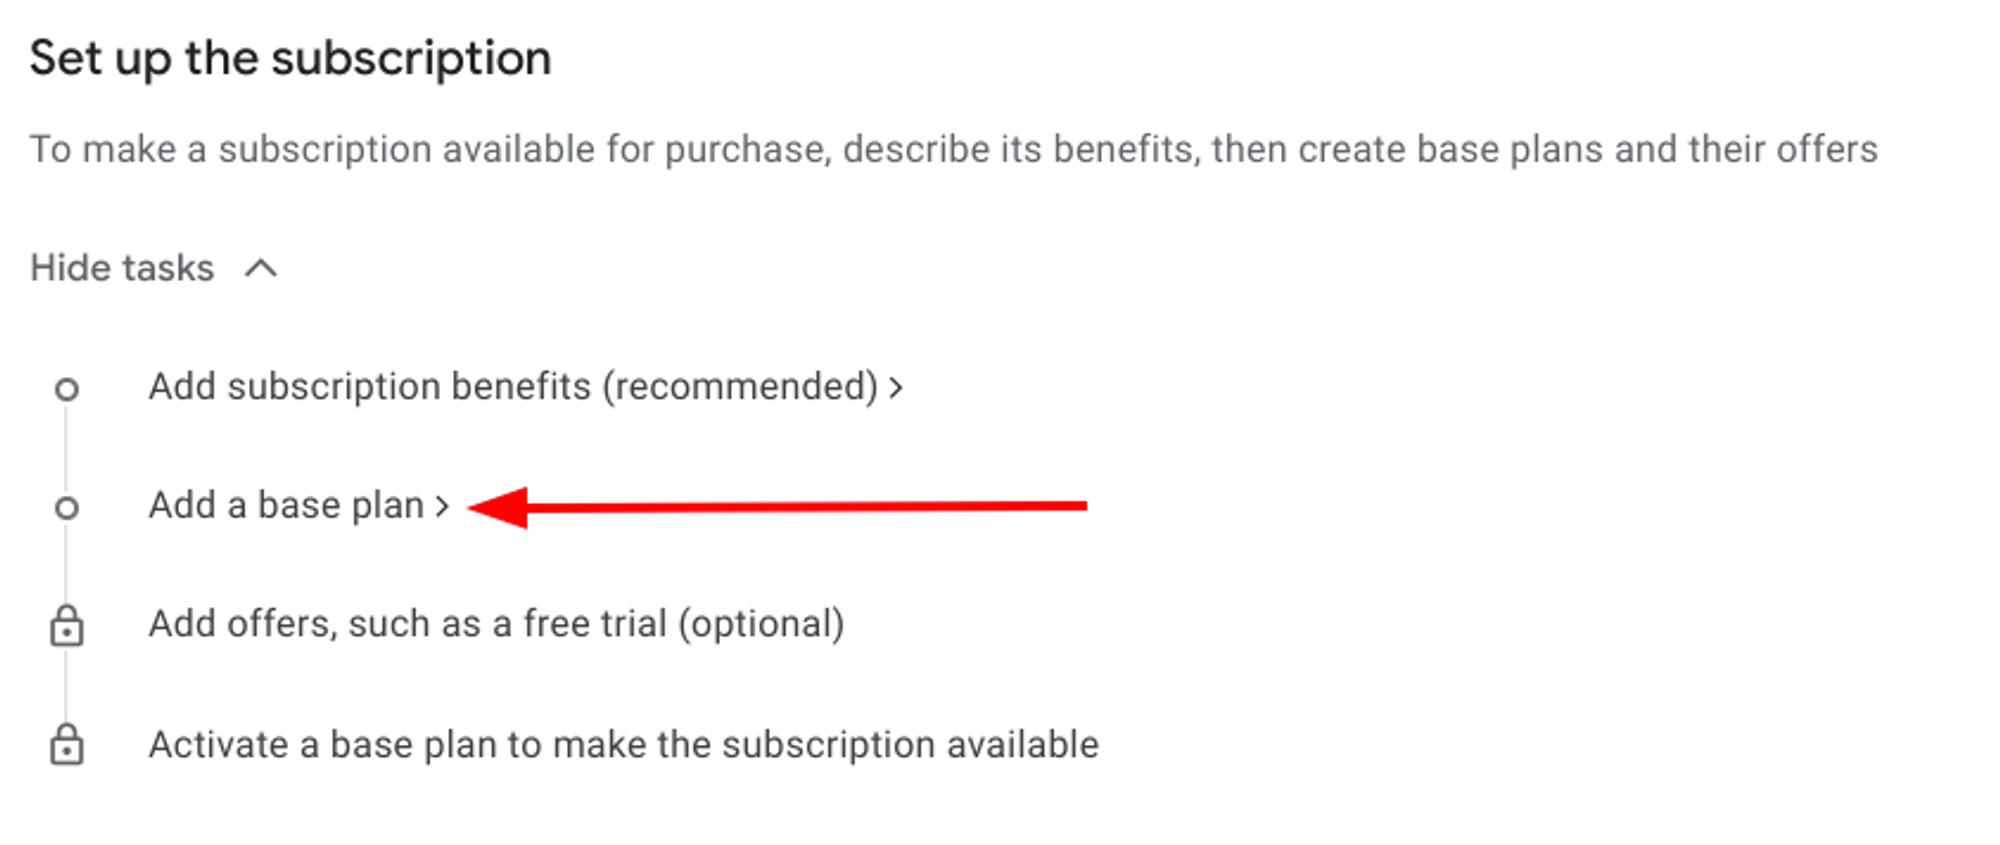
To complete the set up for the subscription, you’ll need to add at least a base plan. Feel free to also add the subscription benefits, which is recommended. We’ll cover the steps 2 and 3 in the following sections
Adding the Annual Base Plan
In the “Set up the subscription” section, click on “Add a base plan”
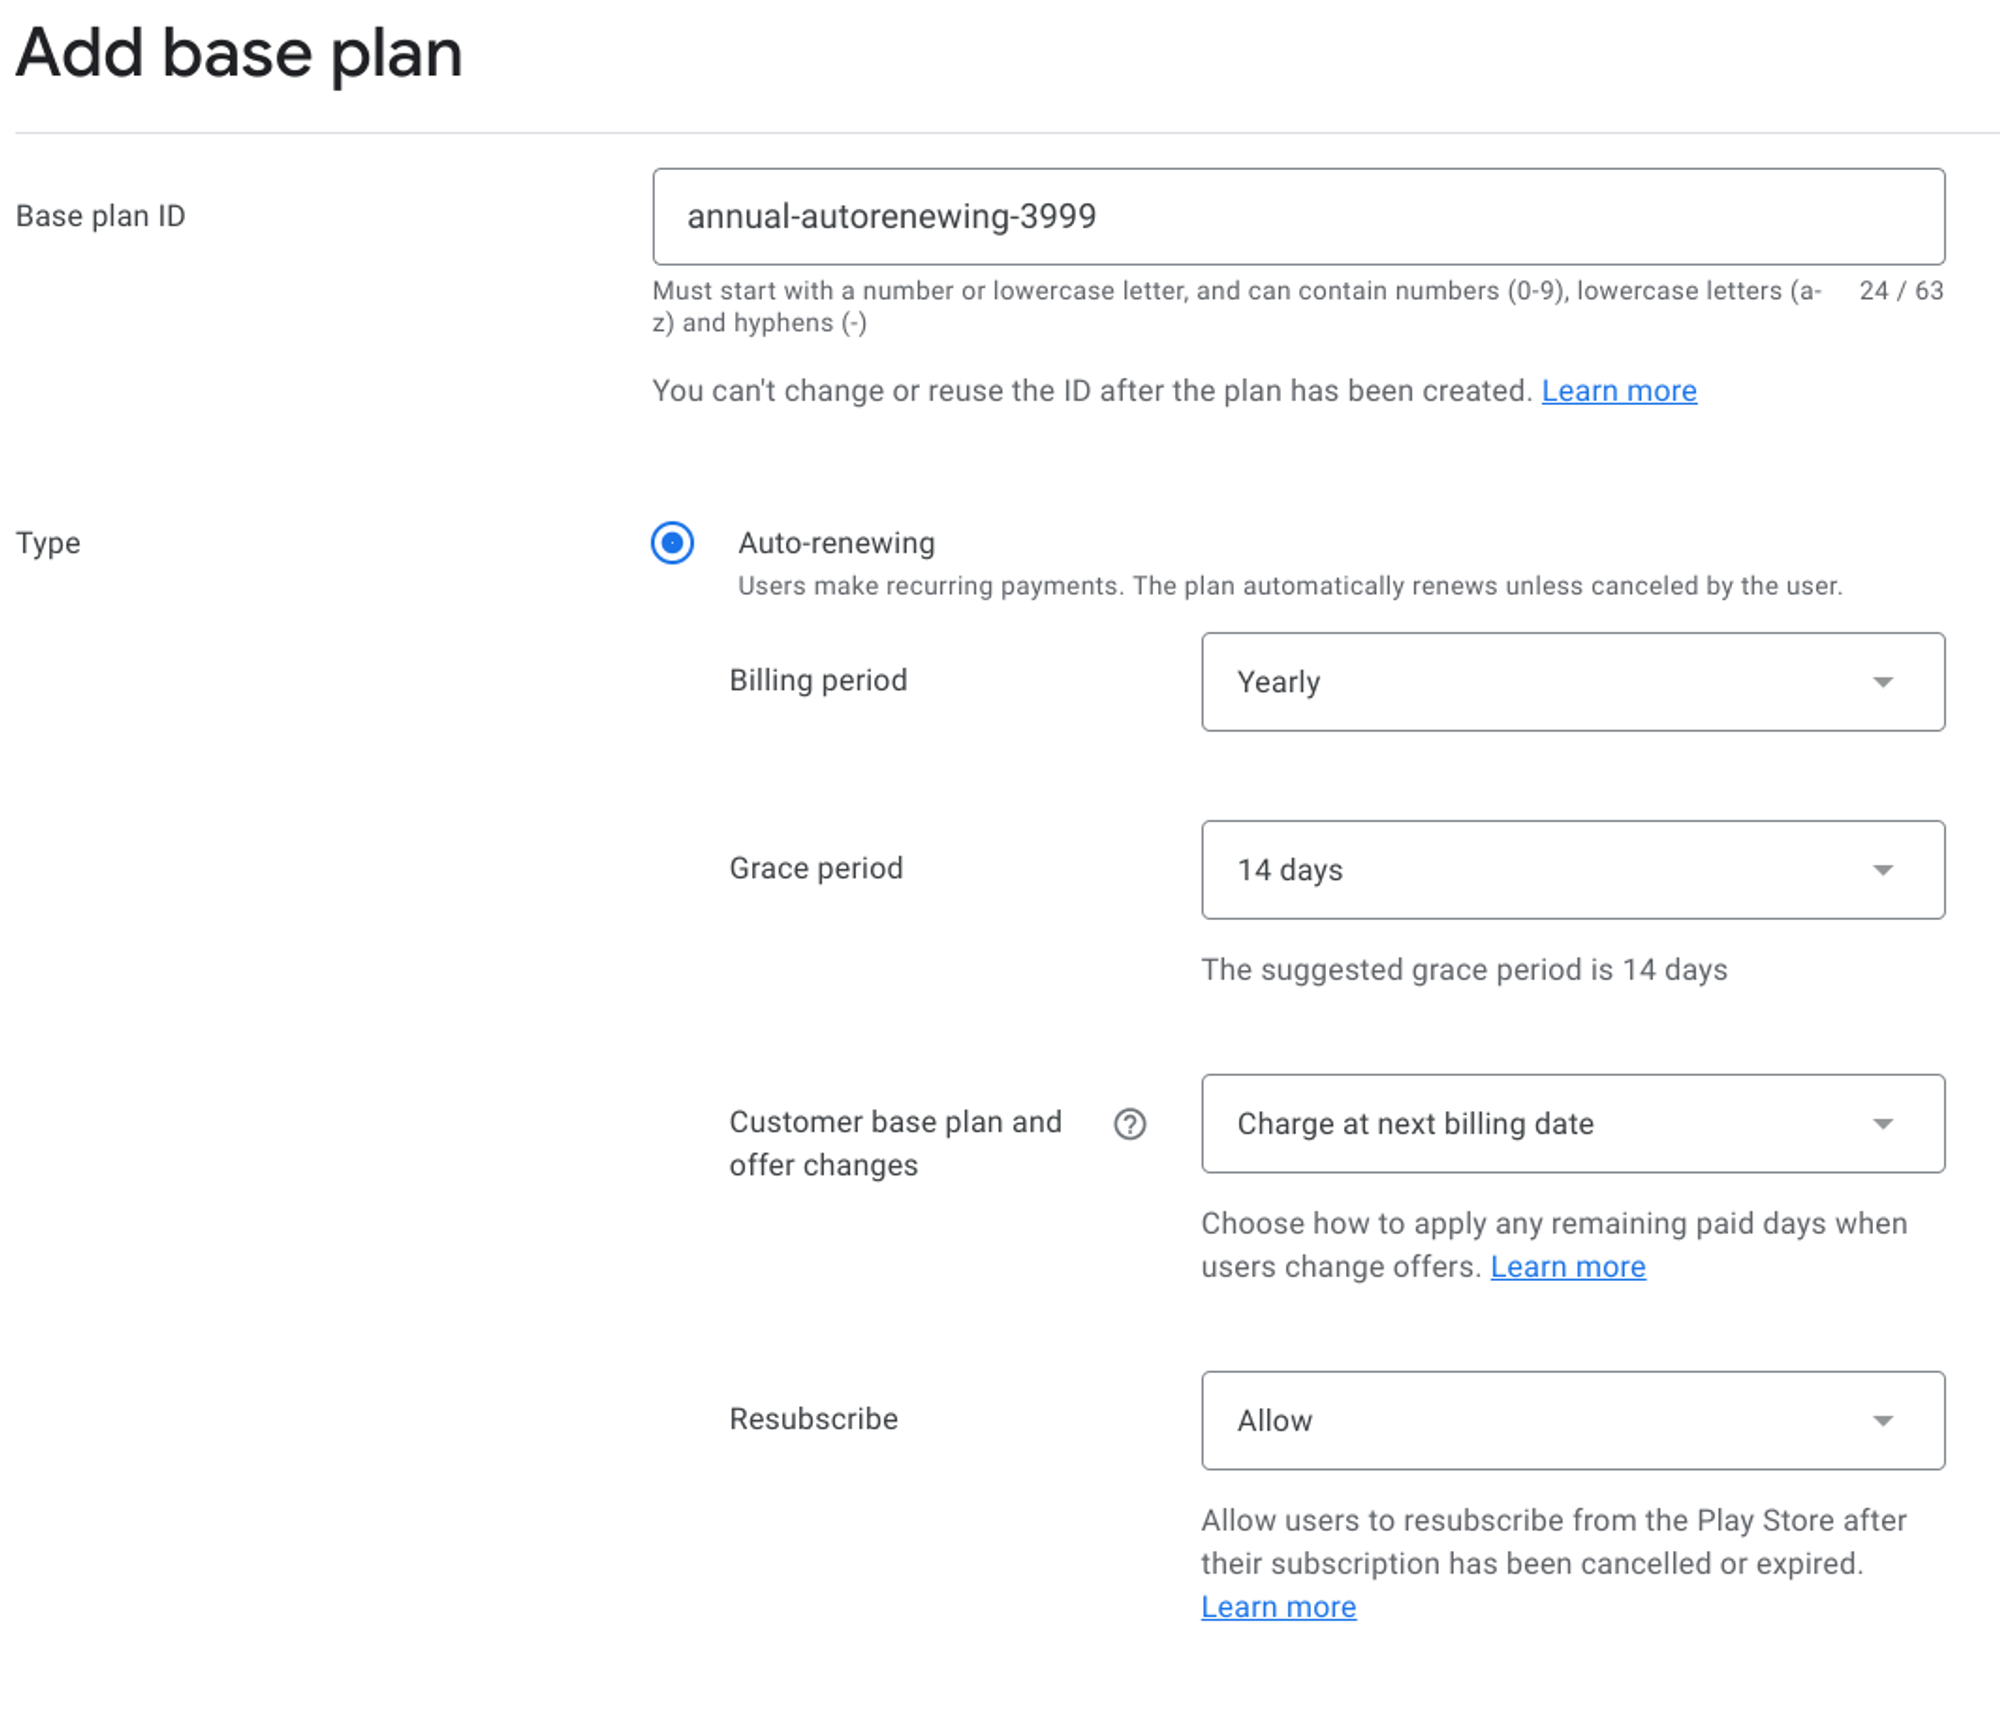
For the “Base Plan ID”, I’m using the structure:
duration_type_priceIn the “Type” section, select “Auto-renewing”, and choose a yearly billing period. Complete the other information based on your preferences. Here’s an example:
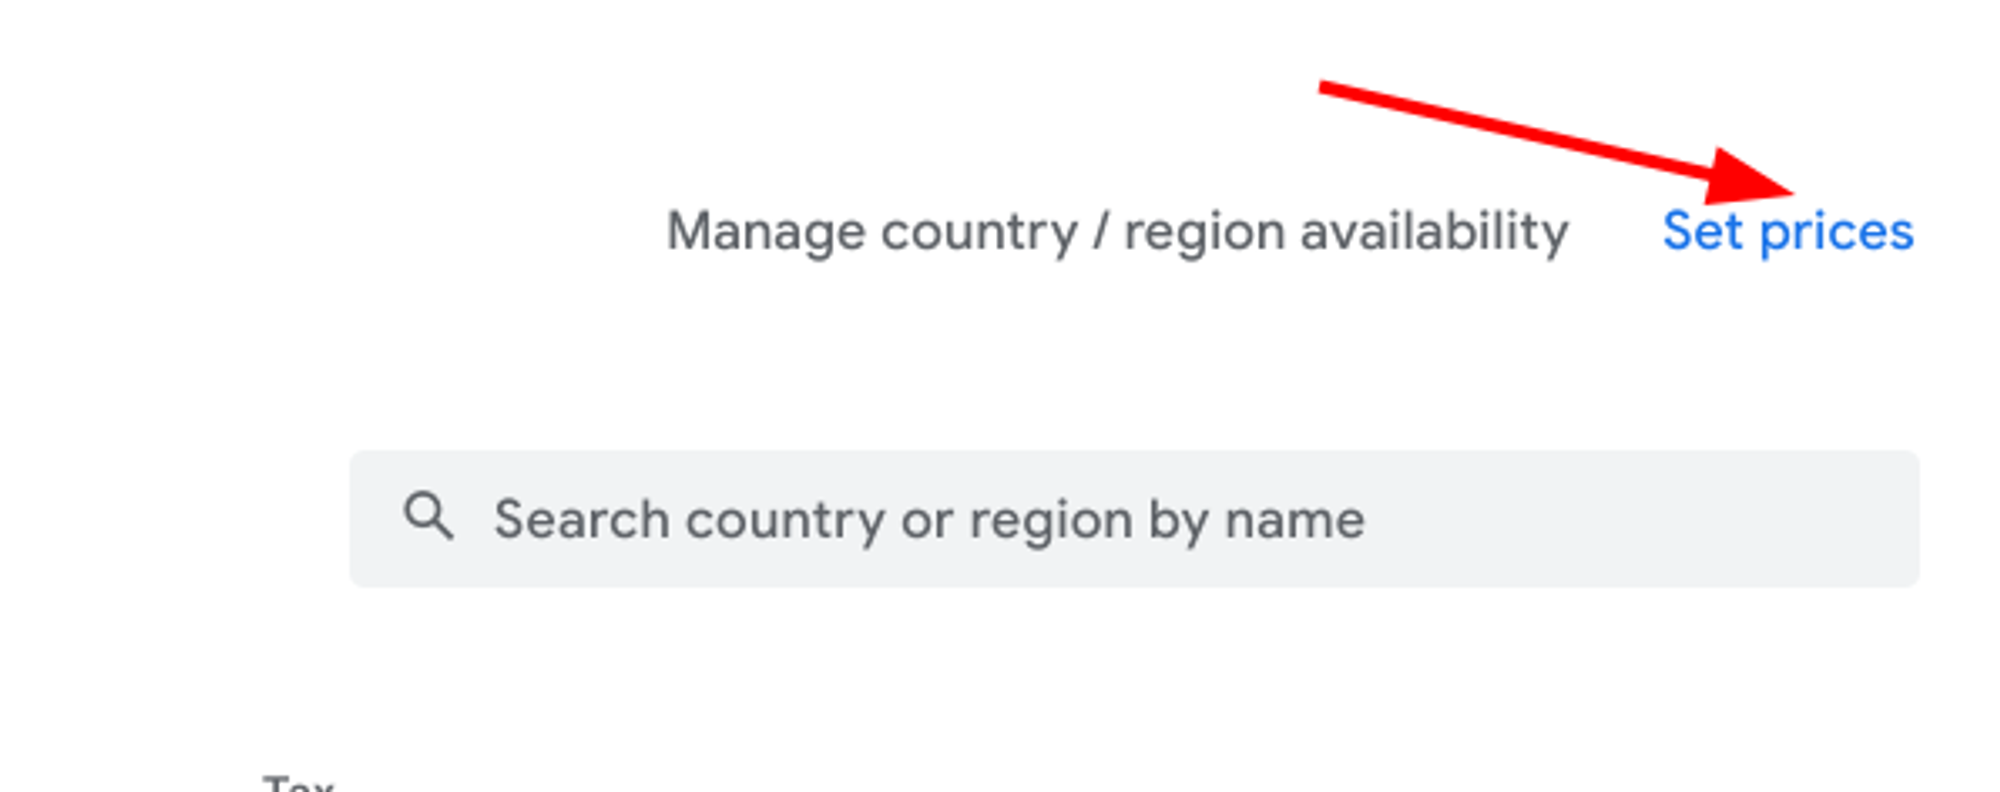
Next, you’ll need set prices and availability. Click the “Set prices” button on the right
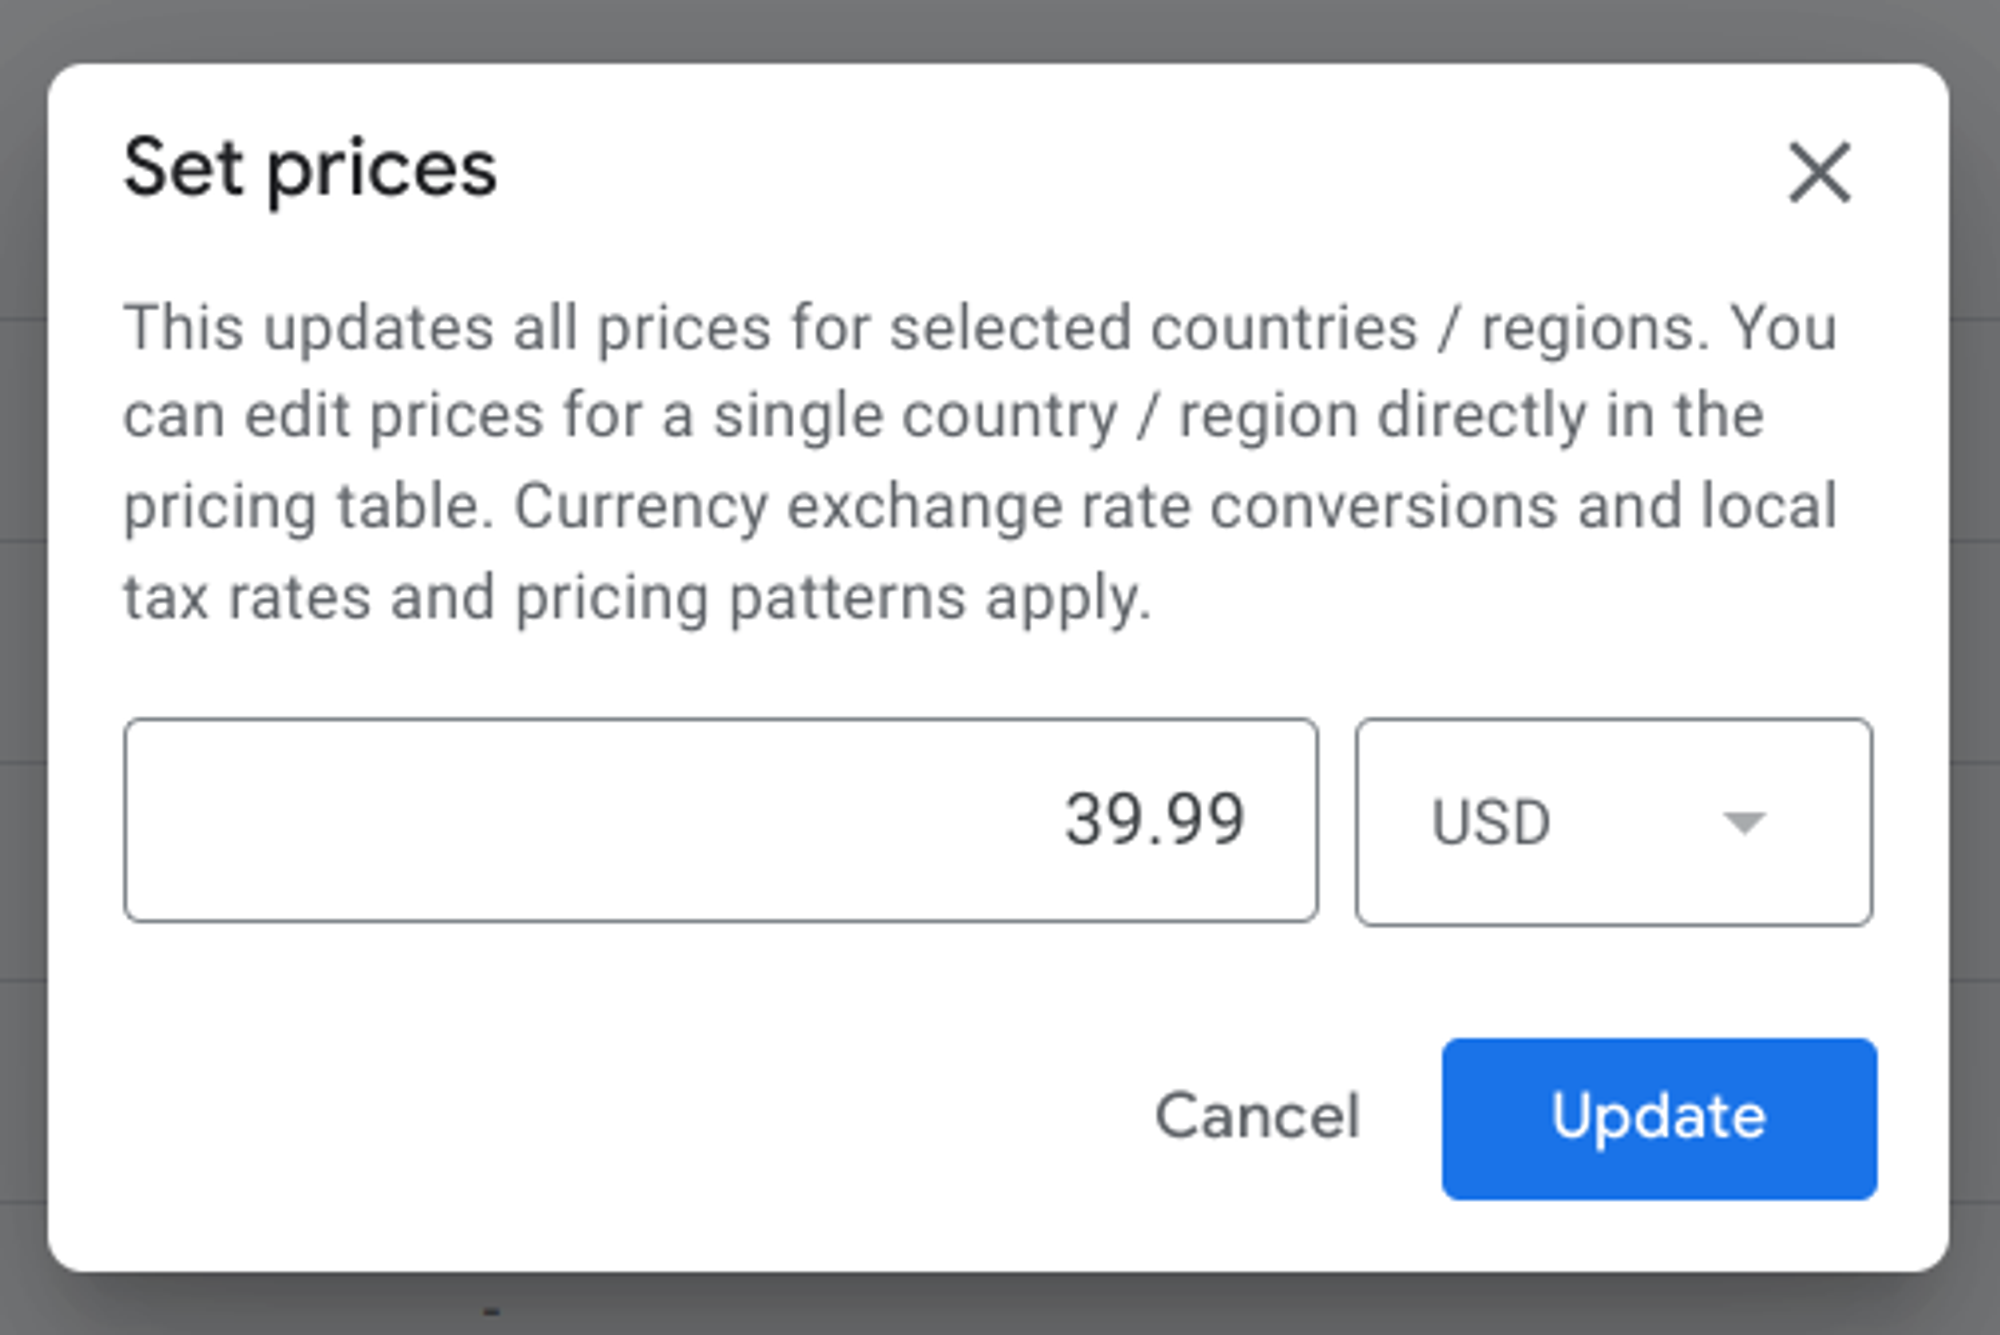
Use the checkbox at the top of the countries table to select all the countries, and then click “Set Price” in the button below
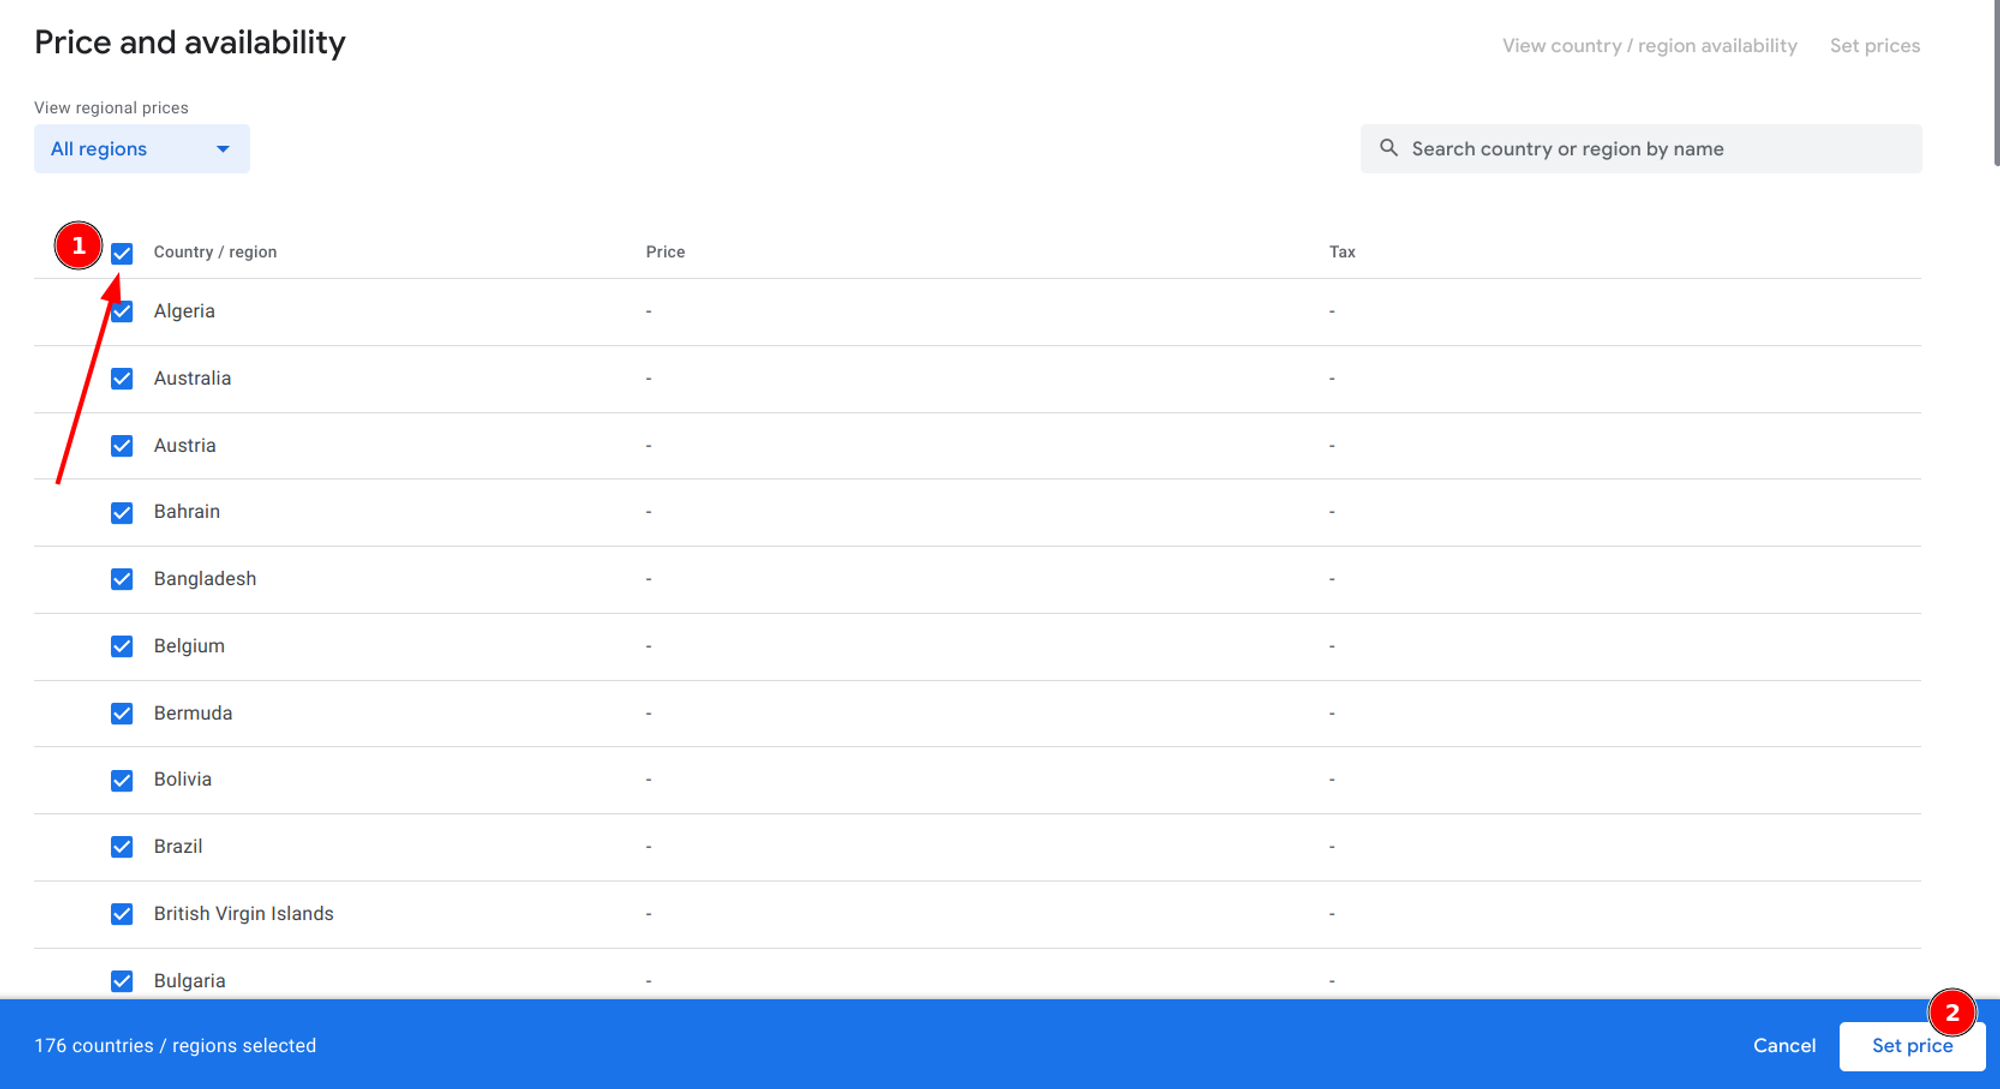
Choose a price and click “Update”
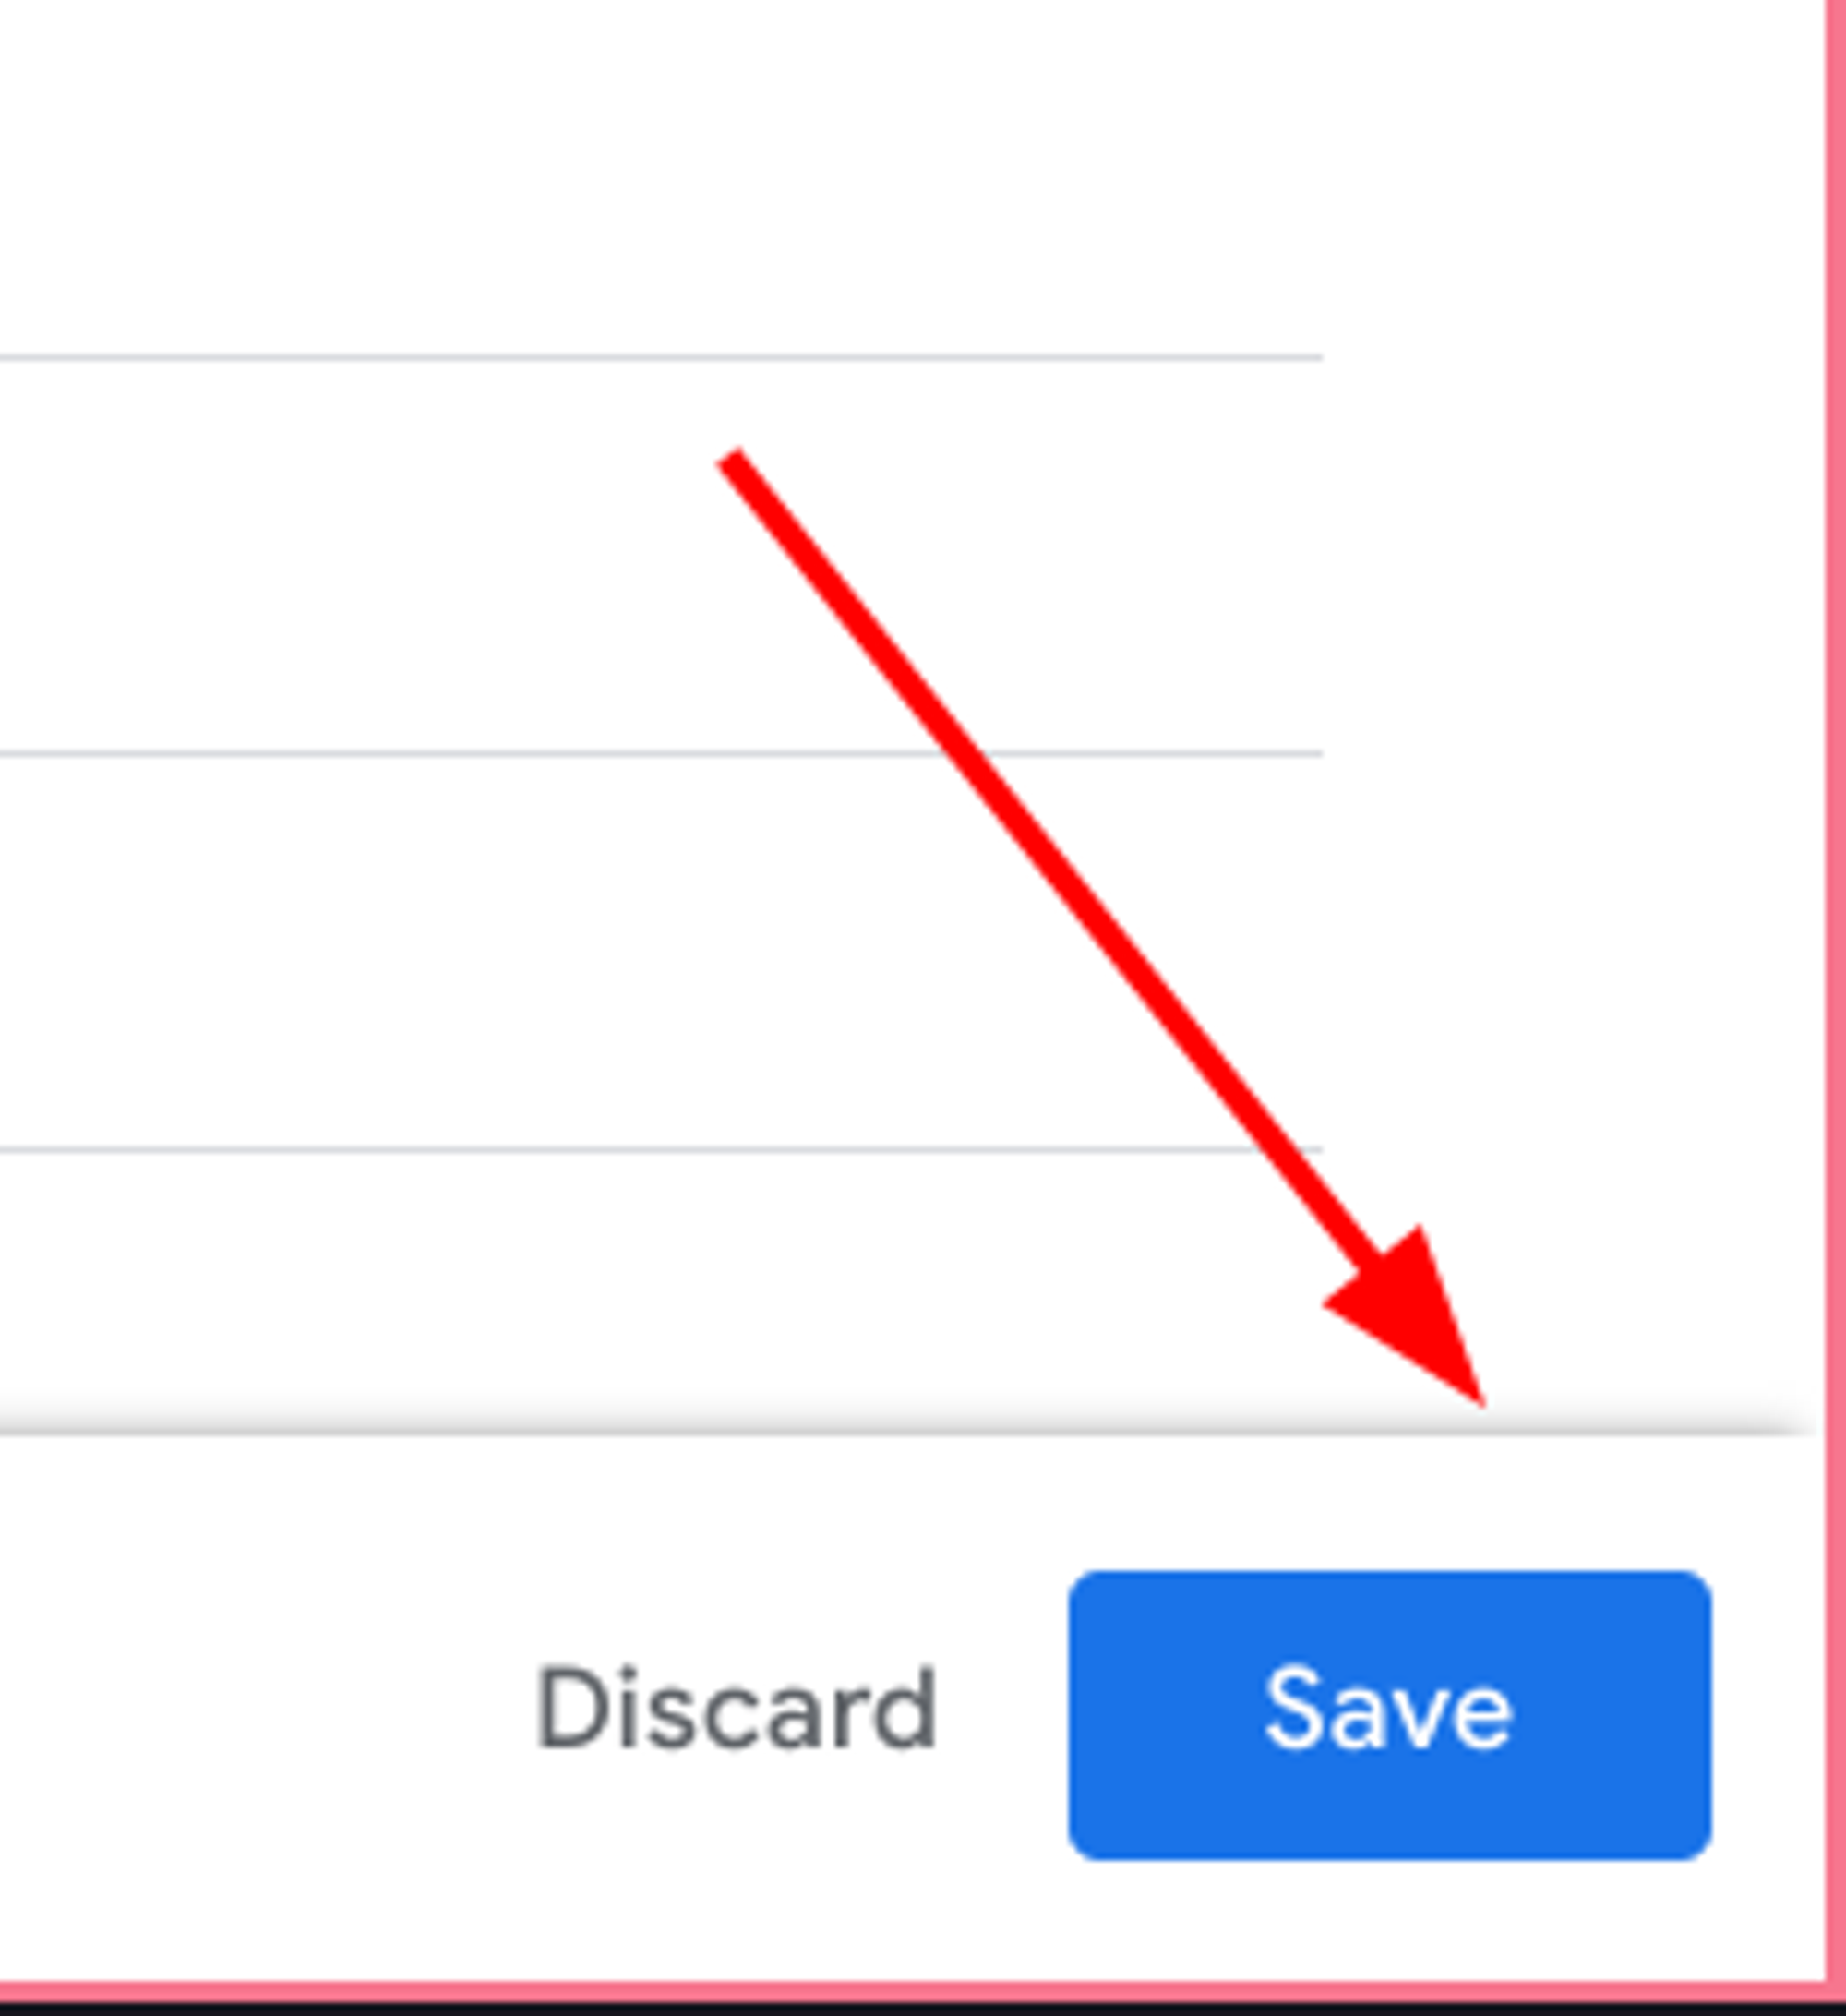
In the bottom right corner, click “Save”
Finally, click “Activate” so you can start using this base plan

Adding the free trial for the annual base plan
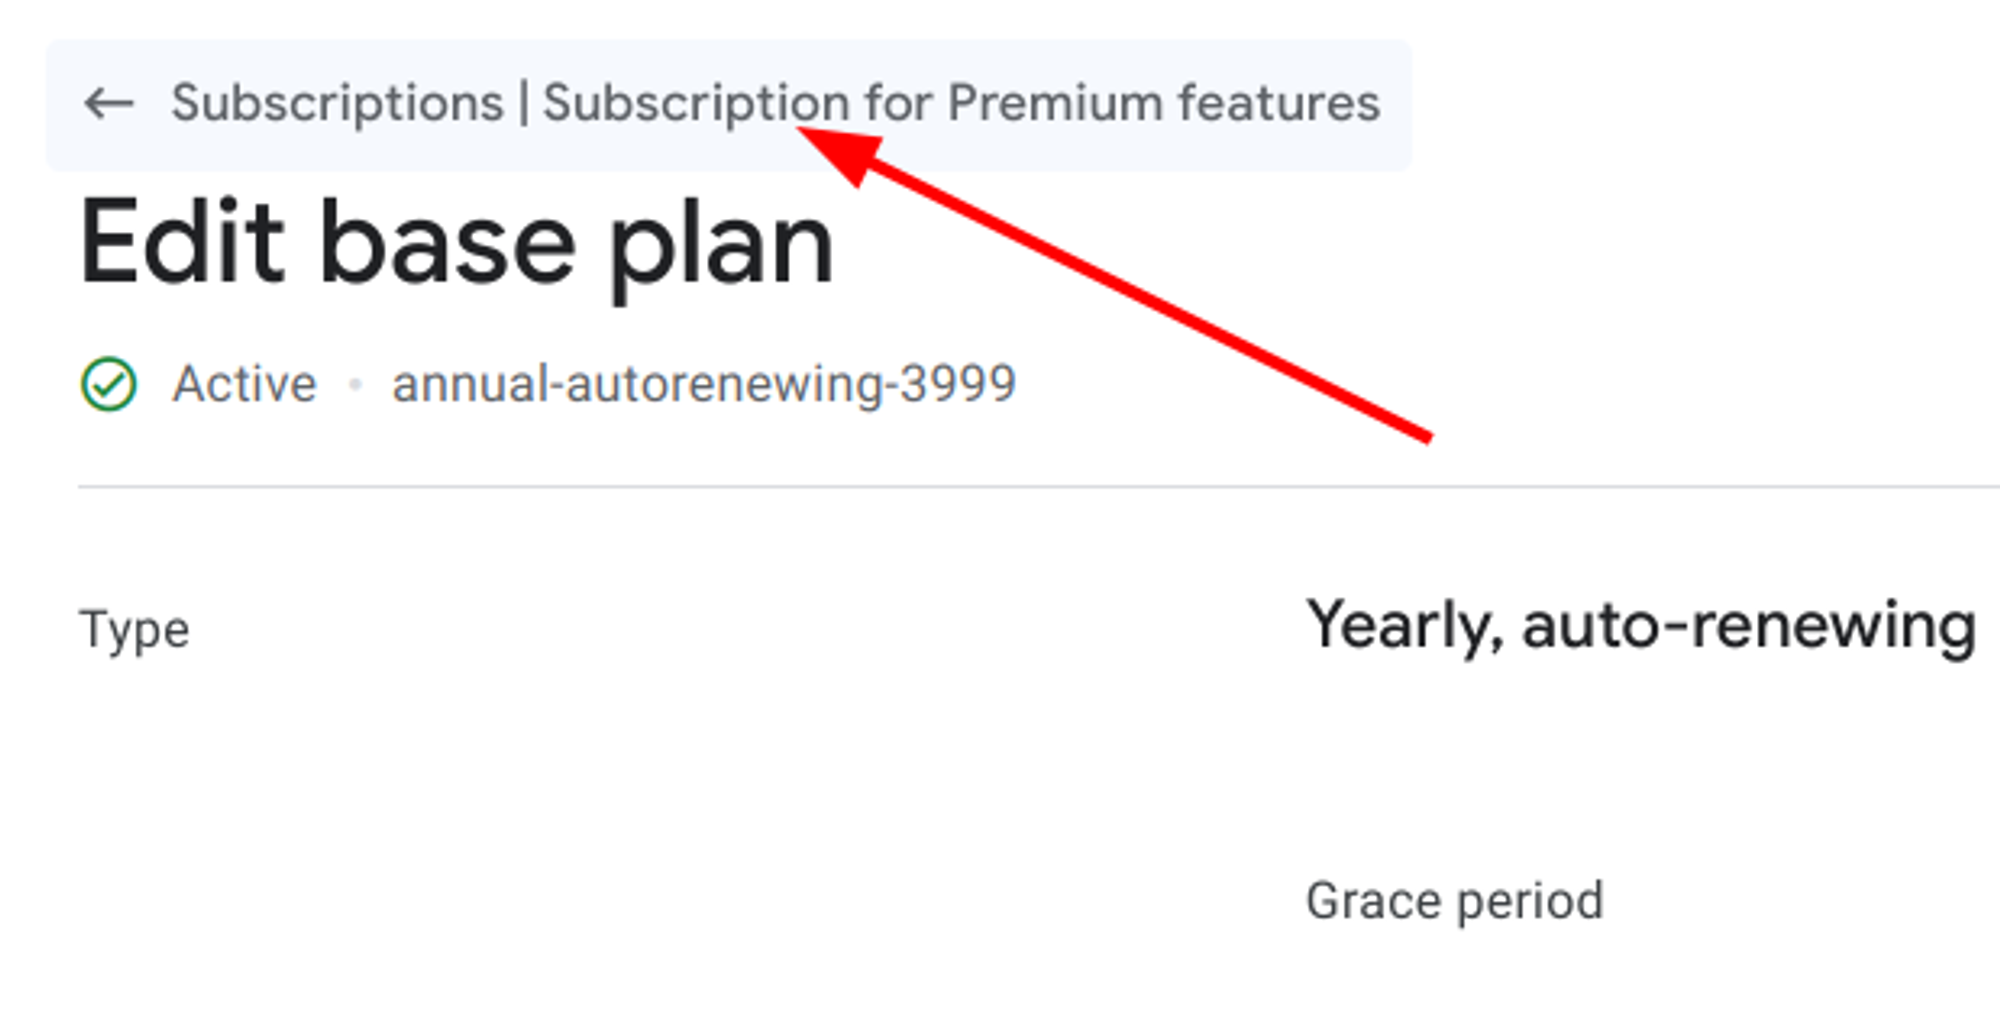
From the base plan, go back to the subscription page
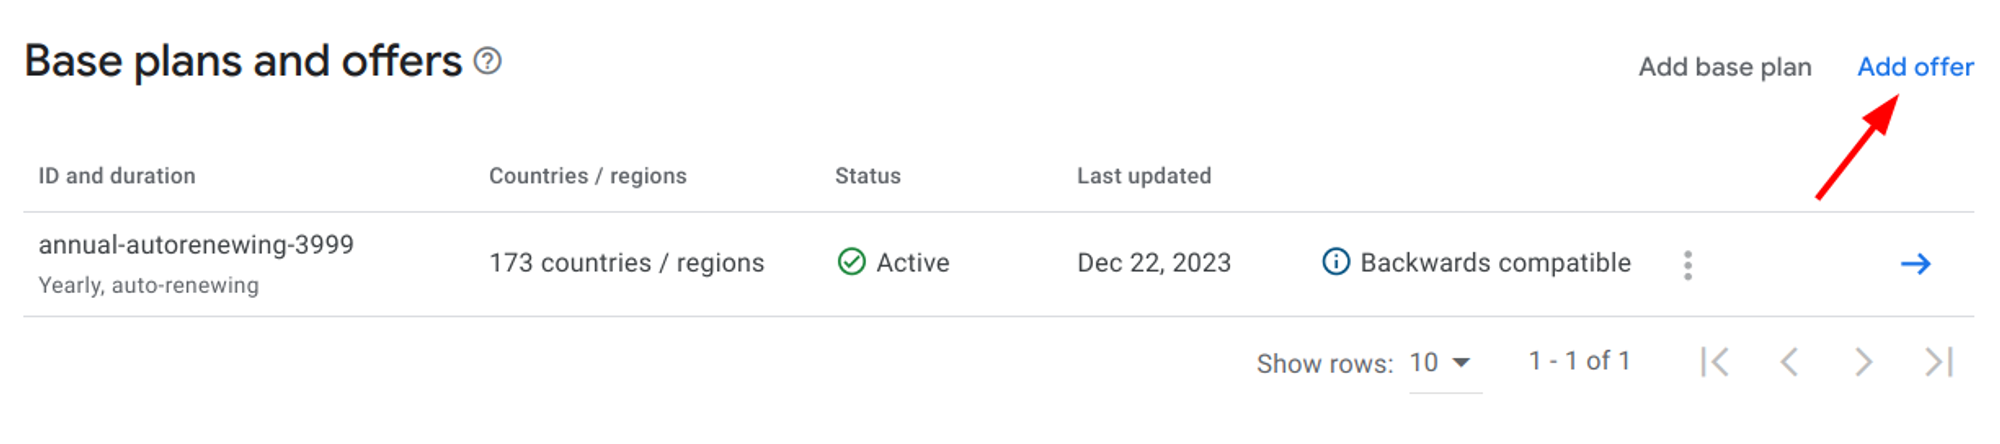
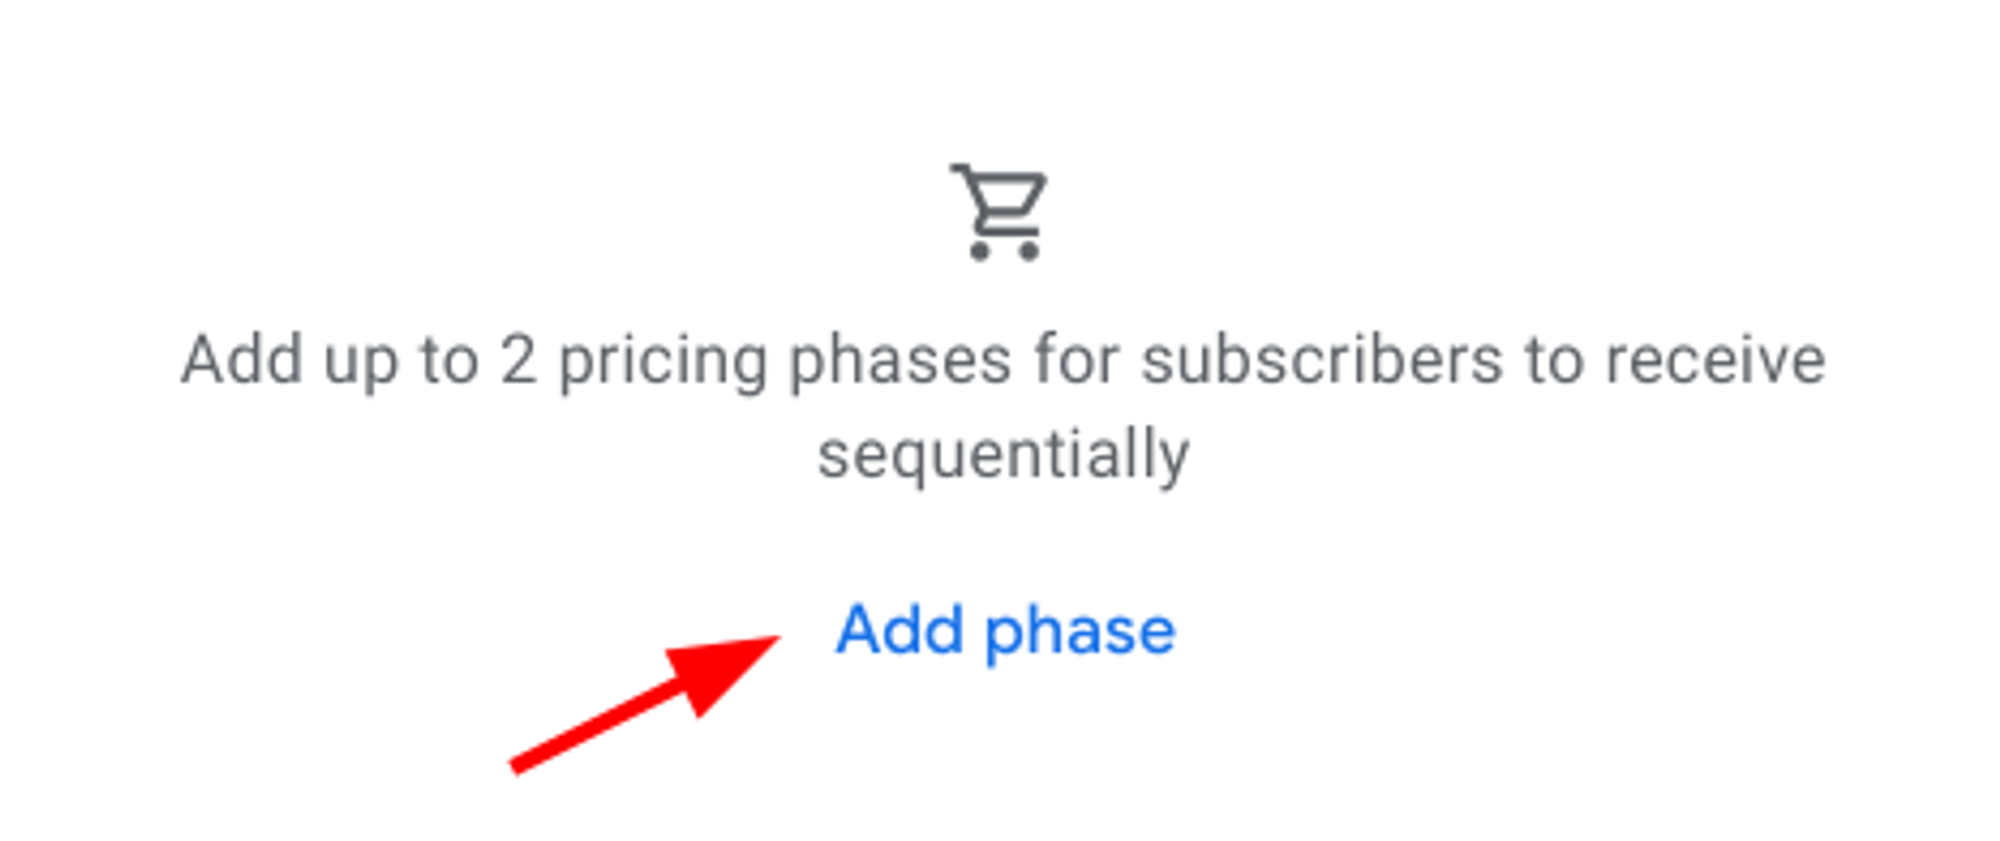
In the “Base plans and offers” section, click on “Add offer”
Choose the annual base plan you just created, and click “Add offer”
Choose a unique Offer ID, like
free-trial-for-annual-subscription.For “Eligibility Criteria”, select “New customer acquisition”
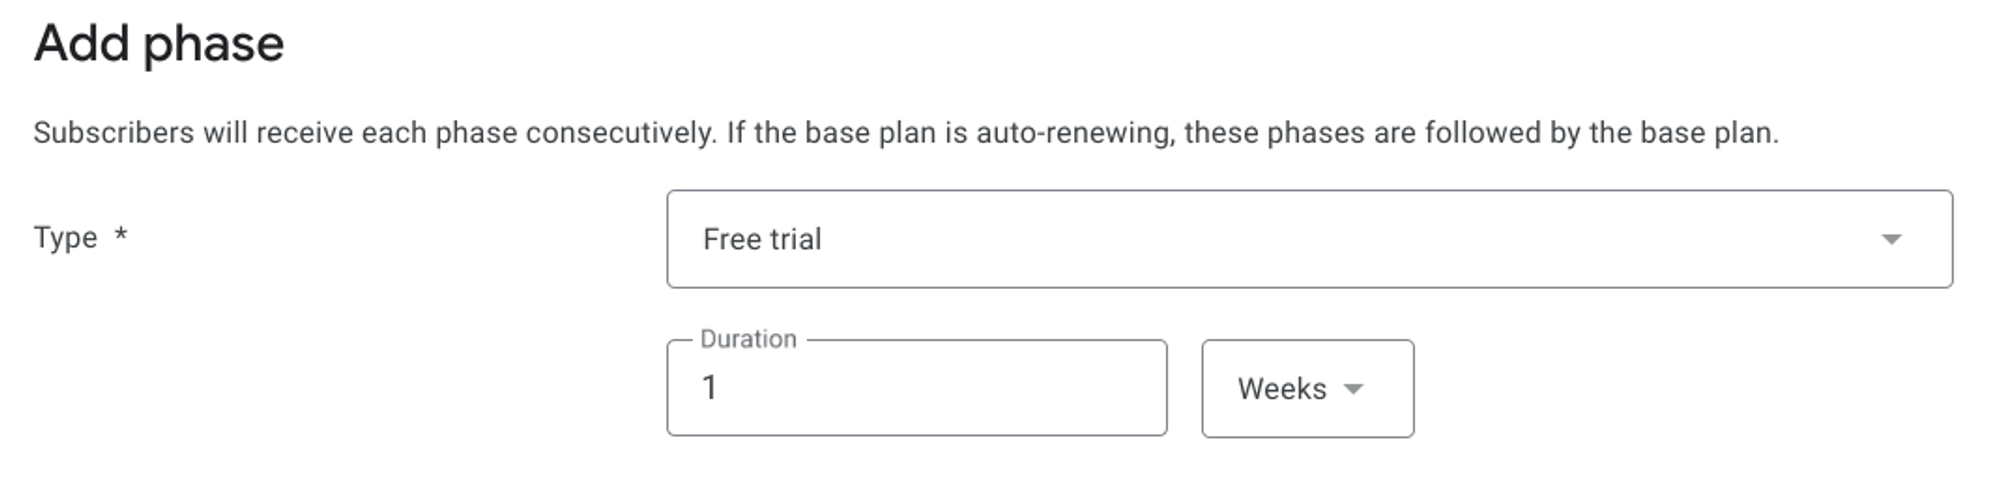
Scroll to the “Phases” section, and click on “Add phase”
Choose “Free Trial” and 1 week for the duration. Click “Apply”
Finally, click “Save”, and “Activate” to enable the free trial for the annual plan.
Adding the Monthly base plan
Repeat the steps mentioned above to setup the monthly base plan. Remember to also add the “Offer” for the free trial.
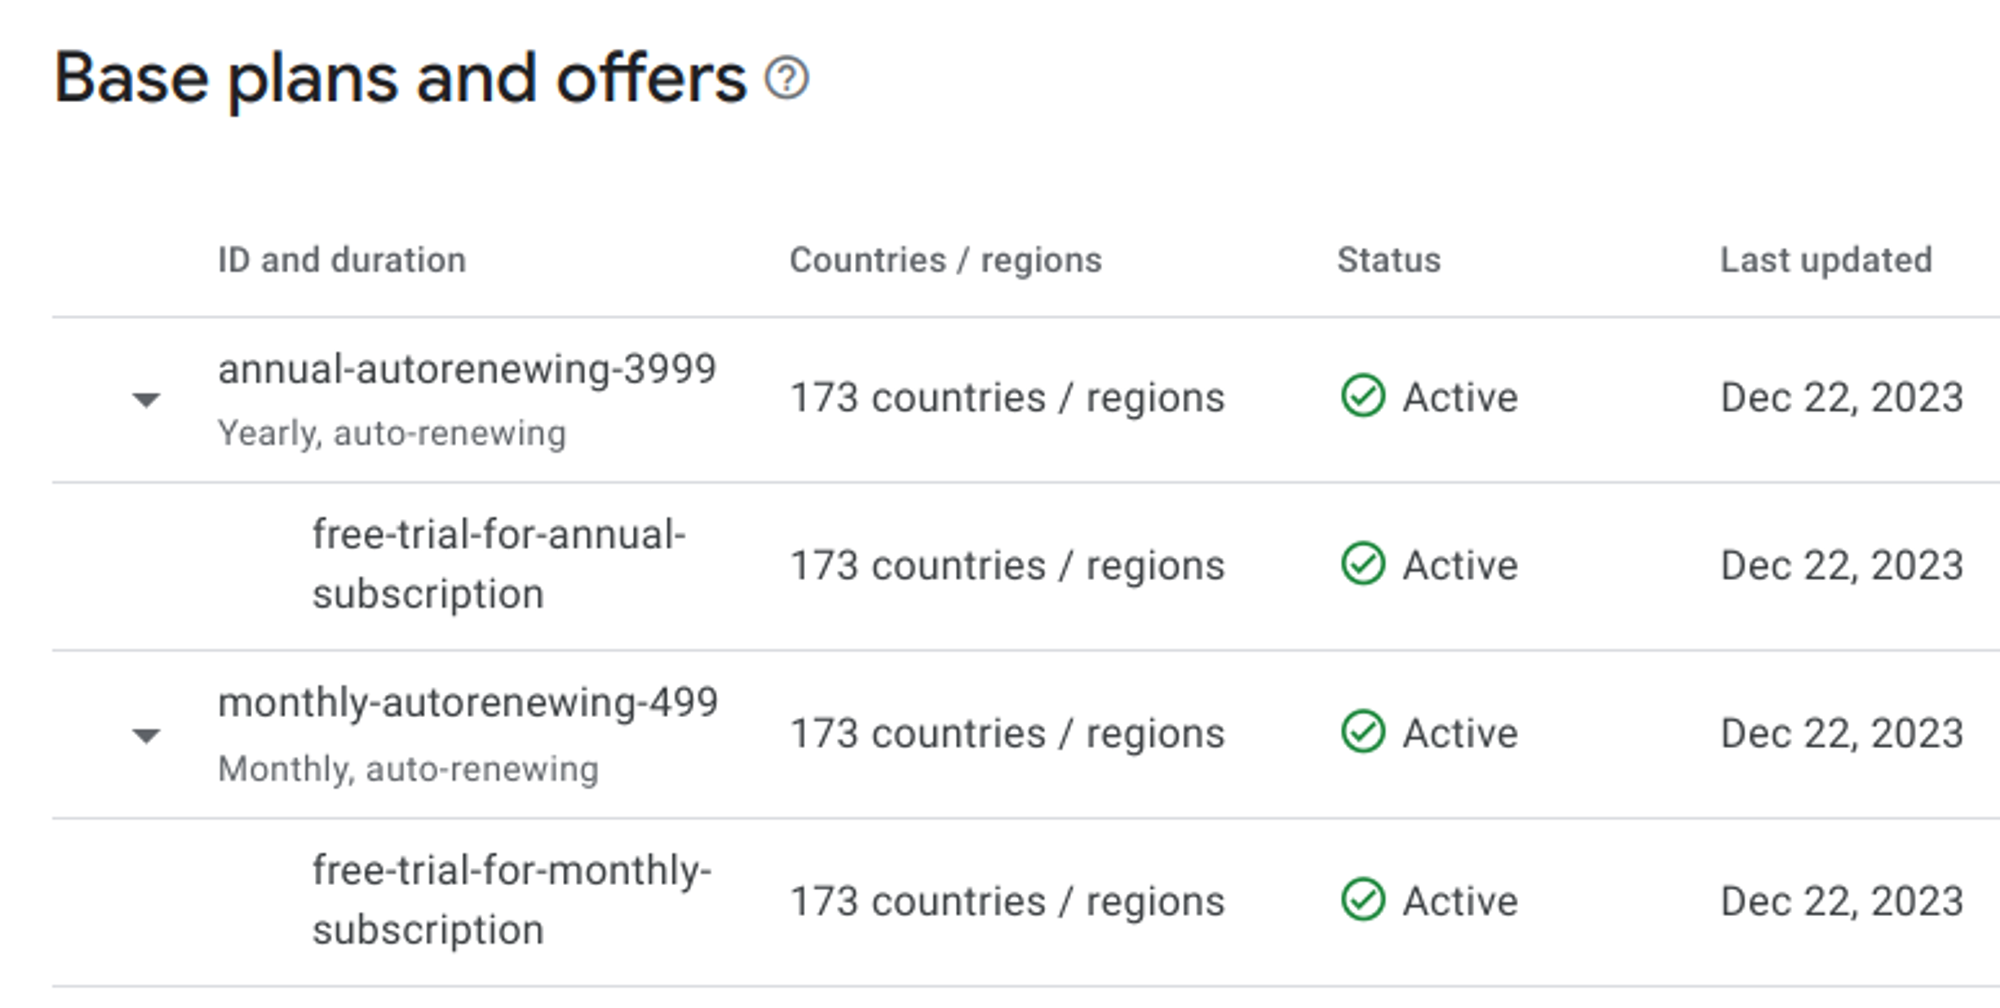
If everything went as expected, your subscription should look like this:
Adding in-app products to Remove Ads
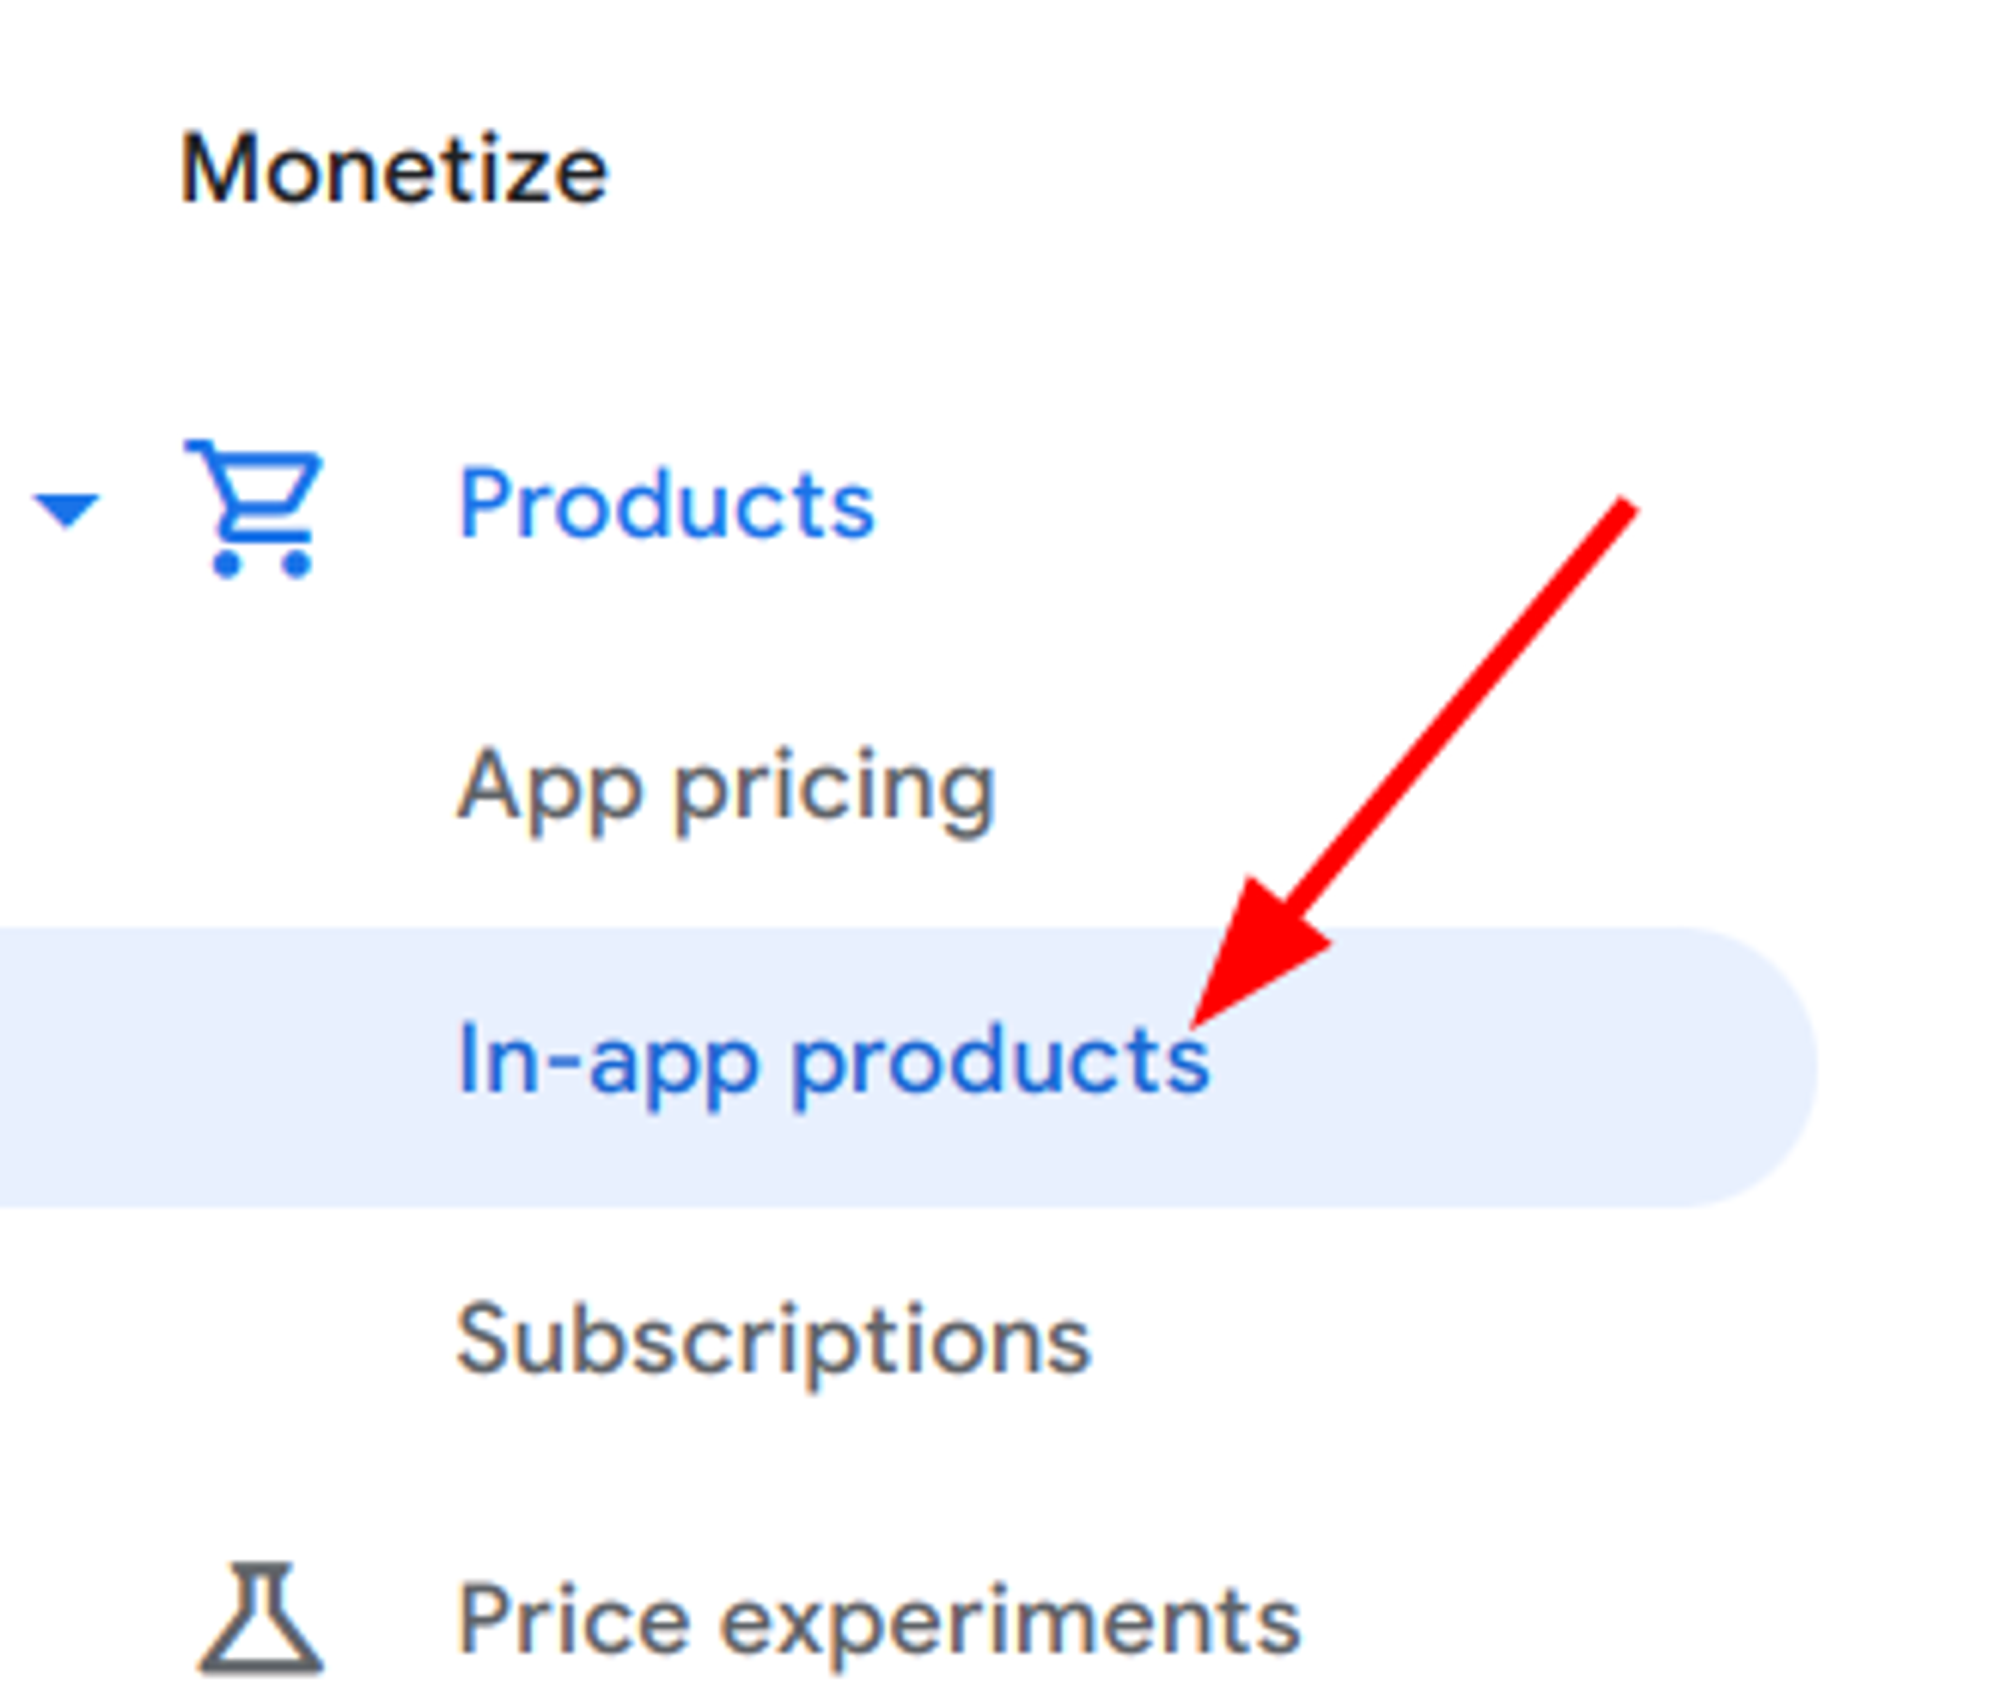
Go back to your app dashboard. Scroll to the “Monetize” section in the sidebar, and click “In-app purchases”.
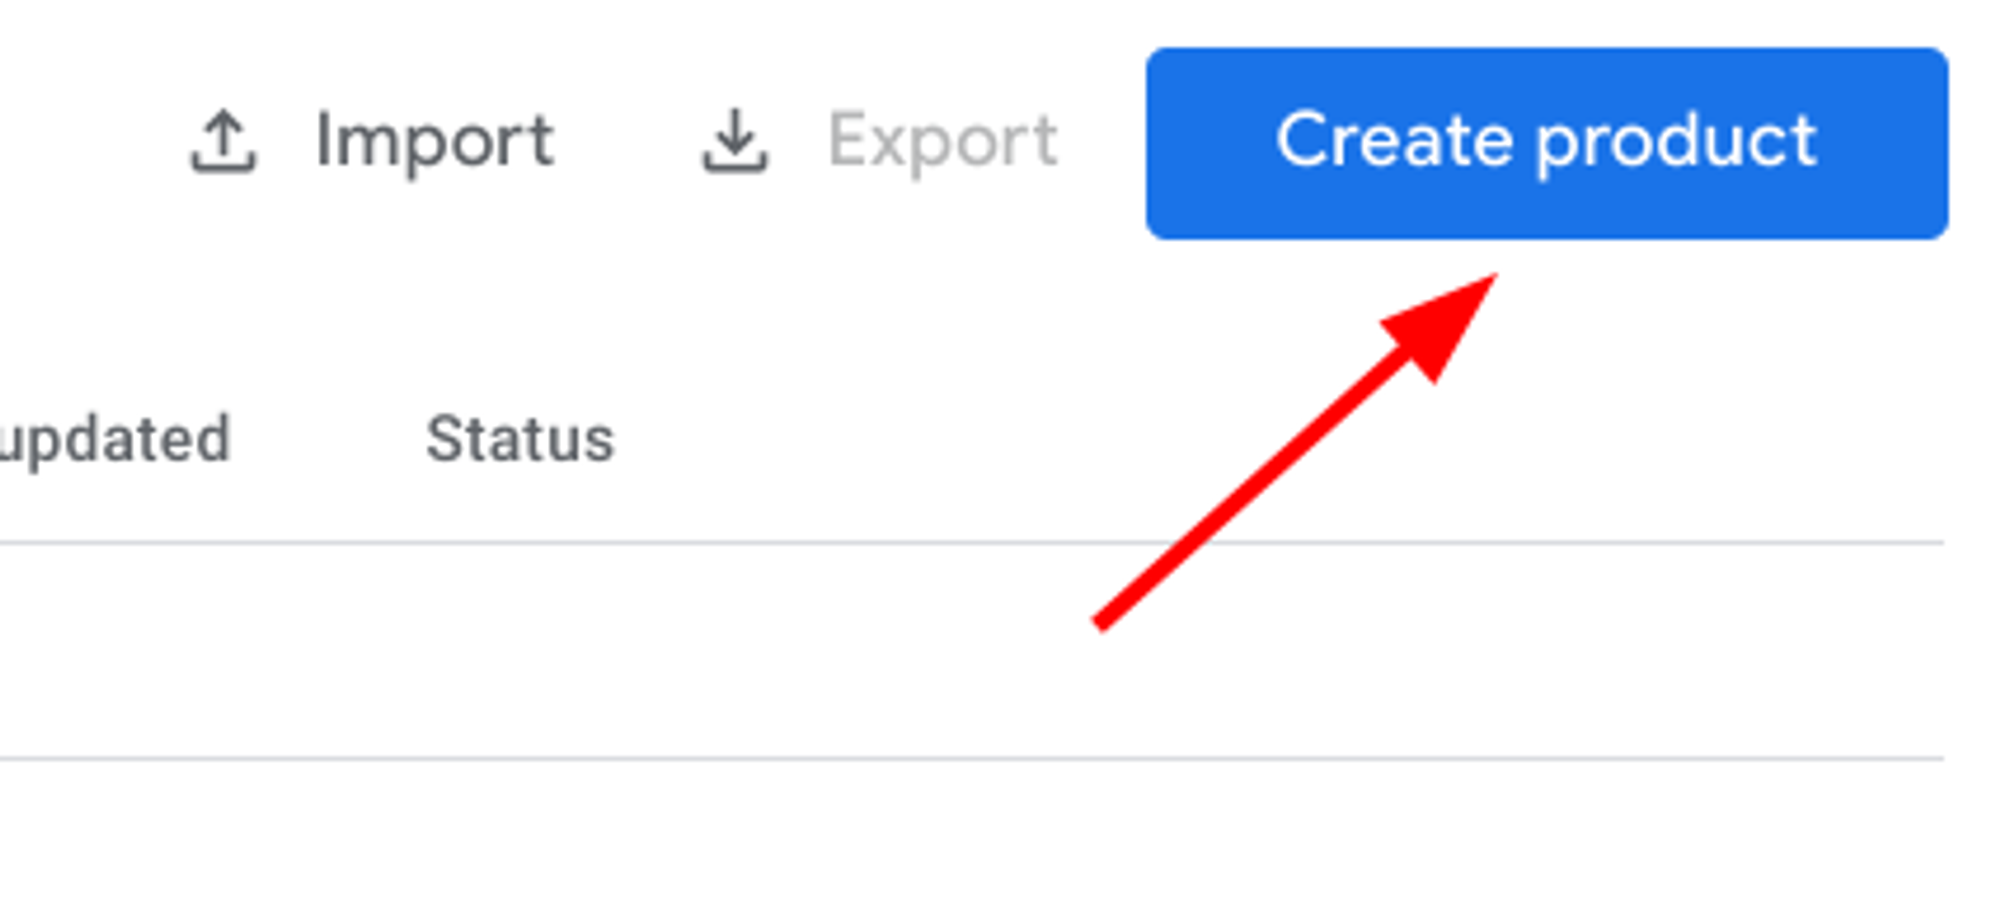
Click on “Create product”
In the “Create in-app product” screen, choose a Product ID like you did for the subscriptions. You can use the following structure:
appname_description_priceChoose a “Name”, “Description”, and “Price” for the product.
Click “Save” and then “Activate” to finish.
Congrats! You are done with the product configuration for Android!
The next step is to set up everything on the RevenueCat side of things.
Congrats! You are done with the second part!
What's next?
In the next part of the series, I'll guide you through everything you need to setup in RevenueCat to import all the products you just created in both stores.
You can read the next part of the series here:
Happy coding!